Valentine’s Day is a celebration of love, and what better way to express your affection than with a homemade treat that’s as beautiful as it is delicious? These Red Velvet Valentine’s Day Cinnamon Rolls are the perfect embodiment of this sentiment. Imagine soft, fluffy cinnamon rolls swirled with the rich, decadent taste of red velvet cake, all generously drizzled with a tangy and sweet cream cheese frosting. These aren’t just your average cinnamon rolls; they’re a labor of love, a symbol of care and attention, making them an extra special gift for someone you cherish (or a delightful indulgence for yourself!). This comprehensive guide will walk you through each step of the process, demystifying the art of cinnamon roll baking and empowering even the most novice baker to create a masterpiece. We’ll cover everything from proofing the yeast to achieving the perfect glaze consistency, ensuring that your first (or next!) foray into cinnamon roll baking is a resounding success.
Red Velvet Valentine’s Day Cinnamon Rolls: A Beginner’s Guide to Baking Love
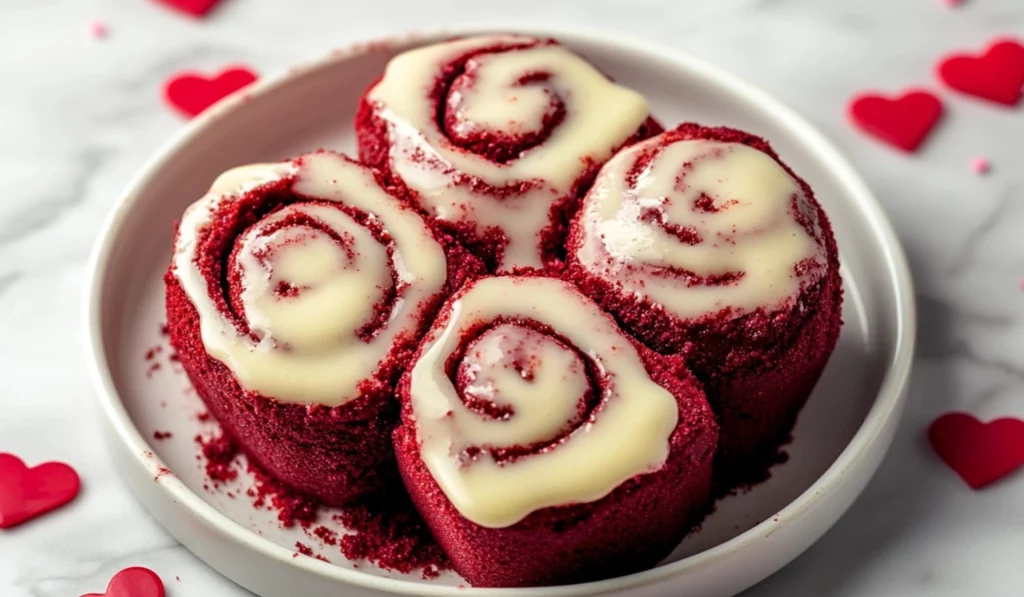
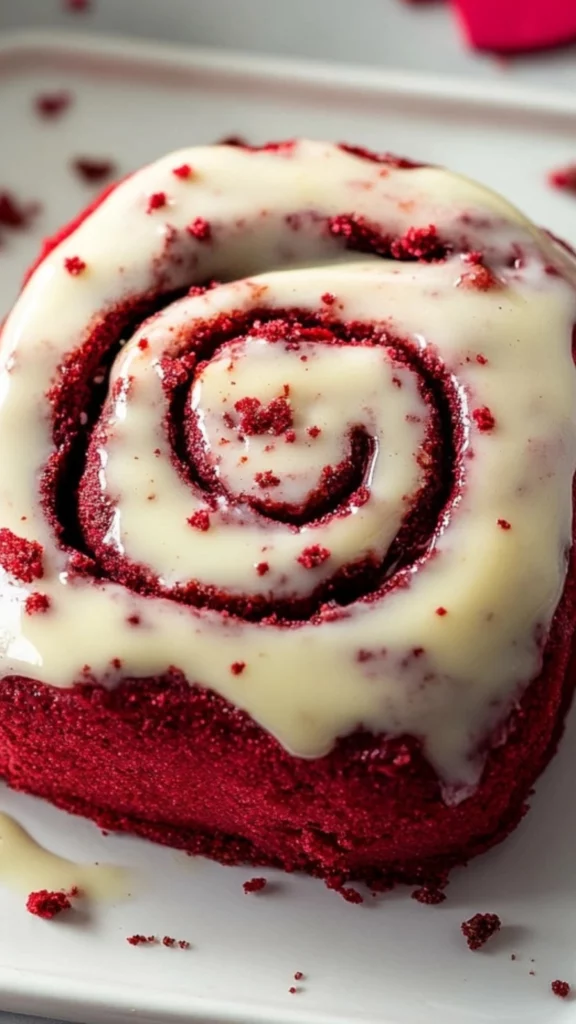
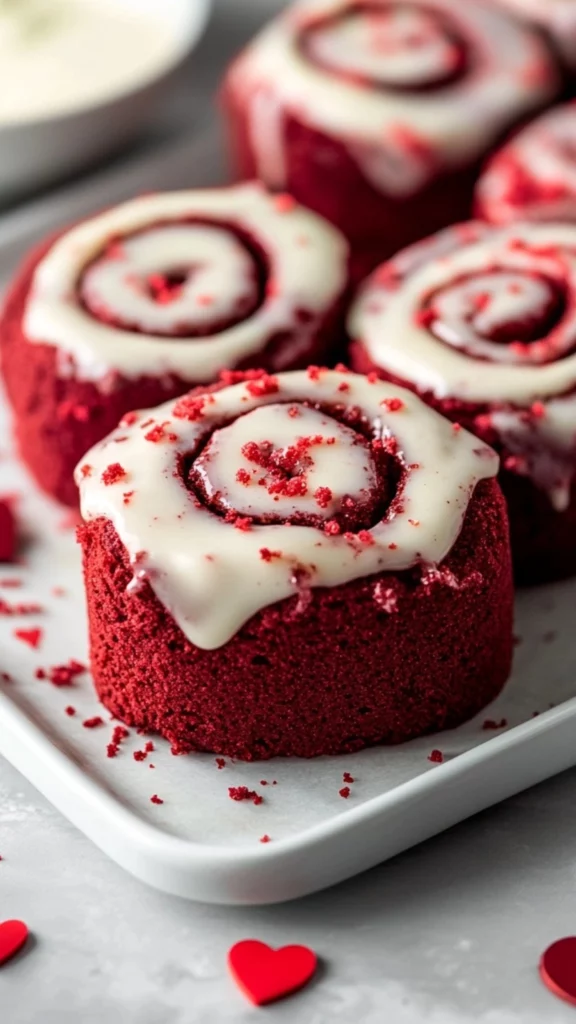
Valentine’s Day deserves a special treat, and these Red Velvet Cinnamon Rolls are the perfect way to share the love. Soft, fluffy, and bursting with red velvet flavor, all topped with a creamy cream cheese frosting and festive sprinkles, they’re a delightful indulgence for your loved ones (or yourself!). Imagine warm, gooey cinnamon rolls, swirled with rich cocoa and a hint of tang, then drizzled with a sweet and tangy glaze. It’s a symphony of flavors and textures, perfect for a cozy Valentine’s Day morning or a sweet after-dinner surprise. This recipe is designed for beginner bakers, with clear instructions and helpful tips to ensure your rolls turn out perfectly every time.
- Prep Time: 2 hours
- Cook Time: 25 minutes
- Total Time: 2 hours 25 minutes
- Yield: 12 rolls 1x
- Category: Dessert
- Method: Baking
- Cuisine: American
- Diet: Vegetarian
Ingredients
For the Dough:
- 1 cup warm milk (whole or 2%)
- 2 1/4 teaspoons active dry yeast (1 packet)
- 1/2 cup granulated sugar
- 1/4 cup melted unsalted butter
- 2 large eggs, room temperature
- 4 cups all-purpose flour
- 1 teaspoon salt
- 2 tablespoons unsweetened cocoa powder
- 2 teaspoons red food coloring (gel recommended)
- 1 teaspoon vanilla extract
For the Filling:
- 1 cup packed brown sugar
- 3 tablespoons ground cinnamon
- 1/4 cup unsalted butter, softened
For the Cream Cheese Glaze:
- 4 ounces cream cheese, softened
- 1/4 cup unsalted butter, softened
- 1 1/2 cups powdered sugar
- 1 teaspoon vanilla extract
- 2–3 tablespoons milk
- Heart sprinkles for decoration
Instructions
- Activate the Yeast (The Magic Begins): In a large bowl, combine the warm milk, yeast, and a pinch of sugar. Let sit for 5-10 minutes until foamy. This “proofs” the yeast, ensuring it’s alive and ready to work its magic. If it doesn’t foam, your yeast might be old, and you’ll need to start again with fresh yeast.
- Combine Dry Ingredients (Building the Base): In a separate bowl, whisk together the flour, sugar, cocoa powder, and salt. This evenly distributes the dry ingredients, preventing lumps and ensuring consistent flavor throughout the dough.
- Mix the Dough (Bringing it Together): Add the melted butter, eggs, red food coloring, and vanilla extract to the foamy yeast mixture. Gradually add the dry ingredients to the wet ingredients, mixing with a wooden spoon or a stand mixer with a dough hook until a soft dough forms. Don’t overmix at this stage.
- Knead the Dough (Developing Strength): Turn the dough out onto a lightly floured surface and knead for 5-7 minutes, until it becomes smooth and elastic. Kneading develops the gluten in the flour, which gives the rolls their structure and chewiness. If the dough is too sticky, add a little more flour, one tablespoon at a time.
- First Rise (Letting the Yeast Work): Place the dough in a greased bowl, cover it with plastic wrap or a clean kitchen towel, and let it rise in a warm place for 1-2 hours, or until it has doubled in size. This allows the yeast to ferment, creating carbon dioxide that makes the dough light and airy. A warm, humid environment will speed up the rising process.
- Prepare the Filling (The Sweet Surprise): While the dough is rising, prepare the filling. In a small bowl, combine the softened butter, brown sugar, and cinnamon until well mixed. The consistency should be spreadable.
- Assemble the Rolls (The Art of Swirling): Once the dough has doubled, punch it down gently to release the trapped air. Roll it out on a lightly floured surface into a 15×9 inch rectangle. Spread the filling evenly over the dough, leaving a small border along one of the long edges to help seal the roll.
- Roll and Cut (Creating the Spirals): Starting from the long edge without the filling border, tightly roll the dough into a log. Cut the log into 12 equal pieces using a sharp knife or dental floss. Dental floss is a great way to get clean cuts without squashing the rolls.
- Second Rise (Final Fluffiness): Place the rolls in a greased 9×13 inch baking dish, arranging them evenly. Cover them loosely with plastic wrap or a kitchen towel and let them rise for another 30-45 minutes, or until they have doubled in size again. This second rise is crucial for achieving truly light and fluffy rolls.
- Bake (The Grand Finale): Preheat your oven to 350°F (175°C). Bake the rolls for 25-30 minutes, or until they are golden brown and cooked through. A toothpick inserted into the center of a roll should come out clean.
- Make the Glaze (The Perfect Touch): While the rolls are baking, prepare the cream cheese glaze. In a medium bowl, beat together the softened cream cheese and butter until smooth and creamy. Gradually add the powdered sugar and vanilla extract, beating until well combined. Add milk one tablespoon at a time until you reach your desired consistency. If the glaze is too thick, add a little more milk. If it’s too thin, add a little more powdered sugar.
- Glaze and Decorate (The Finishing Flourish): Once the rolls have cooled slightly (but are still warm), drizzle or spread the cream cheese glaze generously over the tops of the rolls. Sprinkle with heart sprinkles for a festive Valentine’s Day touch. Serve immediately and enjoy the warm, gooey goodness!
Notes
- Warm Milk (Not Hot!): Ensure the milk is warm, not hot, as hot milk can kill the yeast. Test the temperature by dipping your finger in – it should feel lukewarm.
- Kneading (The Key to Texture): Don’t be afraid to really get into kneading the dough. It might be sticky at first, but it will become smoother and more manageable as you knead.
- Rising Time (Patience is a Virtue): The rising times given are estimates. The actual time will depend on the temperature and humidity of your kitchen. A warmer environment will result in faster rising.
- Doneness (The Toothpick Test): Use a toothpick to check if the rolls are cooked through. Insert it into the center of a roll; it should come out clean when the rolls are done.
- Glaze Consistency (Adjust as Needed): Adjust the amount of milk in the glaze to achieve your desired consistency. If you want a thicker glaze, use less milk. If you want a thinner glaze, use more milk.
- Cooling (Don’t Rush It): Allow the rolls to cool slightly before glazing. This will help the glaze set properly.
This recipe is particularly well-suited for beginners because it breaks down the seemingly complex process of working with yeast into simple, manageable steps. We’ll demystify the dough-making, filling preparation, and frosting creation, ensuring that your first experience with these delectable treats is a sweet victory. The vibrant red velvet color and the irresistible flavor combination of cinnamon, cocoa, and cream cheese are guaranteed crowd-pleasers, boosting your baking confidence and leaving everyone craving more. Beyond the deliciousness, the act of baking itself can be incredibly therapeutic and rewarding. The aroma of warm dough, the transformation of simple ingredients into something extraordinary – it’s a truly magical experience.
Ingredients and Preparation (Detailed Breakdown)
This recipe yields 12 servings of love-filled cinnamon rolls, perfect for sharing (or not!).
For the Dough (The Foundation of Flavor):
- 1 cup warm milk (whole or 2% milk is recommended for a richer, more tender dough. The warmth is crucial for activating the yeast.)
- 2 1/4 teaspoons active dry yeast (one standard packet – this is the key to getting those light and fluffy rolls. Fresh yeast is essential!)
- 1/2 cup granulated sugar (provides sweetness and also helps activate the yeast.)
- 1/4 cup melted unsalted butter (adds richness and moisture to the dough. Make sure it’s melted but not too hot.)
- 2 large eggs, room temperature (room temperature eggs incorporate more easily into the dough, creating a smoother texture.)
- 4 cups all-purpose flour (the base of our dough. Measure accurately for best results. Don’t pack it down!)
- 1 teaspoon salt (enhances the flavors and controls the yeast activity.)
- 2 tablespoons unsweetened cocoa powder (gives the rolls their signature red velvet flavor and color.)
- 2 teaspoons red food coloring (gel food coloring is recommended for a vibrant, intense red hue. You can adjust the amount to achieve your desired shade. Natural food colorings can be used, but the color may be less pronounced.)
- 1 teaspoon vanilla extract (adds a touch of warmth and enhances the overall flavor profile.)
For the Filling (The Heart of the Matter):
- 1 cup packed brown sugar (adds moisture and a caramel-like sweetness to the filling.)
- 3 tablespoons ground cinnamon (the classic cinnamon roll flavor! Use high-quality cinnamon for the best taste.)
- 1/4 cup unsalted butter, softened (binds the filling ingredients together and adds richness.)
For the Cream Cheese Glaze (The Crowning Glory):
- 4 ounces cream cheese, softened (the star of the glaze! Use full-fat cream cheese for a richer flavor.)
- 1/4 cup unsalted butter, softened (complements the cream cheese and creates a smooth, spreadable glaze.)
- 1 1/2 cups powdered sugar (adds sweetness and thickens the glaze.)
- 1 teaspoon vanilla extract (enhances the flavor of the glaze.)
- 2-3 tablespoons milk (adjust the amount to achieve your desired consistency – less milk for a thicker glaze, more milk for a thinner glaze.)
- Heart sprinkles for decoration (because it’s Valentine’s Day! Have fun with the decorations.)
Alternatives and Flexibility (Making it Your Own):
- Milk: Almond milk or other non-dairy milk can be substituted, but may slightly alter the rise and texture of the dough.
- Food Coloring: Beet juice or other natural food colorings can be used, but the color may not be as intense as gel food coloring.
- Filling: Add chopped nuts (pecans, walnuts), dried fruit (cranberries, raisins), or even chocolate chips to the filling for added texture and flavor.
- Glaze: For a less tangy glaze, reduce the amount of cream cheese or add a touch more vanilla extract. You can also add a hint of lemon zest for a bright, fresh flavor.
Step-by-Step Instructions (With Extra Tips and Tricks)
- Activate the Yeast (The Magic Begins): In a large bowl, combine the warm milk, yeast, and a pinch of sugar. Let sit for 5-10 minutes until foamy. This “proofs” the yeast, ensuring it’s alive and ready to work its magic. If it doesn’t foam, your yeast might be old, and you’ll need to start again with fresh yeast.
- Combine Dry Ingredients (Building the Base): In a separate bowl, whisk together the flour, sugar, cocoa powder, and salt. This evenly distributes the dry ingredients, preventing lumps and ensuring consistent flavor throughout the dough.
- Mix the Dough (Bringing it Together): Add the melted butter, eggs, red food coloring, and vanilla extract to the foamy yeast mixture. Gradually add the dry ingredients to the wet ingredients, mixing with a wooden spoon or a stand mixer with a dough hook until a soft dough forms. Don’t overmix at this stage.
- Knead the Dough (Developing Strength): Turn the dough out onto a lightly floured surface and knead for 5-7 minutes, until it becomes smooth and elastic. Kneading develops the gluten in the flour, which gives the rolls their structure and chewiness. If the dough is too sticky, add a little more flour, one tablespoon at a time.
- First Rise (Letting the Yeast Work): Place the dough in a greased bowl, cover it with plastic wrap or a clean kitchen towel, and let it rise in a warm place for 1-2 hours, or until it has doubled in size. This allows the yeast to ferment, creating carbon dioxide that makes the dough light and airy. A warm, humid environment will speed up the rising process.
- Prepare the Filling (The Sweet Surprise): While the dough is rising, prepare the filling. In a small bowl, combine the softened butter, brown sugar, and cinnamon until well mixed. The consistency should be spreadable.
- Assemble the Rolls (The Art of Swirling): Once the dough has doubled, punch it down gently to release the trapped air. Roll it out on a lightly floured surface into a 15×9 inch rectangle. Spread the filling evenly over the dough, leaving a small border along one of the long edges to help seal the roll.
- Roll and Cut (Creating the Spirals): Starting from the long edge without the filling border, tightly roll the dough into a log. Cut the log into 12 equal pieces using a sharp knife or dental floss. Dental floss is a great way to get clean cuts without squashing the rolls.
- Second Rise (Final Fluffiness): Place the rolls in a greased 9×13 inch baking dish, arranging them evenly. Cover them loosely with plastic wrap or a kitchen towel and let them rise for another 30-45 minutes, or until they have doubled in size again. This second rise is crucial for achieving truly light and fluffy rolls.
- Bake (The Grand Finale): Preheat your oven to 350°F (175°C). Bake the rolls for 25-30 minutes, or until they are golden brown and cooked through. A toothpick inserted into the center of a roll should come out clean.
- Make the Glaze (The Perfect Touch): While the rolls are baking, prepare the cream cheese glaze. In a medium bowl, beat together the softened cream cheese and butter until smooth and creamy. Gradually add the powdered sugar and vanilla extract, beating until well combined. Add milk one tablespoon at a time until you reach your desired consistency. If the glaze is too thick, add a little more milk. If it’s too thin, add a little more powdered sugar.
- Glaze and Decorate (The Finishing Flourish): Once the rolls have cooled slightly (but are still warm), drizzle or spread the cream cheese glaze generously over the tops of the rolls. Sprinkle with heart sprinkles for a festive Valentine’s Day touch. Serve immediately and enjoy the warm, gooey goodness!
Beginner Tips and Notes (Words of Wisdom)
- Warm Milk (Not Hot!): Ensure the milk is warm, not hot, as hot milk can kill the yeast. Test the temperature by dipping your finger in – it should feel lukewarm.
- Kneading (The Key to Texture): Don’t be afraid to really get into kneading the dough. It might be sticky at first, but it will become smoother and more manageable as you knead.
- Rising Time (Patience is a Virtue): The rising times given are estimates. The actual time will depend on the temperature and humidity of your kitchen. A warmer environment will result in faster rising.
- Doneness (The Toothpick Test): Use a toothpick to check if the rolls are cooked through. Insert it into the center of a roll; it should come out clean when the rolls are done.
- Glaze Consistency (Adjust as Needed): Adjust the amount of milk in the glaze to achieve your desired consistency. If you want a thicker glaze, use less milk. If you want a thinner glaze, use more milk.
- Cooling (Don’t Rush It): Allow the rolls to cool slightly before glazing. This will help the glaze set properly.
Serving Suggestions (Enhancing the Experience)
These Red Velvet Valentine’s Day Cinnamon Rolls are best served warm, fresh from the oven, when they are at their most gooey and delicious. They are perfect for a special breakfast, brunch, or an indulgent dessert anytime of day. Pair them with a cup of coffee, tea, or a cold glass of milk for the ultimate comfort food experience. A scoop of vanilla ice cream alongside a warm cinnamon roll is also a delightful treat.
Storage Tips (Keeping the Love Alive):
Leftover rolls can be stored in an airtight container at room temperature for up to 3 days or in the refrigerator for up to a week. Reheat them in the microwave or oven for a few seconds to warm them up before serving.
Conclusion (A Sweet Ending)
Congratulations! You’ve successfully baked a batch of delicious and beautiful Red Velvet Valentine’s Day Cinnamon Rolls. These treats are a perfect way to express your love and celebrate the holiday with someone special. The combination of the vibrant red velvet color, the warm cinnamon spice, and the tangy cream cheese frosting creates a symphony of flavors that is both comforting and exciting. Don’t be afraid to experiment with different flavors and decorations in the future. Baking is a journey of learning, creativity, and, most importantly, sharing. Whether you’re a seasoned baker or just starting out, remember that the most important ingredient is love.
Now, go forth and bake! Share your creations with your loved ones, or simply enjoy them yourself. We’d love to see your beautiful rolls – share your photos and stories in the comments below! Happy baking, and Happy Valentine’s Day! May your day be filled with love, laughter, and delicious cinnamon rolls. And remember, even if your rolls aren’t picture-perfect, the love and effort you put into them will make them taste all the sweeter. So, embrace the imperfections, enjoy the process, and savor the sweet rewards. After all, that’s what Valentine’s Day – and baking – is all about.