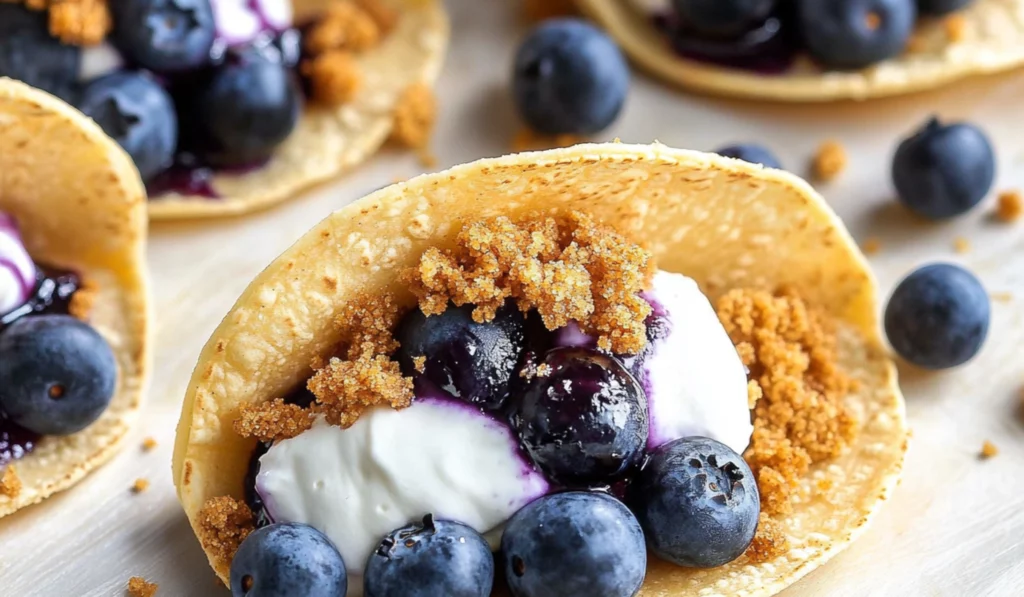
When you think of tacos, you might imagine savory fillings like beef, chicken, or fish, but what if I told you that tacos could also be a sweet and delightful treat? These Blueberry Cheesecake Tacos combine the deliciousness of a crunchy tortilla shell with a creamy cheesecake filling and topped with a homemade blueberry sauce. It’s a fun twist on a traditional dessert that’s not only creative but also easy to make. Whether you’re hosting a party, treating yourself, or looking for a way to impress your guests, these tacos are a guaranteed hit. What’s even better is that they’re quick and simple to prepare, making them an ideal recipe for beginners in the kitchen. No need for complex techniques or fancy equipment—just a few ingredients and simple steps to create something delicious and impressive.
Blueberry Cheesecake Tacos: The Perfect Easy Dessert for Beginners
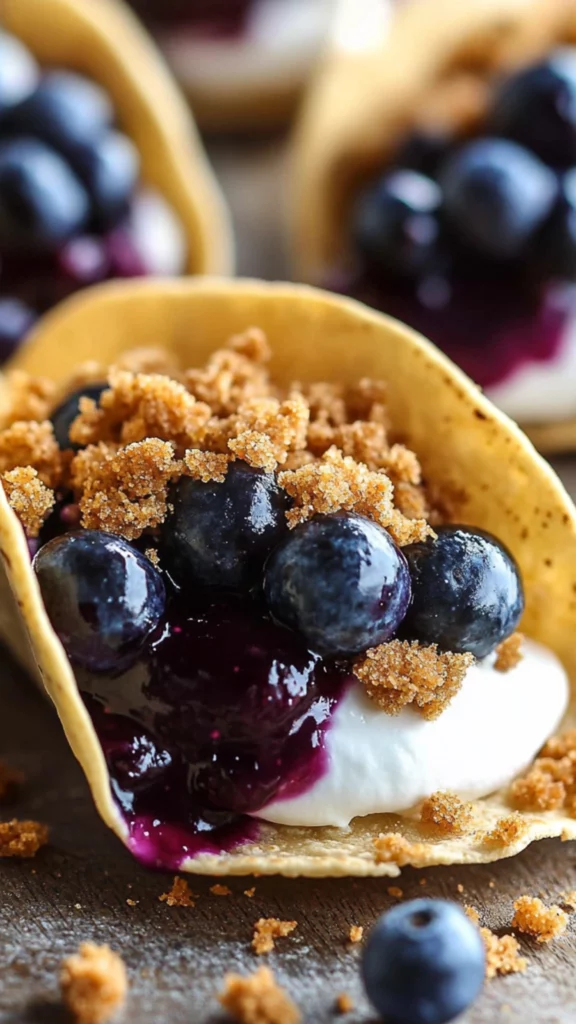
Looking for a fun, easy dessert to impress your friends and family? These Blueberry Cheesecake Tacos are the perfect treat! With a crunchy tortilla shell, creamy cheesecake filling, and fresh blueberry sauce, this sweet twist on a classic dessert is simple to make and packed with flavor. Whether you’re a beginner or seasoned cook, this recipe will be a hit at any occasion. Ready to get started? Let’s dive in!
- Prep Time: 20 minutes
- Cook Time: 10 minutes
- Total Time: 30 minutes
- Yield: 24–30 tacos 1x
- Category: Dessert
- Method: Baking, Stovetop
- Cuisine: American, Mexican
- Diet: Vegetarian
Ingredients
For the Taco Shells:
- 6 (8-inch) Tortillas – You’ll need about 6 tortillas, and each one will give you around 4-5 taco shells. The total number of taco shells you’ll get will vary depending on the size of your cookie cutter, but you should end up with around 24-30 taco shells. You can use either flour or corn tortillas for this recipe. Flour tortillas work best for a crispy texture that holds up well to the filling, while corn tortillas add a more authentic touch. Either way, both options will yield delicious results.
- 1 cup graham cracker crumbs – This is the base for the taco shells, and it gives them that signature sweet flavor and slight crunch. If you can’t find graham crackers, you can substitute with any plain sweet cracker, or even crushed-up cookies like vanilla wafers or shortbread. The idea is to have something with a bit of sweetness and texture to contrast with the creamy filling.
- 1/2 teaspoon cinnamon – This spice enhances the graham cracker crumbs with a subtle warmth that complements both the blueberry sauce and the cheesecake filling. If you’re not a fan of cinnamon, you can leave it out, or try nutmeg or cardamom for a different flavor profile.
- 1/4 cup butter, melted – The melted butter helps bind the graham cracker crumbs together and gives the taco shells a golden, crispy texture when baked. If you prefer, you can use coconut oil or vegetable oil as a substitute for butter.
For the Cheesecake Filling:
- 1 cup heavy cream – Heavy cream is the secret ingredient that makes this cheesecake filling smooth, rich, and indulgent. If you’re looking for a lighter version, you can substitute it with half-and-half, though the texture may not be quite as rich.
- 1 cup cream cheese, softened – Cream cheese is the heart of any cheesecake filling. Make sure it’s softened to room temperature before mixing. If the cream cheese is too cold, it may cause lumps in the filling, which we definitely want to avoid. You can use full-fat or low-fat cream cheese depending on your preference.
- 1 teaspoon lemon zest – The lemon zest brightens up the rich filling with a refreshing citrusy note that balances out the creaminess. If you don’t have a lemon, you can substitute with orange zest for a slightly different flavor.
- 1 teaspoon vanilla extract – Vanilla is a classic addition to any cheesecake filling. It rounds out the flavors and adds depth to the sweetness.
- 1/4 cup powdered sugar – This sweetens the cheesecake filling and helps give it that smooth, creamy consistency. If you prefer a less sweet filling, feel free to reduce the sugar by half, though the recipe is designed to have just the right level of sweetness.
For the Homemade Blueberry Sauce:
- 1/2 cup granulated sugar – The sugar is the sweetener for the blueberry sauce. You can adjust the amount of sugar depending on how sweet your blueberries are. If you’re using frozen blueberries, you may need to add a little more sugar as they tend to be less sweet than fresh ones.
- 2 cups fresh or frozen blueberries (about 8 oz) – You can use fresh or frozen blueberries for the sauce. Fresh blueberries will give a brighter, fresher flavor, while frozen blueberries are more accessible and work just as well. If you’re using frozen blueberries, make sure they’re thawed before cooking.
- 5 tablespoons warm water – The warm water helps dissolve the cornstarch and create a smooth, thick sauce. If you’re using fresh blueberries, you may need slightly less water, so feel free to adjust.
- 1 tablespoon lemon juice (optional but recommended) – A little bit of lemon juice enhances the blueberry flavor and gives the sauce a nice balance of sweet and tart. If you don’t have lemon juice, you can leave it out or use lime juice for a slightly different twist.
- 3 tablespoons cornstarch – The cornstarch thickens the blueberry sauce, giving it the perfect consistency for drizzling on the tacos. If you prefer a thicker sauce, you can add a little more cornstarch, but be careful not to make it too thick or it will become gummy.
For the Canned Blueberry Filling (Optional):
- 1 can blueberry pie filling – If you’re short on time or want a quicker option, you can substitute homemade blueberry sauce with canned blueberry pie filling. It’s an easy shortcut that saves you time but may not have the same fresh flavor as the homemade version.
Instructions
Step 1: Preheat the Oven and Prepare the Taco Shells
Start by preheating your oven to 400°F (200°C). While the oven is heating up, prepare the taco shells. In a bowl, combine the graham cracker crumbs and cinnamon. This mixture will coat the tortillas and give them that signature sweet flavor and slight crunch. Next, take your tortillas and cut out 4-5 rounds from each using a cookie cutter. You’ll end up with about 24-30 taco shells, depending on the size of your cutter. Dip each tortilla round into the melted butter, making sure it’s fully coated, then dip the buttered tortilla into the graham cracker mixture, ensuring it’s evenly coated on both sides. This step is crucial for creating the flavor and texture you want in your taco shells. Now, flip your muffin tin upside down and place each tortilla piece in between the muffin cups. This creates the taco shell shape while they bake. Bake the shells for about 10 minutes, or until they’re golden brown and crispy. Be careful not to over-bake them, as they can burn quickly. Once baked, remove them from the oven and let them cool in the muffin tin. They will continue to crisp up as they cool.
Step 2: Make the Blueberry Sauce
While the taco shells are cooling, it’s time to make the blueberry sauce. In a small bowl, whisk together the warm water and cornstarch until smooth. Set this aside for later. In a saucepan, combine the blueberries and granulated sugar. Heat the mixture over medium-low heat for 4-5 minutes, stirring occasionally. You’ll notice the blueberries starting to release their juices. Once the blueberries begin to break apart, stir in the cornstarch mixture and let it simmer for 3 more minutes until the sauce thickens. Be sure to stir gently to avoid crushing the blueberries too much. Remove the sauce from the heat and let it cool to room temperature.
Step 3: Prepare the Cheesecake Filling
Next, prepare the cheesecake filling. In a large mixing bowl, beat together the softened cream cheese, heavy cream, powdered sugar, lemon zest, and vanilla extract. Using an electric mixer, beat the mixture on medium speed for about 2 minutes until the filling thickens and becomes smooth. It should have a light and airy texture. Once it’s ready, transfer the filling to a piping bag or a plastic zip-top bag with the tip cut off. Refrigerate the cheesecake filling for about 30 minutes to help it firm up. Chilling it will also make it easier to pipe into the taco shells later.
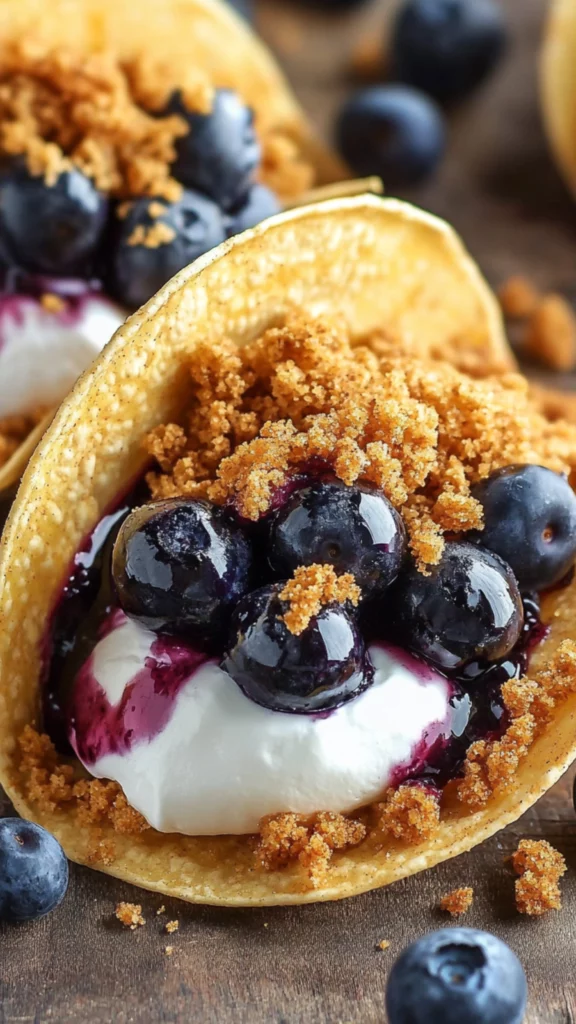
Step 4: Assemble the Tacos
Once the taco shells have cooled, the cheesecake filling has chilled, and the blueberry sauce has thickened, it’s time to assemble your tacos. Using the piping bag, pipe a generous amount of cheesecake filling into each taco shell. Don’t be afraid to fill them up—these tacos are meant to be indulgent! Top each taco with a spoonful of your homemade blueberry sauce. You can also drizzle a little extra sauce over the top if you like. For an extra touch, sprinkle a few graham cracker crumbs on top of the filled tacos for added crunch and flavor.
Step 5: Serve and Enjoy
Once your Blueberry Cheesecake Tacos are assembled, they’re ready to serve! These tacos are perfect for a party or a fun family dessert. They’re bite-sized, making them easy to eat and share. If you have any leftovers (which is unlikely), you can store them in the fridge for up to 2 days. The taco shells will stay crispy, and the cheesecake filling will remain creamy and delicious. Just make sure to store the filling and sauce separately if you plan on keeping leftovers.
Notes
- Taco Shells Too Soft? If your taco shells aren’t crispy enough, you can bake them a little longer, but keep an eye on them to prevent burning. The graham cracker coating will help them crisp up, but they need enough time in the oven to achieve the perfect crunch.
- Cream Cheese Lumps? Make sure your cream cheese is softened before mixing to avoid lumps. If you forget to take it out ahead of time, microwave it for 10-15 seconds, or let it sit at room temperature for 20-30 minutes.
- Blueberry Sauce Too Thin? If your blueberry sauce isn’t thickening properly, let it simmer for a little longer or add an extra teaspoon of cornstarch dissolved in water to thicken it further.
I remember the first time I made these Blueberry Cheesecake Tacos for a family gathering. I was feeling a little intimidated because it was my first time preparing dessert for a crowd. But as soon as I served them, they were met with immediate smiles and compliments. The crunchy shells, creamy filling, and sweet blueberry topping were a huge hit, and what really amazed me was how easy it had been to make. This recipe became my go-to whenever I needed a dessert that would impress without taking up too much time. It’s perfect for beginners because it’s simple, doesn’t require any complex techniques, and delivers on taste and presentation.
The beauty of Blueberry Cheesecake Tacos lies in how accessible they are to beginner cooks. With just a few ingredients, basic kitchen tools, and minimal time, you can create a dessert that looks like it came from a bakery. The cheesecake filling is made with a few pantry staples, and the blueberry sauce adds a burst of fresh flavor without any complicated steps. Plus, if you have dietary preferences or are working with limited ingredients, there are plenty of substitutions you can make. From the taco shells to the filling and topping, this recipe offers flexibility while keeping the process straightforward. Let’s dive into the details of this amazing dessert that’s bound to become a favorite in your cooking repertoire.
Ingredients and Preparation
Before we dive into the step-by-step instructions, let’s take a look at the ingredients you’ll need to make these Blueberry Cheesecake Tacos. The list is short, but the flavors are anything but simple. You’ll be creating a crunchy, sweet taco shell, a creamy, decadent cheesecake filling, and a tangy blueberry sauce that ties it all together.
For the Taco Shells:
- 6 (8-inch) Tortillas – You’ll need about 6 tortillas, and each one will give you around 4-5 taco shells. The total number of taco shells you’ll get will vary depending on the size of your cookie cutter, but you should end up with around 24-30 taco shells. You can use either flour or corn tortillas for this recipe. Flour tortillas work best for a crispy texture that holds up well to the filling, while corn tortillas add a more authentic touch. Either way, both options will yield delicious results.
- 1 cup graham cracker crumbs – This is the base for the taco shells, and it gives them that signature sweet flavor and slight crunch. If you can’t find graham crackers, you can substitute with any plain sweet cracker, or even crushed-up cookies like vanilla wafers or shortbread. The idea is to have something with a bit of sweetness and texture to contrast with the creamy filling.
- 1/2 teaspoon cinnamon – This spice enhances the graham cracker crumbs with a subtle warmth that complements both the blueberry sauce and the cheesecake filling. If you’re not a fan of cinnamon, you can leave it out, or try nutmeg or cardamom for a different flavor profile.
- 1/4 cup butter, melted – The melted butter helps bind the graham cracker crumbs together and gives the taco shells a golden, crispy texture when baked. If you prefer, you can use coconut oil or vegetable oil as a substitute for butter.
For the Cheesecake Filling:
- 1 cup heavy cream – Heavy cream is the secret ingredient that makes this cheesecake filling smooth, rich, and indulgent. If you’re looking for a lighter version, you can substitute it with half-and-half, though the texture may not be quite as rich.
- 1 cup cream cheese, softened – Cream cheese is the heart of any cheesecake filling. Make sure it’s softened to room temperature before mixing. If the cream cheese is too cold, it may cause lumps in the filling, which we definitely want to avoid. You can use full-fat or low-fat cream cheese depending on your preference.
- 1 teaspoon lemon zest – The lemon zest brightens up the rich filling with a refreshing citrusy note that balances out the creaminess. If you don’t have a lemon, you can substitute with orange zest for a slightly different flavor.
- 1 teaspoon vanilla extract – Vanilla is a classic addition to any cheesecake filling. It rounds out the flavors and adds depth to the sweetness.
- 1/4 cup powdered sugar – This sweetens the cheesecake filling and helps give it that smooth, creamy consistency. If you prefer a less sweet filling, feel free to reduce the sugar by half, though the recipe is designed to have just the right level of sweetness.
For the Homemade Blueberry Sauce:
- 1/2 cup granulated sugar – The sugar is the sweetener for the blueberry sauce. You can adjust the amount of sugar depending on how sweet your blueberries are. If you’re using frozen blueberries, you may need to add a little more sugar as they tend to be less sweet than fresh ones.
- 2 cups fresh or frozen blueberries (about 8 oz) – You can use fresh or frozen blueberries for the sauce. Fresh blueberries will give a brighter, fresher flavor, while frozen blueberries are more accessible and work just as well. If you’re using frozen blueberries, make sure they’re thawed before cooking.
- 5 tablespoons warm water – The warm water helps dissolve the cornstarch and create a smooth, thick sauce. If you’re using fresh blueberries, you may need slightly less water, so feel free to adjust.
- 1 tablespoon lemon juice (optional but recommended) – A little bit of lemon juice enhances the blueberry flavor and gives the sauce a nice balance of sweet and tart. If you don’t have lemon juice, you can leave it out or use lime juice for a slightly different twist.
- 3 tablespoons cornstarch – The cornstarch thickens the blueberry sauce, giving it the perfect consistency for drizzling on the tacos. If you prefer a thicker sauce, you can add a little more cornstarch, but be careful not to make it too thick or it will become gummy.
For the Canned Blueberry Filling (Optional):
- 1 can blueberry pie filling – If you’re short on time or want a quicker option, you can substitute homemade blueberry sauce with canned blueberry pie filling. It’s an easy shortcut that saves you time but may not have the same fresh flavor as the homemade version.
Step-by-Step Instructions
Now that you have your ingredients ready, let’s break down the steps to making these delightful Blueberry Cheesecake Tacos. These instructions are designed to be simple and beginner-friendly, with clear guidance on how to prepare the different components of the recipe.
Step 1: Preheat the Oven and Prepare the Taco Shells
Start by preheating your oven to 400°F (200°C). While the oven is heating up, prepare the taco shells. In a bowl, combine the graham cracker crumbs and cinnamon. This mixture will coat the tortillas and give them that signature sweet flavor and slight crunch. Next, take your tortillas and cut out 4-5 rounds from each using a cookie cutter. You’ll end up with about 24-30 taco shells, depending on the size of your cutter. Dip each tortilla round into the melted butter, making sure it’s fully coated, then dip the buttered tortilla into the graham cracker mixture, ensuring it’s evenly coated on both sides. This step is crucial for creating the flavor and texture you want in your taco shells. Now, flip your muffin tin upside down and place each tortilla piece in between the muffin cups. This creates the taco shell shape while they bake. Bake the shells for about 10 minutes, or until they’re golden brown and crispy. Be careful not to over-bake them, as they can burn quickly. Once baked, remove them from the oven and let them cool in the muffin tin. They will continue to crisp up as they cool.
Step 2: Make the Blueberry Sauce
While the taco shells are cooling, it’s time to make the blueberry sauce. In a small bowl, whisk together the warm water and cornstarch until smooth. Set this aside for later. In a saucepan, combine the blueberries and granulated sugar. Heat the mixture over medium-low heat for 4-5 minutes, stirring occasionally. You’ll notice the blueberries starting to release their juices. Once the blueberries begin to break apart, stir in the cornstarch mixture and let it simmer for 3 more minutes until the sauce thickens. Be sure to stir gently to avoid crushing the blueberries too much. Remove the sauce from the heat and let it cool to room temperature.
Step 3: Prepare the Cheesecake Filling
Next, prepare the cheesecake filling. In a large mixing bowl, beat together the softened cream cheese, heavy cream, powdered sugar, lemon zest, and vanilla extract. Using an electric mixer, beat the mixture on medium speed for about 2 minutes until the filling thickens and becomes smooth. It should have a light and airy texture. Once it’s ready, transfer the filling to a piping bag or a plastic zip-top bag with the tip cut off. Refrigerate the cheesecake filling for about 30 minutes to help it firm up. Chilling it will also make it easier to pipe into the taco shells later.
Step 4: Assemble the Tacos
Once the taco shells have cooled, the cheesecake filling has chilled, and the blueberry sauce has thickened, it’s time to assemble your tacos. Using the piping bag, pipe a generous amount of cheesecake filling into each taco shell. Don’t be afraid to fill them up—these tacos are meant to be indulgent! Top each taco with a spoonful of your homemade blueberry sauce. You can also drizzle a little extra sauce over the top if you like. For an extra touch, sprinkle a few graham cracker crumbs on top of the filled tacos for added crunch and flavor.
Step 5: Serve and Enjoy
Once your Blueberry Cheesecake Tacos are assembled, they’re ready to serve! These tacos are perfect for a party or a fun family dessert. They’re bite-sized, making them easy to eat and share. If you have any leftovers (which is unlikely), you can store them in the fridge for up to 2 days. The taco shells will stay crispy, and the cheesecake filling will remain creamy and delicious. Just make sure to store the filling and sauce separately if you plan on keeping leftovers.
Beginner Tips and Notes
- Taco Shells Too Soft? If your taco shells aren’t crispy enough, you can bake them a little longer, but keep an eye on them to prevent burning. The graham cracker coating will help them crisp up, but they need enough time in the oven to achieve the perfect crunch.
- Cream Cheese Lumps? Make sure your cream cheese is softened before mixing to avoid lumps. If you forget to take it out ahead of time, microwave it for 10-15 seconds, or let it sit at room temperature for 20-30 minutes.
- Blueberry Sauce Too Thin? If your blueberry sauce isn’t thickening properly, let it simmer for a little longer or add an extra teaspoon of cornstarch dissolved in water to thicken it further.
Serving Suggestions
These Blueberry Cheesecake Tacos are already a showstopper, but they’re even better when paired with complementary sides or drinks. Serve them with a side of fresh fruit, like sliced strawberries or raspberries, to balance out the sweetness of the tacos. You can also serve them with whipped cream or a scoop of vanilla ice cream for an extra indulgent dessert experience. As for drinks, a refreshing glass of iced tea or lemonade pairs perfectly with these tacos.
Conclusion
Whether you’re new to cooking or just looking for a fun, easy dessert to impress your friends and family, Blueberry Cheesecake Tacos are the perfect solution. With a simple set of ingredients and straightforward instructions, anyone can create this beautiful dessert. Don’t be afraid to get creative and experiment with different toppings or filling variations. The possibilities are endless! Give this recipe a try, and I’d love to hear how it turns out for you. Feel free to share your thoughts and any adjustments you made in the comments below. Happy cooking!