Do you ever find yourself staring into the refrigerator, wondering what to make for dinner? Takeout can be tempting, but it’s often expensive and not always the healthiest option. I used to struggle with this dilemma until I discovered the magic of stuffed peppers. These Buffalo Chicken Stuffed Peppers are a game-changer, especially for beginner cooks. They’re incredibly simple to make, require minimal prep time, and are packed with flavor. Plus, they’re a healthy, low-carb option, perfect for anyone looking for a quick and satisfying meal. This easy sheet pan dinner is the perfect starting point for your culinary journey!
Buffalo Chicken Stuffed Peppers: A Beginner’s Guide to Flavorful, Fuss-Free Cooking
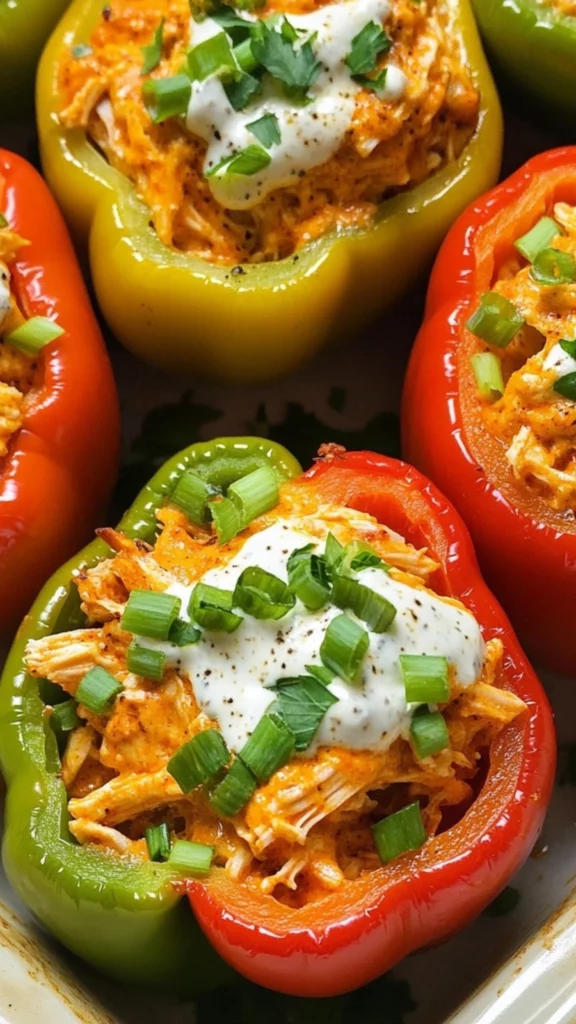
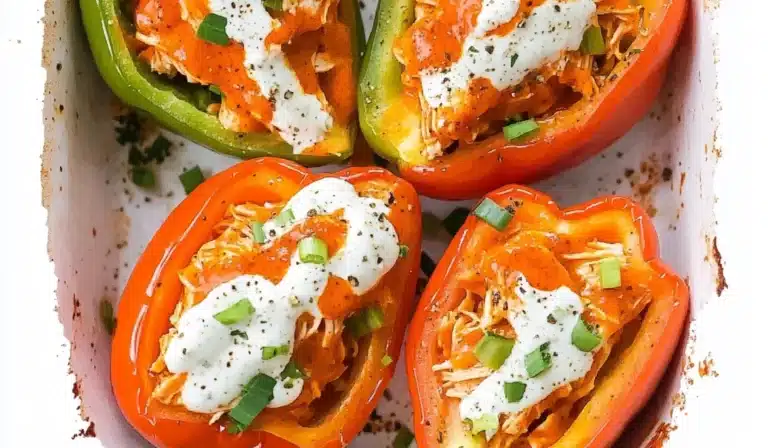
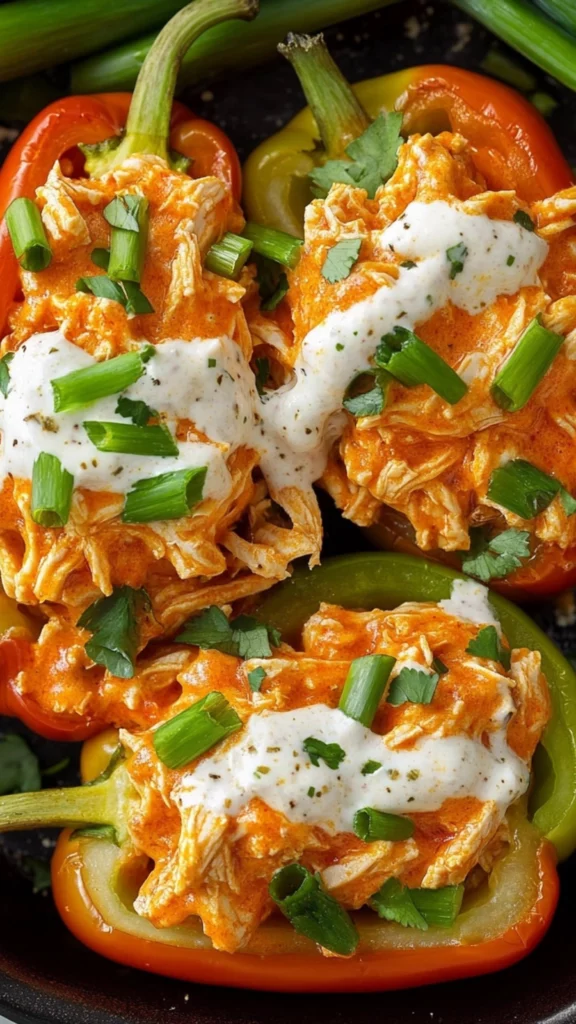
Looking for a quick, easy, and healthy dinner that’s bursting with flavor? These Buffalo Chicken Stuffed Peppers are the perfect solution! Juicy shredded chicken, tangy buffalo sauce, and sweet bell peppers combine for a meal that’s both satisfying and fun to make. Imagine colorful bell peppers overflowing with a creamy, spicy chicken filling, topped with a cool ranch drizzle. It’s a feast for the eyes and the taste buds, perfect for any weeknight meal. This easy recipe is ideal for beginner cooks, requiring minimal ingredients and delivering maximum flavor.
- Total Time: 1 hour 5 minutes
- Yield: 6 servings 1x
Ingredients
- 3 large bell peppers (any color!), halved lengthwise and seeded
- 4 cups cooked shredded chicken (rotisserie chicken is a great shortcut!)
- 1 cup paleo mayonnaise (or regular mayo, Greek yogurt)
- ½ cup hot sauce/buffalo sauce (Frank’s Red Hot, or your favorite)
- 1 teaspoon garlic powder
- 1 teaspoon onion powder
- 1 teaspoon kosher salt
- ¼ teaspoon black pepper
- 2 tablespoons nutritional yeast (optional)
- 1 bunch green onions, thinly sliced (plus more for garnish)
- Whole30 ranch dressing (for garnish)
- Fresh herbs (parsley, cilantro, etc., for garnish)
Instructions
- Preheat the Oven: Preheat your oven to 400 degrees Fahrenheit (200 degrees Celsius). This ensures the peppers cook evenly and the filling gets nice and bubbly. Preheating the oven is a crucial step in baking. It ensures that the oven reaches the correct temperature before you put the food in, which helps to ensure even cooking.
- Prepare the Peppers: Arrange the halved and seeded bell peppers in a lightly greased large skillet or baking dish, cut side up. Using a skillet allows you to easily transfer the dish from the oven to the stovetop if you want to broil the peppers for a few minutes at the end for extra browning. Lightly greasing the baking dish prevents the peppers from sticking and makes cleanup easier.
- Mix the Filling: In a large bowl, combine the shredded chicken, mayonnaise, hot sauce, garlic powder, onion powder, salt, black pepper, nutritional yeast (if using), and sliced green onions. Mix thoroughly until everything is well combined. This is where the magic happens! Make sure all the ingredients are evenly distributed throughout the chicken mixture.
- Taste and Adjust: Taste the filling and add more hot sauce or salt if desired. Don’t be afraid to customize the flavor to your liking. This is your chance to make the recipe your own. Taste as you go and adjust the seasonings until you achieve the perfect balance of flavors.
- Stuff the Peppers: Fill each bell pepper half with the buffalo chicken mixture, packing it in firmly. Don’t be shy – pile it high! The more filling you add, the more flavorful and satisfying the stuffed peppers will be.
- Bake the Peppers: Cover the baking dish with foil and bake for 30 minutes. This helps the peppers soften and the flavors meld together. Covering the dish with foil creates a steamy environment that helps the peppers cook more quickly and evenly.
- Uncover and Bake Again: Remove the foil and bake for another 20 minutes, or until the peppers are tender and the stuffing is bubbling and slightly browned. Keep an eye on them to prevent burning. Removing the foil during the last part of baking allows the top of the filling to brown and become slightly crispy.
- Garnish and Serve: Top the stuffed peppers with a drizzle of ranch dressing, thinly sliced green onion, and fresh herbs, if desired. This adds a beautiful finishing touch and enhances the flavor. Serve immediately and enjoy your delicious and easy sheet pan dinner! Garnishing the dish with fresh herbs and ranch dressing not only makes it look more appealing but also adds a refreshing element to the overall flavor profile.
Notes
- Use softened cream cheese for a smooth dip.
- Don’t overmix.
- Chill for a firmer consistency (optional).
- Get creative with dippers!
- Prep Time: 15 minutes
- Cook Time: 50 minutes
- Category: Main Course, Dinner
- Method: Baking
- Cuisine: American, Southwestern
- Diet: Gluten Free
Ingredients and Preparation: The Building Blocks of Deliciousness
This recipe shines with its simplicity. Here’s a detailed breakdown of what you’ll need to create your culinary masterpiece:
- Bell Peppers: 3 large bell peppers (any color!), halved lengthwise and seeded. Choosing the right peppers is key. Look for firm, vibrant peppers that feel heavy for their size. This indicates they’re fresh and will hold their shape well during baking. A mix of colors not only looks beautiful but also adds subtle variations in sweetness.
- Cooked Chicken: 4 cups cooked shredded chicken (a rotisserie chicken is a fantastic shortcut!). Rotisserie chickens are a lifesaver for busy weeknights. The pre-cooked chicken saves you a ton of time and effort. You can also use leftover chicken from a previous meal, making this a great way to reduce food waste. Alternatively, you can poach chicken breasts specifically for this recipe. Simply simmer boneless, skinless chicken breasts in water or broth until cooked through, then shred with two forks.
- Paleo Mayonnaise: 1 cup paleo mayonnaise (homemade or store-bought avocado mayo works great). Mayonnaise adds creaminess and binds the filling together. Paleo mayo, often made with avocado oil, is a healthier alternative to traditional mayonnaise. If you’re feeling ambitious, you can even make your own paleo mayo at home! There are plenty of easy recipes available online.
- Hot Sauce/Buffalo Sauce: ½ cup hot sauce or buffalo sauce (Frank’s Red Hot is a classic, or choose a Whole30 compatible buffalo sauce if needed). The amount can be adjusted based on your spice preference. Start with ½ cup and add more to taste if you like it extra spicy. For a milder flavor, you can use less hot sauce or mix it with a little bit of melted butter.
- Garlic Powder: 1 teaspoon. Garlic powder adds a subtle savory note that complements the other flavors. It’s a pantry staple that adds depth to many dishes.
- Onion Powder: 1 teaspoon. Onion powder complements the garlic powder and adds another layer of savory flavor. It’s a convenient way to add onion flavor without having to chop onions.
- Kosher Salt: 1 teaspoon. Salt is essential for enhancing the flavors in any dish. Kosher salt is preferred by many chefs because its larger crystals make it easier to control the amount you’re using.
- Black Pepper: ¼ teaspoon. A pinch of pepper adds a little kick and balances the richness of the other ingredients. Freshly ground black pepper is always best, but pre-ground pepper works just fine too.
- Nutritional Yeast (Optional): 2 tablespoons. Nutritional yeast adds a cheesy, umami flavor, especially if you’re dairy-free. It’s a great ingredient for adding depth and complexity to vegetarian and vegan dishes.
- Green Onions: 1 bunch, white and light green parts thinly sliced (plus more for garnish). Green onions add a fresh, oniony bite and a pop of color to the dish. They’re a versatile ingredient that can be used in many different ways.
- Whole30 Ranch Dressing (for garnish): A drizzle of ranch provides a cooling contrast to the buffalo sauce. If you’re following a Whole30 diet, make sure to choose a compliant ranch dressing. You can also make your own homemade ranch dressing.
- Fresh Herbs (for garnish): Parsley, cilantro, or chives add a pop of color and freshness. Fresh herbs elevate the dish and make it look even more appealing.
Alternative Ingredient Suggestions:
- Bell Peppers: Feel free to experiment with different colored bell peppers. Red, yellow, and orange peppers tend to be sweeter, while green peppers have a slightly more bitter flavor. You can also use poblano peppers for a milder flavor or jalapenos for a spicier kick.
- Chicken: Canned chicken can be used in a pinch, but fresh or rotisserie chicken will provide the best flavor and texture. You can also use ground chicken or turkey as a substitute.
- Mayonnaise: If you don’t have or don’t like paleo mayo, you can use regular mayonnaise, Greek yogurt, or even a cashew cream sauce for a vegan option.
- Nutritional Yeast: If you don’t have nutritional yeast, you can omit it or substitute it with grated Parmesan cheese if you’re not dairy-free.
Step-by-Step Instructions: Cooking Made Easy
- Preheat the Oven: Preheat your oven to 400 degrees Fahrenheit (200 degrees Celsius). This ensures the peppers cook evenly and the filling gets nice and bubbly. Preheating the oven is a crucial step in baking. It ensures that the oven reaches the correct temperature before you put the food in, which helps to ensure even cooking.
- Prepare the Peppers: Arrange the halved and seeded bell peppers in a lightly greased large skillet or baking dish, cut side up. Using a skillet allows you to easily transfer the dish from the oven to the stovetop if you want to broil the peppers for a few minutes at the end for extra browning. Lightly greasing the baking dish prevents the peppers from sticking and makes cleanup easier.
- Mix the Filling: In a large bowl, combine the shredded chicken, mayonnaise, hot sauce, garlic powder, onion powder, salt, black pepper, nutritional yeast (if using), and sliced green onions. Mix thoroughly until everything is well combined. This is where the magic happens! Make sure all the ingredients are evenly distributed throughout the chicken mixture.
- Taste and Adjust: Taste the filling and add more hot sauce or salt if desired. Don’t be afraid to customize the flavor to your liking. This is your chance to make the recipe your own. Taste as you go and adjust the seasonings until you achieve the perfect balance of flavors.
- Stuff the Peppers: Fill each bell pepper half with the buffalo chicken mixture, packing it in firmly. Don’t be shy – pile it high! The more filling you add, the more flavorful and satisfying the stuffed peppers will be.
- Bake the Peppers: Cover the baking dish with foil and bake for 30 minutes. This helps the peppers soften and the flavors meld together. Covering the dish with foil creates a steamy environment that helps the peppers cook more quickly and evenly.
- Uncover and Bake Again: Remove the foil and bake for another 20 minutes, or until the peppers are tender and the stuffing is bubbling and slightly browned. Keep an eye on them to prevent burning. Removing the foil during the last part of baking allows the top of the filling to brown and become slightly crispy.
- Garnish and Serve: Top the stuffed peppers with a drizzle of ranch dressing, thinly sliced green onion, and fresh herbs, if desired. This adds a beautiful finishing touch and enhances the flavor. Serve immediately and enjoy your delicious and easy sheet pan dinner! Garnishing the dish with fresh herbs and ranch dressing not only makes it look more appealing but also adds a refreshing element to the overall flavor profile.
Beginner Tips and Notes: Setting You Up for Success
- Troubleshooting: Overcooked Veggies: If your peppers seem to be cooking too quickly, you can lower the oven temperature slightly or add a little bit of water to the bottom of the baking dish to create steam. Adding water to the baking dish creates a humid environment that helps to prevent the peppers from drying out.
- Troubleshooting: Chicken Browning Too Quickly: If the top of the chicken filling is browning too much before the peppers are tender, you can loosely cover the baking dish with foil again. This will help to prevent the chicken from burning while the peppers continue to cook.
- Efficient Prep: To save time, you can cook the chicken and chop the vegetables ahead of time. Store them separately in the refrigerator until you’re ready to assemble the stuffed peppers. This is a great tip for busy weeknights when you don’t have a lot of time to cook.
- Tool Substitutions: If you don’t have a large skillet or baking dish, you can use a smaller one, but you may need to adjust the baking time slightly. Just keep an eye on the peppers and check them for doneness more frequently.
Serving Suggestions: Completing the Meal
These Buffalo Chicken Stuffed Peppers are delicious on their own, but they also pair well with a variety of sides:
- Salad: A simple green salad with a light vinaigrette dressing complements the richness of the stuffed peppers. The crispness of the salad provides a refreshing contrast to the richness of the stuffed peppers. Arugula, mixed greens, or even a simple romaine salad would be delicious.
- Quinoa or Rice: A side of quinoa or rice adds a healthy dose of carbohydrates and makes the meal more filling. Quinoa is a great source of protein and fiber, while rice is a classic accompaniment to many dishes. You can also try using brown rice or wild rice for a healthier option.
- Roasted Vegetables: Roast some broccoli, carrots, or sweet potatoes alongside the stuffed peppers for a complete and balanced meal. Roasting vegetables brings out their natural sweetness and adds a delicious caramelized flavor. Tossing them with olive oil, salt, and pepper before roasting is all you need.
- Creamy Polenta: For a more comforting side dish, consider serving the stuffed peppers with creamy polenta. The soft, creamy texture of the polenta complements the spicy chicken filling beautifully.
Storage Tips for Leftovers:
Store leftover stuffed peppers in an airtight container in the refrigerator for up to 3 days. Reheat them in the oven or microwave until heated through. When reheating, you might want to add a splash of water to the container to prevent the peppers from drying out.
Variations and Customization: Making it Your Own
One of the best things about this recipe is its versatility. You can easily customize it to suit your taste preferences and dietary needs. Here are a few ideas:
- Spice it Up: For a spicier version, use a hotter buffalo sauce or add a pinch of red pepper flakes to the chicken filling. You can also add some diced jalapenos to the mix for an extra kick.
- Add Cheese: If you’re not dairy-free, you can add some shredded cheddar cheese, Monterey Jack, or pepper jack cheese to the filling or sprinkle it on top before baking. The cheese will melt and become gooey, adding a delicious richness to the stuffed peppers.
- Make it Vegetarian: For a vegetarian version, you can substitute the chicken with cooked lentils, black beans, or crumbled tofu. These alternatives provide a similar texture and protein content to chicken.
- Add More Veggies: Feel free to add more vegetables to the filling, such as diced celery, carrots, or onions. This will add more flavor and nutrients to the dish. You can also add some chopped spinach or kale to the filling for a boost of vitamins and minerals.
- Use Different Peppers: As mentioned earlier, you can experiment with different types of peppers. Try using poblano peppers for a milder flavor or jalapenos for a spicier kick. You can also use mini bell peppers for a fun and colorful appetizer.
Conclusion: Embrace the Joy of Cooking
Cooking doesn’t have to be intimidating. With the right recipes and a little bit of practice, anyone can create delicious and healthy meals at home. These Buffalo Chicken Stuffed Peppers are a perfect example of a recipe that is both easy and impressive. So, gather your ingredients, preheat your oven, and get ready to embark on a culinary adventure. Don’t be afraid to experiment with different flavors and ingredients to make this recipe your own. And most importantly, have fun! Cooking should be an enjoyable experience, not a chore. Share your creations and experiences in the comments below – I can’t wait to hear how they turn out! Happy cooking!