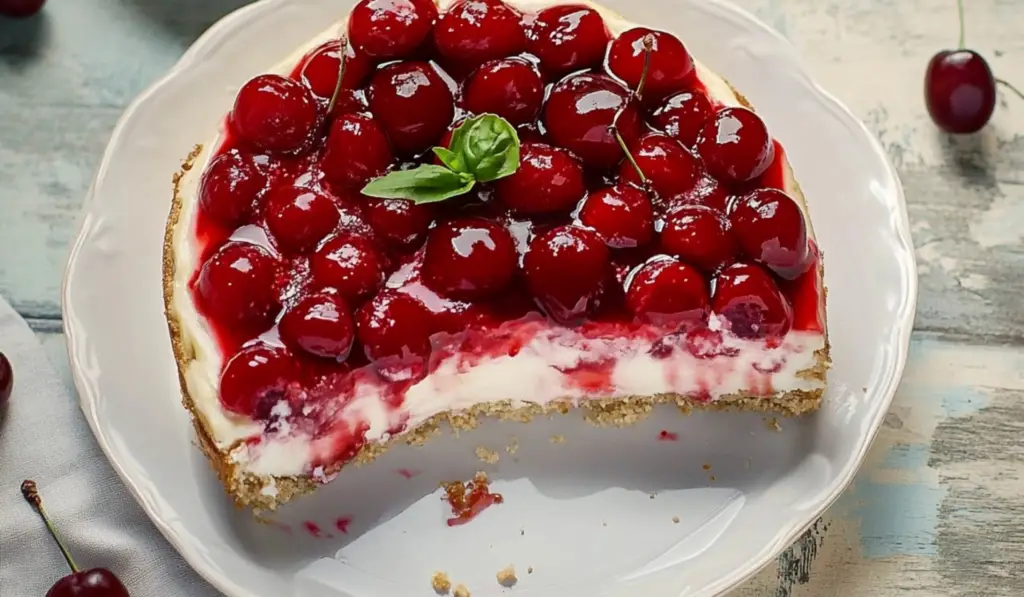
There’s something magical about desserts that manage to strike the perfect balance between simplicity and indulgence, and Classic Cherry Delight is one of those rare treats. With its layers of buttery graham cracker crust, velvety cream cheese filling, and sweet-tart cherry topping, this no-bake dessert delivers big on flavor while keeping preparation effortless.
Print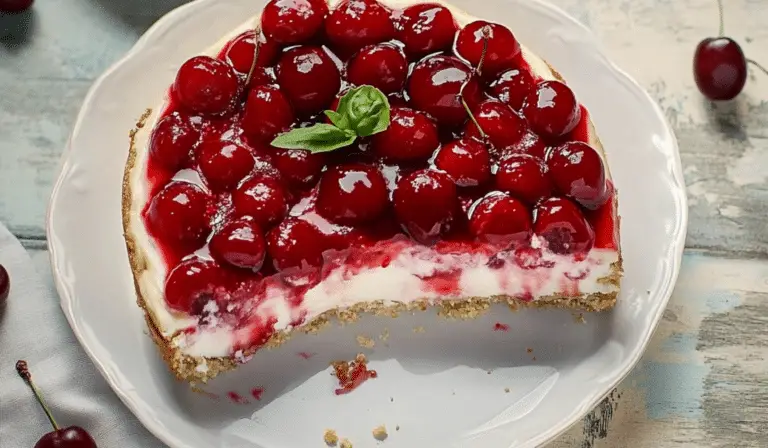
Classic Cherry Delight: A Nostalgic Dessert for All Occasions
There’s something magical about desserts that manage to strike the perfect balance between simplicity and indulgence, and Classic Cherry Delight is one of those rare treats. With its layers of buttery graham cracker crust, velvety cream cheese filling, and sweet-tart cherry topping, this no-bake dessert delivers big on flavor while keeping preparation effortless.
- Total Time: 30 minutes
- Yield: 9 servings 1x
Ingredients
Crust
- Unsalted Butter (7 tablespoons)
- Acts as the binder for the graham cracker crumbs, providing a rich, buttery flavor.
- Graham Cracker Crumbs (1 ½ cups)
- The base layer that offers a sweet, slightly nutty crunch to balance the creamy filling.
- Granulated Sugar (3 tablespoons)
- Adds just the right amount of sweetness to the crust without overpowering the dish.
Filling
- Cream Cheese (8 ounces, softened)
- The star of the filling, giving it a creamy texture and tangy flavor reminiscent of cheesecake.
- Powdered Sugar (1 cup)
- Sweetens the filling while maintaining a smooth consistency.
- Pure Vanilla Extract (1 teaspoon)
- A hint of vanilla enhances the flavor profile, adding warmth and depth.
- Cool Whip (8 ounces)
- Lightens the filling, giving it a fluffy, airy texture.
Topping
- Cherry Pie Filling (21 ounces)
- Provides a sweet and tangy fruit layer, creating a vibrant finish that ties the dessert together.
Instructions
1. Crafting the Perfect Crust
The crust is the foundation of this dessert, and it’s essential to get it right.
- Melt the Butter: Start by placing the butter in a microwave-safe bowl and heating it for about 30 seconds or until fully melted.
- Combine Ingredients: Add the graham cracker crumbs and sugar to the melted butter. Stir until all the crumbs are evenly coated, forming a slightly sticky mixture.
- Press into Pan: Transfer the mixture into an 8×8-inch baking dish. Use the back of a spoon or the bottom of a measuring cup to firmly press the crumbs into an even layer. Set aside while you prepare the filling.
2. Creating the Creamy Filling
The filling is where the magic happens, combining tangy, sweet, and fluffy elements for a perfectly balanced layer.
- Mix the Cream Cheese: In a large mixing bowl, beat the softened cream cheese with a hand or stand mixer until smooth and free of lumps.
- Add Sweetness and Flavor: Mix in the powdered sugar and vanilla extract, ensuring everything is fully incorporated.
- Fold in the Cool Whip: Gently fold the Cool Whip into the cream cheese mixture. Avoid overmixing to maintain the light, airy texture of the filling.
3. Assembling the Layers
Now it’s time to bring everything together.
- Spread the Filling: Using a spatula, evenly spread the cream cheese mixture over the prepared crust. Take your time to create a smooth layer.
- Top with Cherry Pie Filling: Carefully spoon the cherry pie filling over the cream cheese layer. Spread it out evenly, ensuring every bite will have that delicious cherry goodness.
4. Chill to Perfection
Refrigeration is key to allowing the layers to set and meld together. Place the dessert in the refrigerator for at least 2 hours, or preferably overnight, before serving.
Notes
- Soften the Cream Cheese: Ensure the cream cheese is at room temperature to prevent lumps in the filling.
- Pack the Crust Firmly: Use a flat utensil to press the crust firmly into the pan, preventing it from crumbling when cut.
- Allow Ample Chill Time: The longer the dessert chills, the better the flavors meld. Overnight refrigeration is ideal.
- Clean Slicing: Use a sharp knife dipped in warm water for clean, precise cuts.
- Prep Time: 30 minutes
- Cook Time: No cook
- Category: Dessert
- Method: Refrigerate
- Cuisine: American
- Diet: Vegetarian
Whether it’s for a casual family dinner, a festive holiday table, or a backyard potluck, Classic Cherry Delight is always a hit. Its versatility and universal appeal make it an enduring favorite, perfect for every level of baker, from novice to seasoned pro.
In this guide, we’ll dive deep into what makes this dessert so special. From its easy preparation to tips for variations and serving, you’ll discover why Classic Cherry Delight is a must-try recipe that’s bound to become a staple in your kitchen.
The Allure of Classic Cherry Delight
Why do desserts like Classic Cherry Delight remain perennial favorites?
- Ease of Preparation: No oven required, making it perfect for hot summer days or when time is short.
- Crowd-Pleasing Appeal: The layers of flavor and texture ensure there’s something for everyone.
- Adaptability: From the filling to the topping, you can easily customize the recipe to suit your preferences or use what’s on hand.
- Make-Ahead Convenience: It’s one of those desserts that tastes even better the next day, allowing you to prepare in advance and free up time on the day of serving.
Classic Cherry Delight is the perfect intersection of nostalgia and practicality, evoking memories of home-cooked meals while fitting seamlessly into modern, busy lifestyles.
Ingredients: The Building Blocks of Delight
Crust
- Unsalted Butter (7 tablespoons)
- Acts as the binder for the graham cracker crumbs, providing a rich, buttery flavor.
- Graham Cracker Crumbs (1 ½ cups)
- The base layer that offers a sweet, slightly nutty crunch to balance the creamy filling.
- Granulated Sugar (3 tablespoons)
- Adds just the right amount of sweetness to the crust without overpowering the dish.
Filling
- Cream Cheese (8 ounces, softened)
- The star of the filling, giving it a creamy texture and tangy flavor reminiscent of cheesecake.
- Powdered Sugar (1 cup)
- Sweetens the filling while maintaining a smooth consistency.
- Pure Vanilla Extract (1 teaspoon)
- A hint of vanilla enhances the flavor profile, adding warmth and depth.
- Cool Whip (8 ounces)
- Lightens the filling, giving it a fluffy, airy texture.
Topping
- Cherry Pie Filling (21 ounces)
- Provides a sweet and tangy fruit layer, creating a vibrant finish that ties the dessert together.
Step-by-Step Guide to Making Classic Cherry Delight
1. Crafting the Perfect Crust
The crust is the foundation of this dessert, and it’s essential to get it right.
- Melt the Butter: Start by placing the butter in a microwave-safe bowl and heating it for about 30 seconds or until fully melted.
- Combine Ingredients: Add the graham cracker crumbs and sugar to the melted butter. Stir until all the crumbs are evenly coated, forming a slightly sticky mixture.
- Press into Pan: Transfer the mixture into an 8×8-inch baking dish. Use the back of a spoon or the bottom of a measuring cup to firmly press the crumbs into an even layer. Set aside while you prepare the filling.
2. Creating the Creamy Filling
The filling is where the magic happens, combining tangy, sweet, and fluffy elements for a perfectly balanced layer.
- Mix the Cream Cheese: In a large mixing bowl, beat the softened cream cheese with a hand or stand mixer until smooth and free of lumps.
- Add Sweetness and Flavor: Mix in the powdered sugar and vanilla extract, ensuring everything is fully incorporated.
- Fold in the Cool Whip: Gently fold the Cool Whip into the cream cheese mixture. Avoid overmixing to maintain the light, airy texture of the filling.
3. Assembling the Layers
Now it’s time to bring everything together.
- Spread the Filling: Using a spatula, evenly spread the cream cheese mixture over the prepared crust. Take your time to create a smooth layer.
- Top with Cherry Pie Filling: Carefully spoon the cherry pie filling over the cream cheese layer. Spread it out evenly, ensuring every bite will have that delicious cherry goodness.
4. Chill to Perfection
Refrigeration is key to allowing the layers to set and meld together. Place the dessert in the refrigerator for at least 2 hours, or preferably overnight, before serving.
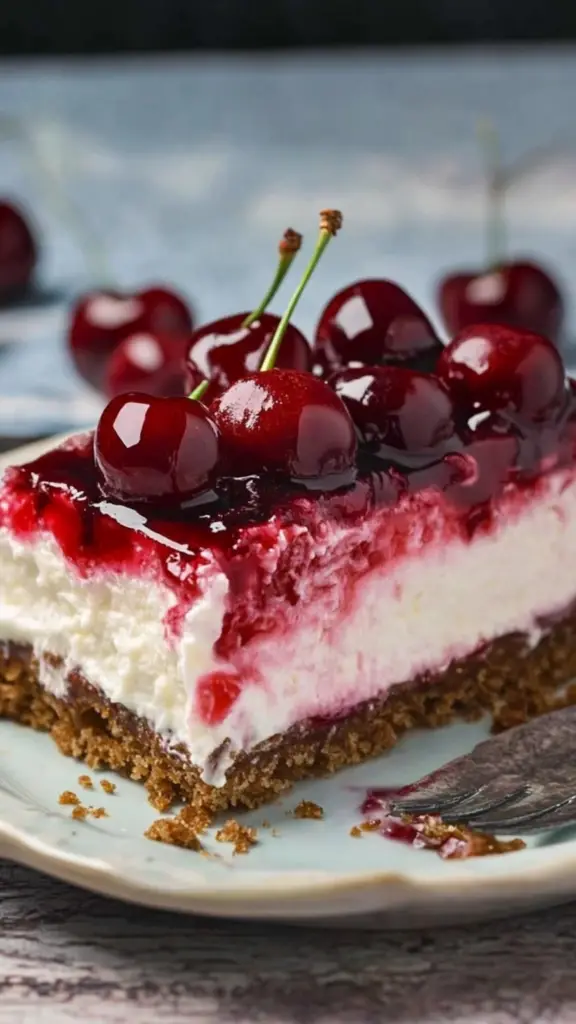
Flavors, Textures, and Aromas: A Sensory Experience
Classic Cherry Delight is more than just a dessert—it’s an experience.
- The Crust: Buttery and slightly crumbly, with just enough sweetness to complement the creamy filling.
- The Filling: Smooth and tangy with a light, fluffy texture that melts in your mouth.
- The Topping: Bursting with fruity sweetness and a hint of tartness, the cherry pie filling adds a vibrant, juicy finish.
The combination of these layers creates a dessert that is rich yet balanced, indulgent yet refreshing.
Tips for the Best Cherry Delight
- Soften the Cream Cheese: Ensure the cream cheese is at room temperature to prevent lumps in the filling.
- Pack the Crust Firmly: Use a flat utensil to press the crust firmly into the pan, preventing it from crumbling when cut.
- Allow Ample Chill Time: The longer the dessert chills, the better the flavors meld. Overnight refrigeration is ideal.
- Clean Slicing: Use a sharp knife dipped in warm water for clean, precise cuts.
Variations and Customizations
One of the best things about Classic Cherry Delight is its adaptability. Here are some ideas for making it your own:
- Swap the Topping
- Use blueberry, strawberry, or peach pie filling for a different flavor profile.
- For a tropical twist, try pineapple chunks or mango puree.
- Change the Crust
- Replace graham crackers with crushed Oreos, gingersnaps, or shortbread cookies.
- For a nutty flavor, mix finely chopped pecans or almonds into the crust.
- Make It Lighter
- Use reduced-fat cream cheese and Cool Whip for a lower-calorie version.
- Opt for a homemade whipped cream sweetened with a touch of honey or stevia.
- Add Texture
- Sprinkle chopped nuts, shredded coconut, or mini chocolate chips over the cherry topping for added crunch and flavor.
Serving Suggestions
Classic Cherry Delight is a versatile dessert that can be served in various ways:
- As Is: Simply slice and serve chilled for a no-fuss presentation.
- Garnished: Add a dollop of whipped cream, fresh cherries, or a drizzle of chocolate sauce for extra flair.
- Paired: Serve alongside coffee, tea, or a glass of dessert wine for a sophisticated touch.
Why It’s a Classic
Classic Cherry Delight has stood the test of time because it offers everything we love in a dessert—simplicity, flavor, and nostalgia. It’s the kind of recipe that gets passed down through generations, shared at potlucks, and requested at family gatherings.
Its charm lies in its balance: indulgent but not overly rich, sweet but not cloying, and impressive without being complicated. It’s a dessert that invites you to slow down, savor each bite, and create memories with loved ones.
Storage and Leftover
If you happen to have leftovers (which is rare!), here’s how to store them:
- Refrigeration: Store in an airtight container or cover the baking dish with plastic wrap. The dessert will stay fresh for 3-4 days.
- Freezing: For longer storage, you can freeze the dessert for up to 2 months. Thaw in the refrigerator overnight before serving.
Classic Cherry Delight is more than just a recipe—it’s a celebration of simple pleasures. From its ease of preparation to its undeniable deliciousness, this dessert is sure to become a cherished favorite in your home. So grab your ingredients, get creative with variations, and enjoy the sweet satisfaction of making (and eating!) this timeless treat.