Making Crusty Italian Bread at home always brings back warm memories of my nonna’s kitchen. I remember tiptoeing to peek at her magic as she gently shaped the dough with flour-dusted hands. The scent of her bread rising in the oven was enough to pull anyone in from the street. For years, I tried to replicate that crusty exterior and tender, chewy inside. After countless loaves—and a few learning curves—I’ve landed on a foolproof method that I’m thrilled to share. Whether you’re dipping it in soup, making bruschetta, or enjoying it warm with butter, this bread delivers pure joy.
In this guide, we’ll break down how to master Crusty Italian Bread, explore the secrets behind its flavor and texture, cover baking techniques, and top it off with practical tips you’ll use every time.
Let’s dive in and start baking!
The Origins and Allure of Crusty Italian Bread
A Taste of Tradition in Every Slice
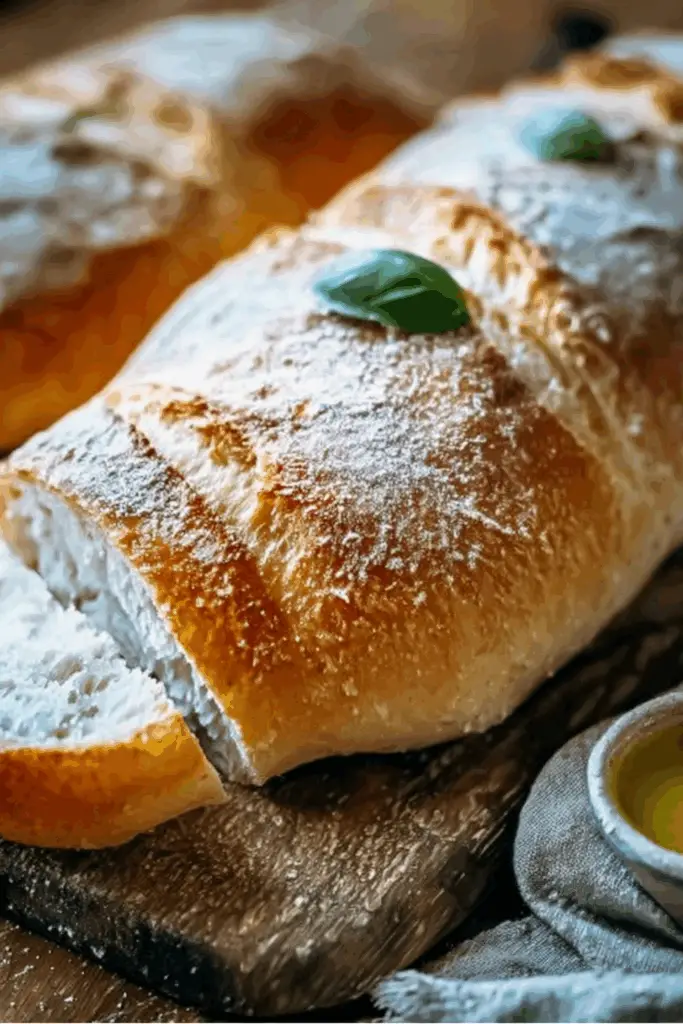
Crusty Italian Bread is more than a recipe—it’s a celebration of history. From rustic farm tables in Tuscany to Sunday dinners in Brooklyn, this loaf has connected generations. Its hallmark is the thick, golden crust that protects a pillowy, airy center. It’s a staple not just in Italy, but in homes and bakeries across the U.S., thanks to its versatility. Whether you’re pairing it with roasted garlic and parmesan carrots or a festive Christmas antipasto wreath, its structure holds up to bold flavors.
The traditional version uses just flour, water, salt, and yeast—yet its simplicity belies its depth. Fermentation, humidity, oven heat, and hydration levels all work together to build the ideal crumb. A properly fermented dough creates that beautiful structure that lets olive oil and balsamic vinegar soak in just right.
Print
Crusty Italian Bread: Bake the Ultimate Loaf at Home
This Crusty Italian Bread recipe yields a golden, crisp exterior with a soft, airy interior. Perfect for soups, sandwiches, or on its own.
- Total Time: 3 hours
- Yield: 1 loaf 1x
Ingredients
- 4 cups bread flour
- 1 1/2 teaspoons salt
- 1 packet instant yeast (2 1/4 tsp)
- 1 3/4 cups warm water (100°F)
- 1 tablespoon olive oil (optional)
Instructions
- Mix flour, salt, and yeast in a large bowl.
- Gradually stir in warm water until a shaggy dough forms.
- Let it rise covered for 2 hours at room temperature.
- Shape into a boule on a floured surface; rest 30 minutes.
- Score the top and bake in a preheated Dutch oven at 450°F for 30 minutes covered, then 10–15 minutes uncovered.
- Cool completely on a wire rack before slicing.
Notes
- Use bread flour for best gluten development.
- Don’t skip the resting period after shaping.
- For softer crust, brush with olive oil after baking.
- Prep Time: 15 minutes
- Cook Time: 45 minutes
- Category: Bread
- Method: Baking
- Cuisine: Italian
- Diet: Vegetarian
Nutrition
- Serving Size: 1 slice
- Calories: 120
- Sugar: 0g
- Sodium: 230mg
- Fat: 1g
- Saturated Fat: 0g
- Unsaturated Fat: 1g
- Trans Fat: 0g
- Carbohydrates: 24g
- Fiber: 1g
- Protein: 3g
- Cholesterol: 0mg
Why We Crave That Crackling Crust
What gives Crusty Italian Bread its signature snap? The secret is steam. When introduced at the beginning of the bake, steam keeps the outer layer soft while the inside expands. Once the moisture escapes, the crust sets into that beautifully bronzed armor. The use of a Dutch oven at home or adding a pan of water in your oven can mimic a bakery’s steam-injection ovens, and transform your loaf from bland to bakery-worthy.
You’ll find that this same crust holds up beautifully when used as a base for appetizers like the cheesy pull-apart Christmas tree bread or crispy baked eggplant dishes. It doesn’t just serve as bread—it becomes the foundation for flavor.
The Ingredients That Make the Loaf
The Power of Simplicity: Flour, Yeast, and Patience
You don’t need fancy ingredients to bake perfect Crusty Italian Bread, but the quality of what you use matters. Opt for high-protein bread flour to ensure gluten development. The yeast should be active and fresh—instant yeast is ideal for beginners, but sourdough starter adds even more depth.
Water temperature plays a big role too. Aim for around 100°F to activate yeast without killing it. Salt shouldn’t just be tossed in—it strengthens the dough and enhances flavor. When mixing, patience is your friend. Letting the dough rise slowly develops flavor and structure. A long ferment can turn a basic loaf into a showstopper, especially when paired with spreads like salted chocolate caramel pretzel bars or a honey mustard chex mix.
Enhancing Flavor Without Overcomplicating
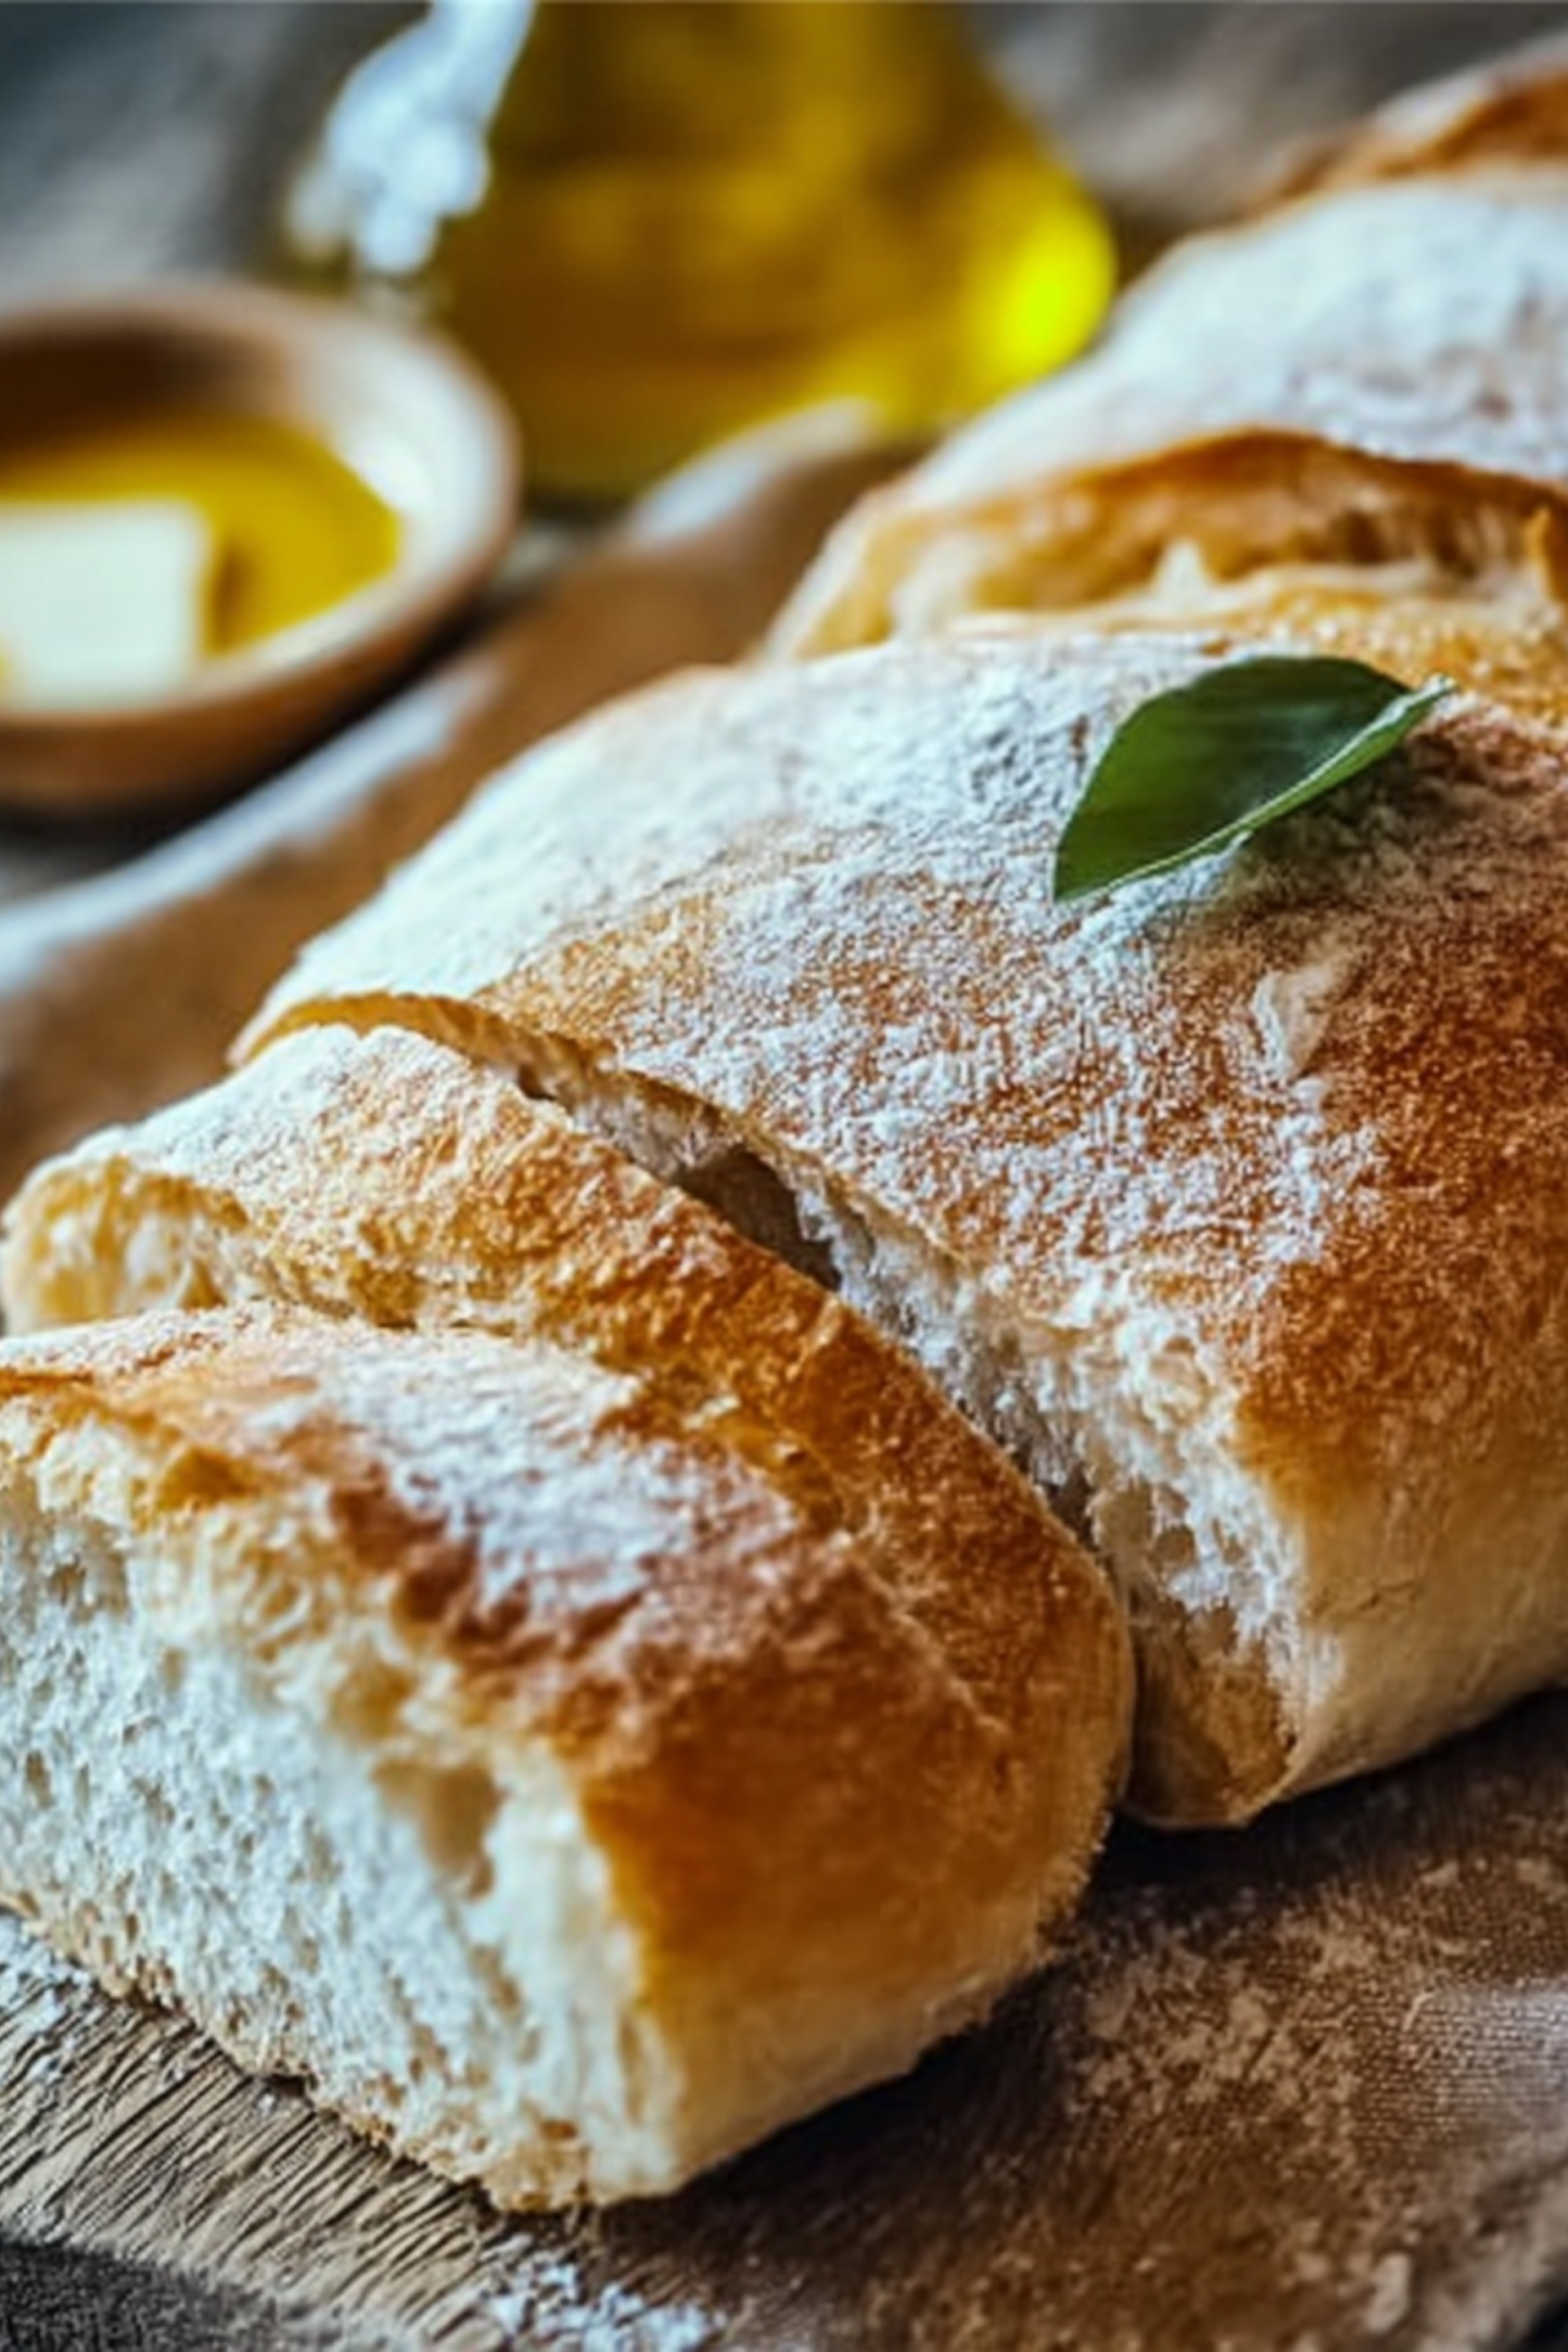
If you want to elevate your bread without overwhelming it, infuse subtle flavors. Roasted garlic, rosemary, or a drizzle of good-quality olive oil folded into the dough adds a twist without stealing the show. Even a light dusting of semolina or cornmeal on the baking sheet gives it a rustic edge and prevents sticking.
Try brushing the crust with olive oil right after baking for a soft sheen and rich aroma. This trick works great if you’re planning to serve it with a creamy dip like no-bake gingerbread cheesecake cups or a sweet twist with cinnamon sugar blondies. It becomes more than bread—it’s a conversation piece.
Baking Techniques That Make the Difference
Prepping the Dough Like a Pro
Once your dough has rested and risen, shaping is key. Be gentle but firm. Avoid overworking—this can deflate the air pockets you worked hard to build. A round boule or long batard are classic shapes for Crusty Italian Bread. After shaping, proofing the dough one last time ensures a lofty rise.
Score the top with a sharp blade just before baking. This allows steam to escape and guides expansion. If using a Dutch oven, preheat it for at least 30 minutes to simulate professional ovens. That’s what gives you a crust that sings when you tap it.
Pair your freshly baked loaf with cozy recipes like soft snickerdoodle cookies or chewy Christmas toffee for a satisfying meal. It’s also a welcome addition to any appetizer spread, particularly next to a cranberry apple quinoa salad.
The Science of the Oven
The ideal baking temp is 450°F, but each oven is different. Use an oven thermometer to make sure your environment is just right. Place a pan of hot water on the bottom rack or spritz the oven walls with water to build that essential steam in the first 10 minutes.
Baking time usually ranges from 25–35 minutes. You’ll know it’s done when the crust is deep golden and it sounds hollow when tapped. Let it cool completely on a wire rack. This helps set the crumb and keeps the crust crispy. Skipping this step can turn your masterpiece into a soggy mess.
Try serving slices with sugar cookie cheesecake or frosted Christmas brownies to create a holiday board that balances sweet and savory perfectly.
Storing, Serving, and Reusing Your Bread
How to Keep Crusty Italian Bread Fresh
The beauty of Crusty Italian Bread is in its crust—but that crust can get tough if not stored properly. Let your bread cool, then store it in a paper bag or wrapped in a tea towel. Avoid plastic, which traps moisture and ruins the texture. If you won’t eat it within two days, slice and freeze it. A quick toast or oven reheat brings it back to life.
Want to repurpose it? Stale slices make excellent croutons or bread pudding. Use it in savory recipes like French toast with brie or as a base for a hearty tomato soup. Paired with peppermint brownie cookies or white chocolate peppermint treats, your dinner transforms into a feast.
Delicious Ways to Serve and Share
Whether you’re breaking it at a family dinner or making appetizers for a holiday party, Crusty Italian Bread rises to any occasion. Slice it thick for sandwiches, toast it for bruschetta, or cube it for dipping into cheesy spinach dip.
A favorite in our home is serving it warm with reindeer cupcakes as a fun dessert option, or with a bright Christmas antipasto wreath as a festive starter. However you serve it, expect it to disappear fast—especially when your guests taste the crisp crust and tender middle.
For even more ideas, take a peek at recipes like the pioneer woman Texas trash or saltine candy Christmas crack—they pair beautifully with a homemade loaf of crusty bread.
Serving Up the Final Words
Crusty Italian Bread isn’t just something you bake—it’s something you experience. From the moment you mix the dough to the first crackle of slicing into the loaf, every step builds anticipation. It’s about patience, tradition, and just a little kitchen magic. When made right, it outshines anything from a store. Once you master it, you’ll never go back.
FAQ
How do I get that perfect crunchy crust on Italian bread?
Bake with steam. Use a Dutch oven or place a tray of water in your oven during the first 10 minutes of baking to achieve a thick, crispy crust.
Can I make Crusty Italian Bread without a Dutch oven?
Yes, just use a baking stone or sheet and create steam with a hot water tray or misting the oven walls. It won’t be exactly the same, but it’s still delicious.
How long does homemade Crusty Italian Bread stay fresh?
At room temperature, it stays fresh up to two days in a paper bag or wrapped in a towel. For longer storage, freeze it sliced.
Is it possible to make this bread gluten-free?
Yes, but it requires special gluten-free flours and binders like psyllium husk. The result won’t be quite as crusty, but still tasty.