There’s something undeniably enchanting about a slice of Southern Red Velvet Cake. The rich, velvety crumb combined with the tangy, smooth cream cheese frosting is a combination that’s loved by many. I remember the first time I tasted a homemade Red Velvet Cake. It was during a family gathering, and my aunt, who was known for her amazing baking skills, had made it. The cake was moist, flavorful, and the perfect balance of sweet and tangy. I was instantly hooked and knew that I had to learn how to make it myself. Southern Red Velvet Cake has become a go-to for many celebrations, whether it’s birthdays, holidays, or simply a special treat. What makes this cake stand out is not only its delicious flavor but also the beautiful, deep red color that makes it as visually appealing as it is tasty. While Red Velvet Cake may seem like a fancy dessert, it’s actually quite approachable, especially for beginners. The ingredients are simple and straightforward, and once you break the recipe down step by step, you’ll see that making this iconic cake is a piece of cake. (Pun intended!) Whether you’re a seasoned baker or just starting, this recipe will guide you through each step, offering tips along the way to ensure your cake turns out perfectly every time. Let’s dive into the recipe!


Southern Style Red Velvet Cake with Cream Cheese Frosting: A Classic Southern Dessert for Beginners
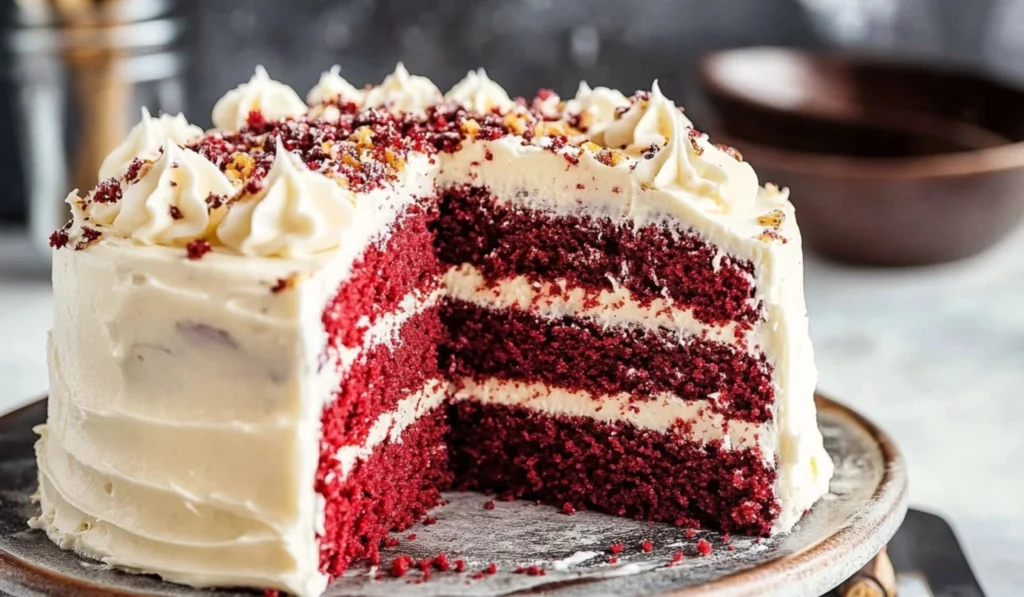
Red Velvet Cake is a showstopper dessert, with its vibrant color and rich, creamy frosting. I was amazed by how easy it was to make this Southern classic at home, even as a beginner baker. Whether for a special occasion or just because, this Southern-style Red Velvet Cake with cream cheese frosting is the perfect treat. Let’s dive into how you can create this delicious cake with ease!
- Total Time: 50 minutes
- Yield: 1 cake (serves 8-10)
Ingredients
For the Cake:
- 2 ½ cups (310g) all-purpose flour, sifted
- 2 tablespoons (15g) natural unsweetened cocoa powder
- 1 teaspoon baking soda
- ½ teaspoon salt
- ½ cup (120ml) unsalted butter, softened
- ½ cup (120ml) vegetable oil
- 2 cups (400g) granulated sugar
- 2 large eggs, room temperature
- 1 cup (240ml) buttermilk, room temperature
- 2 teaspoons pure vanilla extract
- 1 teaspoon white vinegar
- 1–2 tablespoons red gel food coloring (adjust for desired intensity)
For the Cream Cheese Frosting:
- 8 oz (225g) cream cheese, softened
- ½ cup (120g) unsalted butter, softened
- 4 cups (480g) powdered sugar, sifted
- 2 teaspoons pure vanilla extract
- Pinch of salt
Instructions
1. Prepare the Dry Ingredients: Start by sifting the flour, cocoa powder, baking soda, and salt into a medium-sized bowl. Sifting the dry ingredients ensures that they’re evenly mixed and helps prevent clumping. Set this bowl aside for now as you prepare the wet ingredients.
2. Cream the Butter, Oil, and Sugar: In a large mixing bowl, beat the softened butter, vegetable oil, and granulated sugar together. You can use a hand mixer or a stand mixer for this step. Beat the mixture on medium speed for about 2-3 minutes until it becomes light and fluffy. This process helps to incorporate air into the batter, which results in a light and tender cake.
3. Add the Eggs: Add the eggs to the butter mixture one at a time, ensuring each egg is fully incorporated before adding the next one. It’s important to add the eggs slowly so they blend smoothly into the batter. After adding the eggs, mix in the vanilla extract for flavor.
4. Combine the Wet Ingredients: In a small bowl, combine the buttermilk, vinegar, and red gel food coloring. Mix them together until the food coloring is evenly distributed in the liquid. The vinegar helps to activate the baking soda, contributing to the cake’s light and fluffy texture. The red food coloring is what gives this cake its signature color, so feel free to add more if you want a deeper red.
5. Alternate Adding the Dry and Wet Ingredients: Now, it’s time to combine the wet and dry ingredients. Gradually add the sifted dry ingredients to the butter mixture, alternating with the buttermilk mixture. Start by adding a third of the dry ingredients, followed by half of the buttermilk mixture. Continue alternating until everything is well combined, finishing with the dry ingredients. Mixing in parts helps to prevent overmixing the batter, which can lead to a dense cake.
6. Bake the Cake: Divide the batter evenly between your prepared cake pans. You can use two or three 9-inch round cake pans depending on how tall you want the layers to be. Bake the cakes in the preheated oven for 25-30 minutes, or until a toothpick inserted into the center of the cakes comes out clean. If you’re baking in three pans, check them at the 25-minute mark. Allow the cakes to cool in the pans for about 10 minutes before transferring them to a wire rack to cool completely.
7. Make the Cream Cheese Frosting: While your cakes are cooling, you can prepare the frosting. In a large bowl, beat the softened cream cheese and butter together until smooth and creamy. Then, gradually add the sifted powdered sugar. Start mixing on low speed to prevent a sugar shower, then increase to medium speed until the frosting is smooth and fluffy. Add the vanilla extract and a pinch of salt to balance the sweetness of the frosting. If your frosting feels too thick, you can add a tablespoon of milk to loosen it up.
8. Assemble the Cake: Once the cakes are completely cool, level the tops of the cakes using a serrated knife if needed. This will help ensure that the layers stack evenly. Place one layer of cake on a serving platter and spread a generous layer of cream cheese frosting on top. Add the second layer and repeat the process. Finish by frosting the top and sides of the cake, smoothing it out with an offset spatula or creating decorative swirls for a professional touch.
Notes
- Room Temperature Ingredients: It’s important that your eggs, butter, and buttermilk are at room temperature before you begin. Room temperature ingredients mix together more easily, resulting in a smoother batter.
- Don’t Overmix the Batter: When you’re mixing the dry ingredients with the wet ingredients, be careful not to overmix the batter. Overmixing can cause the cake to become dense and heavy.
- Check for Doneness: To check if the cake is done, insert a toothpick into the center of the cake. If it comes out clean or with just a few crumbs, it’s done. If the toothpick comes out wet, bake for an additional 5 minutes and test again.
- Frosting Tip: If your frosting is too soft, you can refrigerate it for 15-20 minutes to firm it up. If it’s too thick, add a teaspoon of milk to loosen it up.
- Prep Time: 20 minutes
- Cook Time: 30 minutes
- Category: Dessert
- Method: Baking
- Cuisine: Southern
- Diet: Vegetarian
Ingredients and Preparation
Before you begin, let’s go over the ingredients. A Southern Red Velvet Cake requires a few basic ingredients, many of which are pantry staples. But don’t let the simplicity fool you—these ingredients combine to create a flavor that’s truly unforgettable. Here’s what you’ll need for both the cake and the cream cheese frosting:
For the Cake:
- 2 ½ cups (310g) all-purpose flour, sifted
- 2 tablespoons (15g) natural unsweetened cocoa powder
- 1 teaspoon baking soda
- ½ teaspoon salt
- ½ cup (120ml) unsalted butter, softened
- ½ cup (120ml) vegetable oil
- 2 cups (400g) granulated sugar
- 2 large eggs, room temperature
- 1 cup (240ml) buttermilk, room temperature
- 2 teaspoons pure vanilla extract
- 1 teaspoon white vinegar
- 1–2 tablespoons red gel food coloring (adjust for desired intensity)
For the Cream Cheese Frosting:
- 8 oz (225g) cream cheese, softened
- ½ cup (120g) unsalted butter, softened
- 4 cups (480g) powdered sugar, sifted
- 2 teaspoons pure vanilla extract
- Pinch of salt
Alternative Ingredient Suggestions:
- Buttermilk Substitute: If you don’t have buttermilk, don’t worry! Simply add 1 tablespoon of lemon juice or white vinegar to 1 cup of regular milk. Let it sit for about 5 minutes to mimic the tanginess and acidity of buttermilk.
- Vegetable Oil Substitution: You can also use canola oil, sunflower oil, or even melted coconut oil in place of vegetable oil, depending on what you have in your kitchen.
- Red Food Coloring: If you’d prefer to avoid food coloring, there are alternatives. You can use natural beetroot juice or powder to give the cake a red hue, but keep in mind that the color may not be as vibrant as the traditional gel food coloring. Alternatively, leave it out for a more subtle red appearance.
Once you have your ingredients ready, preheat your oven to 350°F (175°C). You’ll also want to grease and line two or three 9-inch round cake pans with parchment paper to ensure the cakes come out easily once baked.
Step-by-Step Instructions
Making Red Velvet Cake is easier than you might think! Here’s a detailed guide on how to prepare this beautiful cake:
1. Prepare the Dry Ingredients: Start by sifting the flour, cocoa powder, baking soda, and salt into a medium-sized bowl. Sifting the dry ingredients ensures that they’re evenly mixed and helps prevent clumping. Set this bowl aside for now as you prepare the wet ingredients.
2. Cream the Butter, Oil, and Sugar: In a large mixing bowl, beat the softened butter, vegetable oil, and granulated sugar together. You can use a hand mixer or a stand mixer for this step. Beat the mixture on medium speed for about 2-3 minutes until it becomes light and fluffy. This process helps to incorporate air into the batter, which results in a light and tender cake.
3. Add the Eggs: Add the eggs to the butter mixture one at a time, ensuring each egg is fully incorporated before adding the next one. It’s important to add the eggs slowly so they blend smoothly into the batter. After adding the eggs, mix in the vanilla extract for flavor.
4. Combine the Wet Ingredients: In a small bowl, combine the buttermilk, vinegar, and red gel food coloring. Mix them together until the food coloring is evenly distributed in the liquid. The vinegar helps to activate the baking soda, contributing to the cake’s light and fluffy texture. The red food coloring is what gives this cake its signature color, so feel free to add more if you want a deeper red.
5. Alternate Adding the Dry and Wet Ingredients: Now, it’s time to combine the wet and dry ingredients. Gradually add the sifted dry ingredients to the butter mixture, alternating with the buttermilk mixture. Start by adding a third of the dry ingredients, followed by half of the buttermilk mixture. Continue alternating until everything is well combined, finishing with the dry ingredients. Mixing in parts helps to prevent overmixing the batter, which can lead to a dense cake.
6. Bake the Cake: Divide the batter evenly between your prepared cake pans. You can use two or three 9-inch round cake pans depending on how tall you want the layers to be. Bake the cakes in the preheated oven for 25-30 minutes, or until a toothpick inserted into the center of the cakes comes out clean. If you’re baking in three pans, check them at the 25-minute mark. Allow the cakes to cool in the pans for about 10 minutes before transferring them to a wire rack to cool completely.
7. Make the Cream Cheese Frosting: While your cakes are cooling, you can prepare the frosting. In a large bowl, beat the softened cream cheese and butter together until smooth and creamy. Then, gradually add the sifted powdered sugar. Start mixing on low speed to prevent a sugar shower, then increase to medium speed until the frosting is smooth and fluffy. Add the vanilla extract and a pinch of salt to balance the sweetness of the frosting. If your frosting feels too thick, you can add a tablespoon of milk to loosen it up.
8. Assemble the Cake: Once the cakes are completely cool, level the tops of the cakes using a serrated knife if needed. This will help ensure that the layers stack evenly. Place one layer of cake on a serving platter and spread a generous layer of cream cheese frosting on top. Add the second layer and repeat the process. Finish by frosting the top and sides of the cake, smoothing it out with an offset spatula or creating decorative swirls for a professional touch.
Beginner Tips and Notes
If you’re new to baking, here are a few tips to help you along the way:
- Room Temperature Ingredients: It’s important that your eggs, butter, and buttermilk are at room temperature before you begin. Room temperature ingredients mix together more easily, resulting in a smoother batter.
- Don’t Overmix the Batter: When you’re mixing the dry ingredients with the wet ingredients, be careful not to overmix the batter. Overmixing can cause the cake to become dense and heavy.
- Check for Doneness: To check if the cake is done, insert a toothpick into the center of the cake. If it comes out clean or with just a few crumbs, it’s done. If the toothpick comes out wet, bake for an additional 5 minutes and test again.
- Frosting Tip: If your frosting is too soft, you can refrigerate it for 15-20 minutes to firm it up. If it’s too thick, add a teaspoon of milk to loosen it up.
Serving Suggestions
This Southern Red Velvet Cake is a dessert in itself, but here are a few ideas to make it even more special:
- Fresh Fruit: Fresh berries such as strawberries, raspberries, or blackberries pair wonderfully with the richness of the cake. You can place them on top of the cake for a burst of color and freshness.
- Pair with Sweet Wine: A glass of Moscato or dessert wine complements the rich flavor of the Red Velvet Cake perfectly. The sweetness of the wine enhances the tanginess of the cream cheese frosting.
- Chocolate Sauce: For an indulgent twist, drizzle some warm chocolate sauce over a slice of cake before serving.
Storing Leftovers
If you have any leftovers (though that’s unlikely!), store the cake in an airtight container in the refrigerator for up to 4-5 days. You can also freeze the cake if you’d like to keep it for longer. Wrap slices of cake tightly in plastic wrap and store in a freezer-safe container for up to 3 months. When you’re ready to eat, let it thaw in the refrigerator overnight.
Conclusion
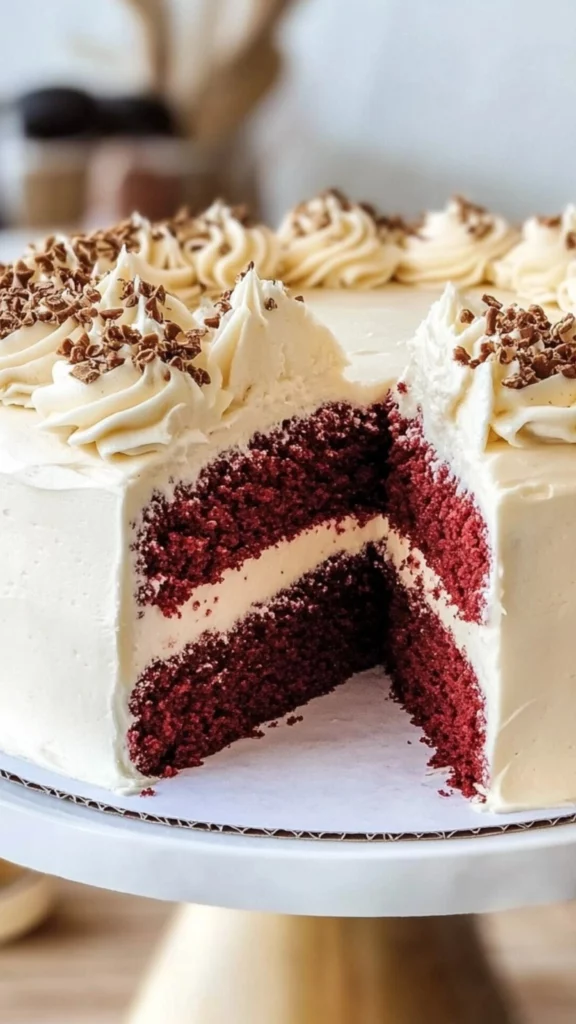
Southern Red Velvet Cake is a true showstopper. With its vibrant color, tender texture, and creamy frosting, it’s the perfect dessert to impress your family and friends. Whether you’re making it for a birthday, holiday, or just because, this cake is sure to delight. Best of all, it’s beginner-friendly and comes together easily with a few simple steps. So go ahead, roll up your sleeves, and give this recipe a try. Your family will love you for it! Don’t forget to leave a comment and let me know how your Red Velvet Cake turned out. Happy baking!