There’s something undeniably magical about a wedding cake. Its delicate layers, its rich flavor, and the way it brings people together in celebration. But what if we told you that this cake doesn’t have to be a complicated, stress-inducing task, especially for beginners? Enter the White Almond Wedding Cake. This cake is a crowd-pleaser for any special occasion, whether it’s a wedding, birthday, or anniversary. Imagine sinking your fork into a slice of moist, fluffy white cake with just the right hint of almond flavor, all topped off with silky almond buttercream frosting. It’s a showstopper, yet surprisingly easy to master, and we’re here to guide you through every step. This White Almond Wedding Cake is as perfect for beginners as it is for seasoned bakers. With a simple method and ingredients that are easy to find, you can make this cake with confidence. Not only will you learn how to create a stunning dessert, but you’ll also impress your friends and family. Whether you’re striving for perfection or just starting to find your baking rhythm, this cake will become your new go-to for elegant, homemade desserts.


The Ultimate Guide to Baking a White Almond Wedding Cake: A Beginner’s Dream
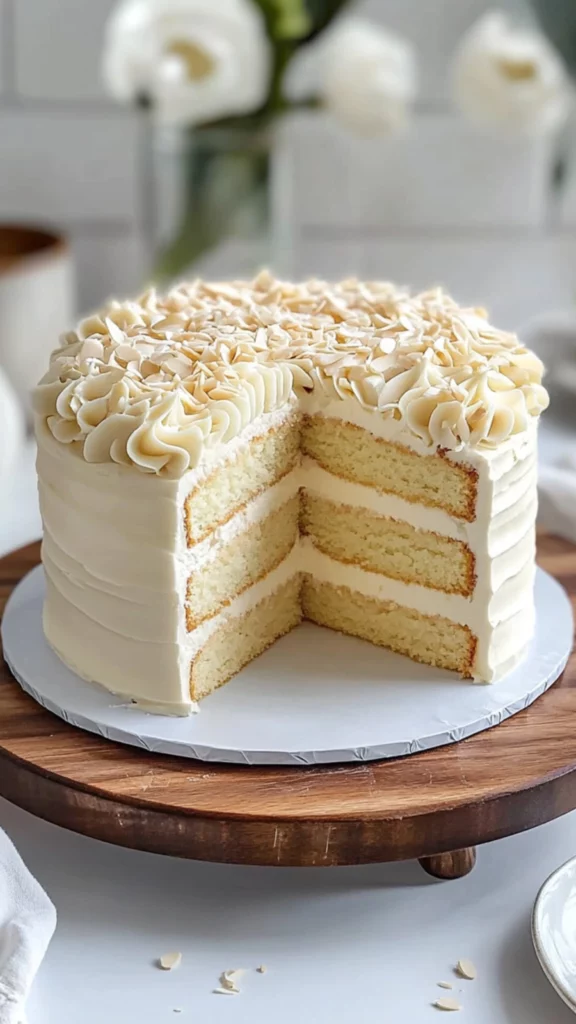
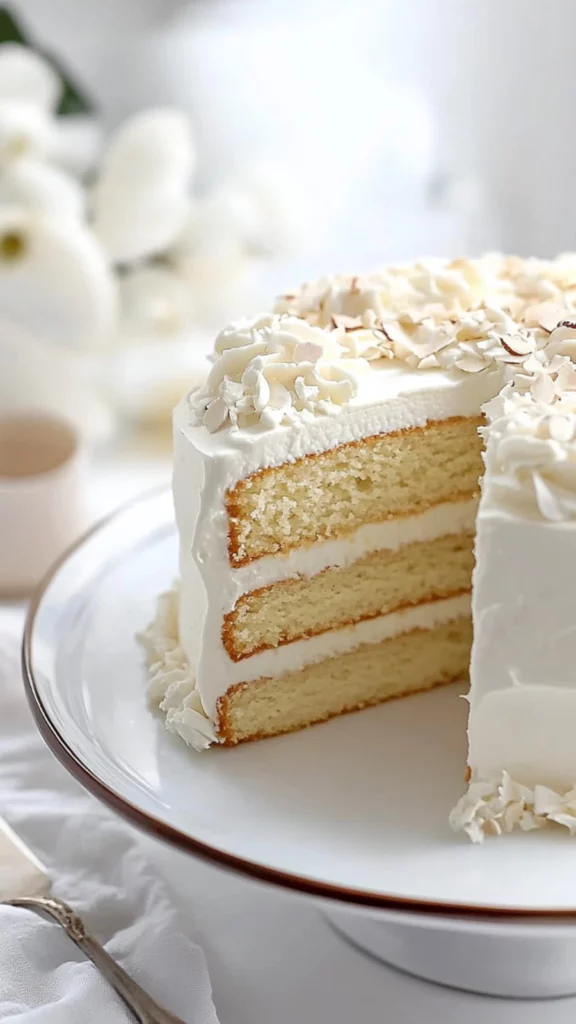
Light, fluffy, and bursting with almond flavor, this White Almond Wedding Cake is pure elegance in every bite. Moist layers and rich almond buttercream make it a showstopper—perfect for any celebration!
- Total Time: 50 minutes
- Yield: 12 servings 1x
Ingredients
For the Cake:
3 cups all-purpose flour
1 tablespoon baking powder
½ teaspoon salt
1 cup unsalted butter (softened)
2 cups granulated sugar
5 large egg whites (room temperature)
1 ½ teaspoons almond extract
1 teaspoon vanilla extract
1 ¼ cups whole milk (room temperature)
For the Almond Buttercream Frosting:
1 cup unsalted butter (softened)
4 cups powdered sugar (sifted)
2–3 tablespoons heavy cream or milk
1 teaspoon almond extract
1 teaspoon vanilla extract
A pinch of salt
Instructions
Step 1: Preheat the Oven and Prepare the Pans
Preheat your oven to 350°F (175°C). While the oven is warming up, grease and flour two 9-inch round cake pans. Alternatively, you can line them with parchment paper for easy cake removal. Preparing your pans properly is key to ensuring the cake doesn’t stick. This extra step might seem small, but it’s essential for a smooth cake removal process and helps ensure your cake layers stay intact.
Step 2: Mix the Dry Ingredients
In a medium-sized bowl, whisk together the all-purpose flour, baking powder, and salt. Make sure to mix these dry ingredients well to evenly distribute the baking powder and salt throughout the flour. Once done, set the mixture aside for later. A tip here is to sift the dry ingredients to ensure there are no lumps and that everything is evenly distributed. This will make it easier to mix into the wet ingredients later, giving you a smoother batter.
Step 3: Cream the Butter and Sugar
In a large mixing bowl, use an electric mixer to cream together the softened butter and granulated sugar. Beat for about 3-4 minutes until the mixture becomes light and fluffy. This step is crucial because it incorporates air into the batter, giving your cake that light, airy texture. Don’t rush this step—proper creaming will make all the difference! The sugar granules create small pockets of air in the butter, which helps to create a fluffy, soft cake. If you’re using a hand mixer, make sure to scrape down the sides of the bowl occasionally to ensure an even mixture.
Step 4: Add Egg Whites and Extracts
Add the egg whites to the butter-sugar mixture one at a time, beating well after each addition. After all the egg whites are incorporated, add the almond extract and vanilla extract. These extracts will bring a lovely depth of flavor to the cake. Mix until everything is fully combined. If you don’t have a stand mixer, you can also use a hand mixer, but just be careful not to overbeat the mixture at this stage. Overbeating can cause the eggs to break down too much, which could affect the texture of the cake.
Step 5: Combine Wet and Dry Ingredients
Now, it’s time to combine the dry and wet ingredients. Gradually add the dry flour mixture to the wet ingredients, alternating with the milk. Start by adding about a third of the flour mixture, then add about half of the milk. Repeat until all ingredients are incorporated, ending with the flour mixture. Be sure not to overmix at this stage—overmixing can result in a dense cake. Mix until just combined for the best texture. This alternating method helps ensure the batter stays smooth and prevents the flour from clumping. Remember, a little bit of flour remaining isn’t a problem; just mix until there are no large streaks of dry ingredients left.
Step 6: Bake the Cake Layers
Divide the batter evenly between the two prepared cake pans, smoothing the tops with a spatula. Place the pans in the preheated oven and bake for 25-30 minutes. To check if the cakes are done, insert a toothpick into the center of the cake. If it comes out clean, the cakes are ready. If there’s wet batter on the toothpick, the cake needs a little more time in the oven. While baking, you may notice the cake rising slightly and turning a light golden brown around the edges—this is a good sign that everything is progressing smoothly!
Step 7: Cool the Cake Layers
Once the cakes are done, remove them from the oven and allow them to cool in the pans for 10 minutes. Afterward, turn the cakes out onto a wire rack to cool completely. Cooling the cakes before frosting is important to ensure the frosting doesn’t melt into the cake. If you’re short on time, you can speed up the cooling process by placing the cake layers in the refrigerator for about 20-30 minutes.
Step 8: Prepare the Almond Buttercream Frosting
While the cakes are cooling, it’s time to prepare the frosting. In a large bowl, beat the softened butter until it’s creamy, about 2 minutes. Gradually add the sifted powdered sugar, one cup at a time, beating well after each addition. Once all the powdered sugar is incorporated, add the heavy cream (or milk), almond extract, vanilla extract, and a pinch of salt. Beat on high for 3-4 minutes until the frosting is light, fluffy, and smooth. If the frosting is too thick, add more cream; if it’s too thin, add more powdered sugar. A pro tip: If your frosting is looking too soft, try refrigerating it for 10-15 minutes to help firm it up before spreading.
Step 9: Assemble the Cake
Place one of the cake layers on a serving platter or cake stand. Spread a generous amount of almond buttercream frosting on top. Place the second layer of cake on top and frost the top and sides of the cake with the remaining frosting. Use an offset spatula to smooth the frosting for a polished, professional look. If you want to add some flair, you can create a textured look by swirling the frosting with the spatula or using a piping bag with your favorite tip.
Step 10: Decorate and Serve
For the final touch, decorate the cake with sliced almonds, fresh flowers, or edible pearls for an elegant look. Once decorated, slice and serve. Enjoy your homemade White Almond Wedding Cake! The cake’s delicate almond flavor, combined with the creamy, smooth frosting, makes every bite a treat. Don’t forget to take a few pictures before it’s all gone—this cake is Instagram-worthy!
Notes
- Room temperature ingredients: Make sure your butter, egg whites, and milk are all at room temperature before you start. This will help them blend more easily and ensure your cake turns out light and fluffy.
- Don’t overmix: When adding the dry ingredients, mix only until they are just incorporated. Overmixing can result in a dense texture.
- How to tell if the cake is done: Insert a toothpick into the center of the cake. If it comes out clean or with a few moist crumbs, the cake is done. If there’s wet batter on the toothpick, the cake needs a little more time in the oven.
- Frosting tips: If your frosting seems too soft, chill it in the fridge for 10-15 minutes to help it set. If it’s too stiff, add a little more milk until you reach your desired consistency.
- Preventing cake from sticking: Greasing and flouring the cake pans is essential for preventing the cakes from sticking. You can also use parchment paper for extra insurance, especially if you’re concerned about the cake sticking to the pan.
- Prep Time: 20 minutes
- Cook Time: 30 minutes
- Category: Dessert
- Method: Baking
- Cuisine: American
- Diet: Vegetarian
Ingredients and Preparation
Before we dive into the step-by-step instructions, let’s take a moment to go over the ingredients needed for this beautiful cake. This recipe uses common ingredients that you likely already have in your kitchen, making it perfect for beginners. Here’s a quick rundown of what you’ll need:
For the Cake:
- 3 cups all-purpose flour
- 1 tablespoon baking powder
- ½ teaspoon salt
- 1 cup unsalted butter (softened)
- 2 cups granulated sugar
- 5 large egg whites (room temperature)
- 1 ½ teaspoons almond extract
- 1 teaspoon vanilla extract
- 1 ¼ cups whole milk (room temperature)
For the Almond Buttercream Frosting:
- 1 cup unsalted butter (softened)
- 4 cups powdered sugar (sifted)
- 2-3 tablespoons heavy cream or milk
- 1 teaspoon almond extract
- 1 teaspoon vanilla extract
- A pinch of salt
This simple ingredient list delivers a cake that is moist, fluffy, and flavorful. The combination of almond and vanilla extracts gives the cake a rich, aromatic flavor without being overwhelming. The buttercream frosting is the perfect complement—rich and smooth with a slight almond undertone. If you’re looking to mix things up, consider these ingredient alternatives: You can substitute whole milk with almond milk or even coconut milk if you prefer a dairy-free version. If you’re not a fan of almond extract, hazelnut extract or vanilla bean paste can provide a unique twist to the flavor. You can use margarine instead of butter for the cake and frosting, though it might slightly affect the texture and flavor.
Step-by-Step Instructions
Now that we have everything ready, let’s dive into the baking process! This cake may seem like a big project, but trust us—it’s very manageable, and the results are well worth it. Let’s break down the process step-by-step, keeping things simple and clear for beginners.
Step 1: Preheat the Oven and Prepare the Pans
Preheat your oven to 350°F (175°C). While the oven is warming up, grease and flour two 9-inch round cake pans. Alternatively, you can line them with parchment paper for easy cake removal. Preparing your pans properly is key to ensuring the cake doesn’t stick. This extra step might seem small, but it’s essential for a smooth cake removal process and helps ensure your cake layers stay intact.
Step 2: Mix the Dry Ingredients
In a medium-sized bowl, whisk together the all-purpose flour, baking powder, and salt. Make sure to mix these dry ingredients well to evenly distribute the baking powder and salt throughout the flour. Once done, set the mixture aside for later. A tip here is to sift the dry ingredients to ensure there are no lumps and that everything is evenly distributed. This will make it easier to mix into the wet ingredients later, giving you a smoother batter.
Step 3: Cream the Butter and Sugar
In a large mixing bowl, use an electric mixer to cream together the softened butter and granulated sugar. Beat for about 3-4 minutes until the mixture becomes light and fluffy. This step is crucial because it incorporates air into the batter, giving your cake that light, airy texture. Don’t rush this step—proper creaming will make all the difference! The sugar granules create small pockets of air in the butter, which helps to create a fluffy, soft cake. If you’re using a hand mixer, make sure to scrape down the sides of the bowl occasionally to ensure an even mixture.
Step 4: Add Egg Whites and Extracts
Add the egg whites to the butter-sugar mixture one at a time, beating well after each addition. After all the egg whites are incorporated, add the almond extract and vanilla extract. These extracts will bring a lovely depth of flavor to the cake. Mix until everything is fully combined. If you don’t have a stand mixer, you can also use a hand mixer, but just be careful not to overbeat the mixture at this stage. Overbeating can cause the eggs to break down too much, which could affect the texture of the cake.
Step 5: Combine Wet and Dry Ingredients
Now, it’s time to combine the dry and wet ingredients. Gradually add the dry flour mixture to the wet ingredients, alternating with the milk. Start by adding about a third of the flour mixture, then add about half of the milk. Repeat until all ingredients are incorporated, ending with the flour mixture. Be sure not to overmix at this stage—overmixing can result in a dense cake. Mix until just combined for the best texture. This alternating method helps ensure the batter stays smooth and prevents the flour from clumping. Remember, a little bit of flour remaining isn’t a problem; just mix until there are no large streaks of dry ingredients left.
Step 6: Bake the Cake Layers
Divide the batter evenly between the two prepared cake pans, smoothing the tops with a spatula. Place the pans in the preheated oven and bake for 25-30 minutes. To check if the cakes are done, insert a toothpick into the center of the cake. If it comes out clean, the cakes are ready. If there’s wet batter on the toothpick, the cake needs a little more time in the oven. While baking, you may notice the cake rising slightly and turning a light golden brown around the edges—this is a good sign that everything is progressing smoothly!
Step 7: Cool the Cake Layers
Once the cakes are done, remove them from the oven and allow them to cool in the pans for 10 minutes. Afterward, turn the cakes out onto a wire rack to cool completely. Cooling the cakes before frosting is important to ensure the frosting doesn’t melt into the cake. If you’re short on time, you can speed up the cooling process by placing the cake layers in the refrigerator for about 20-30 minutes.
Step 8: Prepare the Almond Buttercream Frosting
While the cakes are cooling, it’s time to prepare the frosting. In a large bowl, beat the softened butter until it’s creamy, about 2 minutes. Gradually add the sifted powdered sugar, one cup at a time, beating well after each addition. Once all the powdered sugar is incorporated, add the heavy cream (or milk), almond extract, vanilla extract, and a pinch of salt. Beat on high for 3-4 minutes until the frosting is light, fluffy, and smooth. If the frosting is too thick, add more cream; if it’s too thin, add more powdered sugar. A pro tip: If your frosting is looking too soft, try refrigerating it for 10-15 minutes to help firm it up before spreading.
Step 9: Assemble the Cake
Place one of the cake layers on a serving platter or cake stand. Spread a generous amount of almond buttercream frosting on top. Place the second layer of cake on top and frost the top and sides of the cake with the remaining frosting. Use an offset spatula to smooth the frosting for a polished, professional look. If you want to add some flair, you can create a textured look by swirling the frosting with the spatula or using a piping bag with your favorite tip.
Step 10: Decorate and Serve
For the final touch, decorate the cake with sliced almonds, fresh flowers, or edible pearls for an elegant look. Once decorated, slice and serve. Enjoy your homemade White Almond Wedding Cake! The cake’s delicate almond flavor, combined with the creamy, smooth frosting, makes every bite a treat. Don’t forget to take a few pictures before it’s all gone—this cake is Instagram-worthy!
Beginner Tips and Notes
Baking can sometimes feel intimidating, especially if you’re new to it, but here are a few helpful tips to make your cake-making experience a breeze:
- Room temperature ingredients: Make sure your butter, egg whites, and milk are all at room temperature before you start. This will help them blend more easily and ensure your cake turns out light and fluffy.
- Don’t overmix: When adding the dry ingredients, mix only until they are just incorporated. Overmixing can result in a dense texture.
- How to tell if the cake is done: Insert a toothpick into the center of the cake. If it comes out clean or with a few moist crumbs, the cake is done. If there’s wet batter on the toothpick, the cake needs a little more time in the oven.
- Frosting tips: If your frosting seems too soft, chill it in the fridge for 10-15 minutes to help it set. If it’s too stiff, add a little more milk until you reach your desired consistency.
- Preventing cake from sticking: Greasing and flouring the cake pans is essential for preventing the cakes from sticking. You can also use parchment paper for extra insurance, especially if you’re concerned about the cake sticking to the pan.
Serving Suggestions
- Fresh Fruits: Garnish with fresh berries like strawberries or raspberries for a pop of color and sweetness.
- Elegant Pairings: Serve with a glass of champagne or a warm cup of coffee to complement the almond flavor.
- Special Occasion Touches: Add a drizzle of white chocolate ganache or a dusting of powdered sugar for a festive touch.
Conclusion
Baking the White Almond Wedding Cake may seem like an intimidating project at first, but with the clear steps provided and a little patience, you’ll be able to create a show-stopping dessert that’s as delicious as it is beautiful. Whether you’re a beginner or an experienced baker, this cake is the perfect way to impress your guests and celebrate special occasions. So grab your apron, gather your ingredients, and let’s bake something truly special! We’d love to hear how it turns out—share your pictures and experiences in the comments below, and don’t forget to share the recipe with your friends and family. Happy baking!