
Caramel Apple Dessert Cups are a treat that merges the rich flavors of fall with a convenience that’s perfect for modern kitchens. These no-bake cups showcase layers of buttery vanilla wafer crust, fluffy salted caramel mousse, and warm, spiced cinnamon apples, all topped with a drizzle of luscious caramel sauce. Whether you’re hosting a cozy dinner with family, prepping desserts for a party, or simply indulging in a quiet moment, these cups deliver decadence in every bite. Their portable size and stunning layered presentation make them not only delicious but also a visual delight, perfect for any occasion.
Print
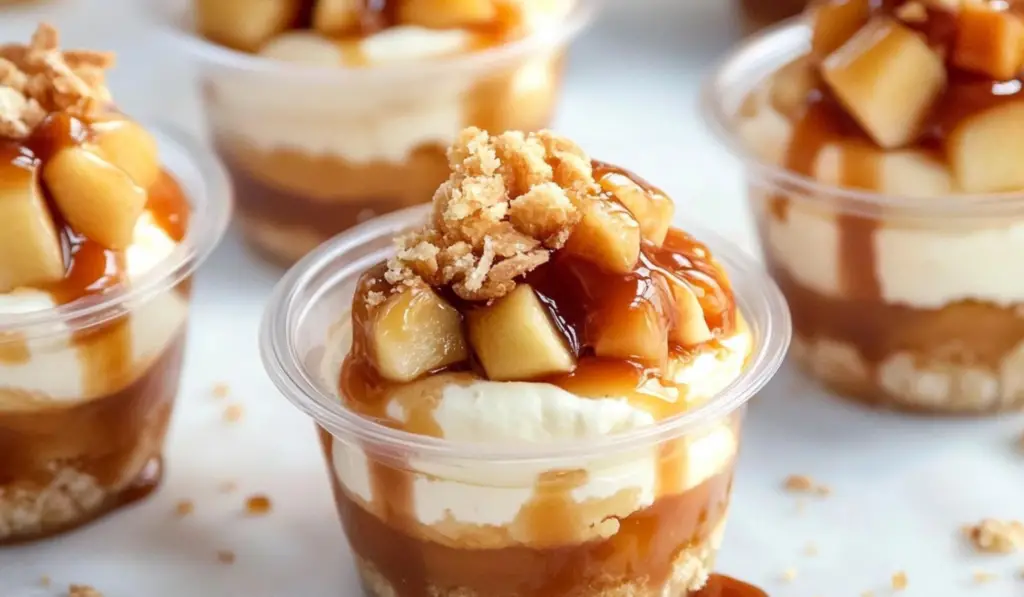
Caramel Apple Dessert Cups: A Heavenly Blend of Comfort and Sweetness
Caramel Apple Dessert Cups are a treat that merges the rich flavors of fall with a convenience that’s perfect for modern kitchens. These no-bake cups showcase layers of buttery vanilla wafer crust, fluffy salted caramel mousse, and warm, spiced cinnamon apples, all topped with a drizzle of luscious caramel sauce. Whether you’re hosting a cozy dinner with family, prepping desserts for a party, or simply indulging in a quiet moment, these cups deliver decadence in every bite. Their portable size and stunning layered presentation make them not only delicious but also a visual delight, perfect for any occasion.
- Total Time: 55 minutes
- Yield: 28 dessert cups 1x
Ingredients
Cinnamon Apples
- 4 cups apples, peeled and chopped
- ½ cup light brown sugar
- 1 tsp cinnamon
Caramel Apple Dessert Cups
- 2 cups vanilla wafer crumbs
- ¼ cup salted or unsalted butter, melted
- 1 package instant vanilla pudding mix (3.4 ounces)
- 1 cup milk
- ⅓ cup salted caramel sauce (homemade or store-bought)
- 1 ½ cups heavy cream
- Additional caramel sauce for garnish
Instructions
1. Prepare the Cinnamon Apples
Start by peeling and chopping your apples into small, uniform pieces. This ensures even cooking and a cohesive texture in every bite. In a medium saucepan, combine the chopped apples with light brown sugar and cinnamon. Stir the mixture over medium heat, letting the apples cook until they soften and release their natural juices. As the liquid thickens into a spiced syrup, the aroma will fill your kitchen with the warm scent of fall. Once cooked, set the apples aside to cool completely before assembling the dessert cups.
2. Create the Vanilla Wafer Crust
For the crust, combine vanilla wafer crumbs with melted butter in a mixing bowl. Stir the mixture until the crumbs are evenly coated with butter. This step is critical to achieving a cohesive and flavorful base for your dessert cups. Using a small cookie scoop, portion the mixture into your plastic cups. Gently press the crumbs down with the back of a spoon or one of the cups to create a compact crust that holds its shape when layered with other components.
3. Whip Up the Salted Caramel Mousse
In a large mixing bowl, whisk together the instant vanilla pudding mix and milk until well combined. Let this mixture sit for about 5 minutes to thicken slightly. Next, add the salted caramel sauce to the pudding mixture and use an electric hand mixer on medium speed to blend the ingredients until smooth.
Pour the heavy cream into the caramel pudding base and whip it with the electric mixer for 3-5 minutes. The mixture will transform into a thick, airy mousse that is both rich and light. This mousse forms the heart of the dessert, adding a creamy contrast to the crunch of the crust and the tartness of the apples. Transfer the mousse into a large piping bag for easy assembly.
4. Assemble the Dessert Cups
Now comes the fun part: layering. Begin by piping a generous layer of salted caramel mousse over the prepared vanilla wafer crust in each cup. Aim to fill each cup about halfway with mousse to leave room for the remaining components.
Next, spoon a portion of the cooled cinnamon apples onto the mousse layer. The spiced apples add a burst of flavor and a delightful texture that complements the creaminess of the mousse. Pipe another layer of salted caramel mousse on top of the apples, creating a beautiful layered effect.
For the finishing touch, drizzle each cup with additional caramel sauce. This step not only enhances the sweetness but also gives the dessert an elegant appearance. For added flair, sprinkle crushed vanilla wafers, a dash of cinnamon, or a pinch of sea salt on top.
5. Chill and Serve
Seal each cup with its lid and place them in the refrigerator to chill for at least 2 hours before serving. This resting period allows the flavors to meld together while the mousse sets to the perfect consistency. If you’re short on time, you can prepare the components in advance and assemble the cups closer to serving time. These dessert cups can be stored in the refrigerator for up to 3 days, making them an excellent make-ahead option for busy schedules.
Notes
- Apple Selection Matters: Use apple varieties that hold their shape during cooking, such as Granny Smith, Honeycrisp, or Fuji. These apples balance tartness with sweetness, ensuring your dessert isn’t overly sugary.
- Perfecting the Caramel Sauce: While store-bought caramel sauce works well, making your own salted caramel can elevate this dessert to gourmet levels. Homemade caramel offers a deeper, richer flavor that pairs beautifully with the spiced apples.
- Chill for Better Flavor: Don’t skip the chilling step. Allowing the dessert to rest in the fridge enhances the flavors and ensures the mousse has the ideal consistency.
- Prep Time: 45 minutes
- Cook Time: 10 minutes
- Category: Dessert
- Method: No-bake
- Cuisine: American
- Diet: Vegetarian
Apple season is one of the most anticipated times of the year. With crisp air, colorful leaves, and the promise of comfort foods, this recipe perfectly captures the essence of the season. Caramel and apple are a match made in dessert heaven, offering a balance of sweet, tart, and salty that tantalizes the taste buds. In this recipe, these classic flavors are paired with the creaminess of mousse and the crunch of a vanilla wafer crust, creating a dessert that’s as versatile as it is delicious.
Ingredients for Caramel Apple Dessert Cups
Cinnamon Apples
- 4 cups apples, peeled and chopped
- ½ cup light brown sugar
- 1 tsp cinnamon
Caramel Apple Dessert Cups
- 2 cups vanilla wafer crumbs
- ¼ cup salted or unsalted butter, melted
- 1 package instant vanilla pudding mix (3.4 ounces)
- 1 cup milk
- ⅓ cup salted caramel sauce (homemade or store-bought)
- 1 ½ cups heavy cream
- Additional caramel sauce for garnish
Essential Equipment
- 28-2 oz. plastic cups with lids
- Electric hand mixer
- Medium saucepan
- Mixing bowls
- Piping bag
- Small cookie scoop
Step-by-Step Preparation Instructions
1. Prepare the Cinnamon Apples
Start by peeling and chopping your apples into small, uniform pieces. This ensures even cooking and a cohesive texture in every bite. In a medium saucepan, combine the chopped apples with light brown sugar and cinnamon. Stir the mixture over medium heat, letting the apples cook until they soften and release their natural juices. As the liquid thickens into a spiced syrup, the aroma will fill your kitchen with the warm scent of fall. Once cooked, set the apples aside to cool completely before assembling the dessert cups.
2. Create the Vanilla Wafer Crust
For the crust, combine vanilla wafer crumbs with melted butter in a mixing bowl. Stir the mixture until the crumbs are evenly coated with butter. This step is critical to achieving a cohesive and flavorful base for your dessert cups. Using a small cookie scoop, portion the mixture into your plastic cups. Gently press the crumbs down with the back of a spoon or one of the cups to create a compact crust that holds its shape when layered with other components.
3. Whip Up the Salted Caramel Mousse
In a large mixing bowl, whisk together the instant vanilla pudding mix and milk until well combined. Let this mixture sit for about 5 minutes to thicken slightly. Next, add the salted caramel sauce to the pudding mixture and use an electric hand mixer on medium speed to blend the ingredients until smooth.
Pour the heavy cream into the caramel pudding base and whip it with the electric mixer for 3-5 minutes. The mixture will transform into a thick, airy mousse that is both rich and light. This mousse forms the heart of the dessert, adding a creamy contrast to the crunch of the crust and the tartness of the apples. Transfer the mousse into a large piping bag for easy assembly.
4. Assemble the Dessert Cups
Now comes the fun part: layering. Begin by piping a generous layer of salted caramel mousse over the prepared vanilla wafer crust in each cup. Aim to fill each cup about halfway with mousse to leave room for the remaining components.
Next, spoon a portion of the cooled cinnamon apples onto the mousse layer. The spiced apples add a burst of flavor and a delightful texture that complements the creaminess of the mousse. Pipe another layer of salted caramel mousse on top of the apples, creating a beautiful layered effect.
For the finishing touch, drizzle each cup with additional caramel sauce. This step not only enhances the sweetness but also gives the dessert an elegant appearance. For added flair, sprinkle crushed vanilla wafers, a dash of cinnamon, or a pinch of sea salt on top.
5. Chill and Serve
Seal each cup with its lid and place them in the refrigerator to chill for at least 2 hours before serving. This resting period allows the flavors to meld together while the mousse sets to the perfect consistency. If you’re short on time, you can prepare the components in advance and assemble the cups closer to serving time. These dessert cups can be stored in the refrigerator for up to 3 days, making them an excellent make-ahead option for busy schedules.
Tips for Success
- Apple Selection Matters: Use apple varieties that hold their shape during cooking, such as Granny Smith, Honeycrisp, or Fuji. These apples balance tartness with sweetness, ensuring your dessert isn’t overly sugary.
- Perfecting the Caramel Sauce: While store-bought caramel sauce works well, making your own salted caramel can elevate this dessert to gourmet levels. Homemade caramel offers a deeper, richer flavor that pairs beautifully with the spiced apples.
- Chill for Better Flavor: Don’t skip the chilling step. Allowing the dessert to rest in the fridge enhances the flavors and ensures the mousse has the ideal consistency.
Variations and Customizations
- Different Crusts: Substitute the vanilla wafers with graham cracker crumbs, digestive biscuits, or even crushed gingersnaps for a unique twist.
- Add Crunch: Sprinkle chopped nuts, such as pecans or walnuts, between the layers or on top for added texture.
- Flavorful Mousse: Swap the vanilla pudding mix for butterscotch or chocolate pudding to create a different flavor profile.
- Dairy-Free Option: Use non-dairy milk and whipped topping to create a dairy-free version of this dessert. Ensure the pudding mix you choose is compatible with your dietary needs.
Serving Suggestions
Caramel Apple Dessert Cups are versatile and suitable for various occasions. Serve them at fall gatherings, holiday parties, or casual family dinners. Pair these cups with warm beverages like apple cider, spiced tea, or coffee for a cozy treat. If you’re hosting a dessert buffet, display the cups on a tiered stand for an eye-catching centerpiece.
These cups also make thoughtful gifts or party favors. Package them in decorative bags with festive ribbons and tags for a personalized touch. They’re guaranteed to bring smiles to anyone who receives them.

Final Thoughts
Caramel Apple Dessert Cups are more than just a dessert—they’re an experience. Each layer brings something special to the table, from the buttery crunch of the vanilla wafer crust to the creamy indulgence of the salted caramel mousse and the warm sweetness of the cinnamon apples. The flavors and textures come together in harmony, creating a dessert that’s as satisfying to eat as it is to prepare.
This recipe is perfect for bakers of all skill levels, thanks to its straightforward instructions and customizable components. Whether you’re looking to impress guests or treat yourself to something special, Caramel Apple Dessert Cups are an excellent choice. With their portable size, make-ahead convenience, and crowd-pleasing taste, these dessert cups are destined to become a favorite in your kitchen.
So, the next time you’re craving something sweet and satisfying, give these Caramel Apple Dessert Cups a try. They’re a celebration of the season and a testament to the magic of simple, well-paired ingredients. One bite, and you’ll be hooked.


