Ingredients
Cinnamon Apples
- 4 cups apples, peeled and chopped
- ½ cup light brown sugar
- 1 tsp cinnamon
Caramel Apple Dessert Cups
- 2 cups vanilla wafer crumbs
- ¼ cup salted or unsalted butter, melted
- 1 package instant vanilla pudding mix (3.4 ounces)
- 1 cup milk
- ⅓ cup salted caramel sauce (homemade or store-bought)
- 1 ½ cups heavy cream
- Additional caramel sauce for garnish
Instructions
1. Prepare the Cinnamon Apples
Start by peeling and chopping your apples into small, uniform pieces. This ensures even cooking and a cohesive texture in every bite. In a medium saucepan, combine the chopped apples with light brown sugar and cinnamon. Stir the mixture over medium heat, letting the apples cook until they soften and release their natural juices. As the liquid thickens into a spiced syrup, the aroma will fill your kitchen with the warm scent of fall. Once cooked, set the apples aside to cool completely before assembling the dessert cups.
2. Create the Vanilla Wafer Crust
For the crust, combine vanilla wafer crumbs with melted butter in a mixing bowl. Stir the mixture until the crumbs are evenly coated with butter. This step is critical to achieving a cohesive and flavorful base for your dessert cups. Using a small cookie scoop, portion the mixture into your plastic cups. Gently press the crumbs down with the back of a spoon or one of the cups to create a compact crust that holds its shape when layered with other components.
3. Whip Up the Salted Caramel Mousse
In a large mixing bowl, whisk together the instant vanilla pudding mix and milk until well combined. Let this mixture sit for about 5 minutes to thicken slightly. Next, add the salted caramel sauce to the pudding mixture and use an electric hand mixer on medium speed to blend the ingredients until smooth.
Pour the heavy cream into the caramel pudding base and whip it with the electric mixer for 3-5 minutes. The mixture will transform into a thick, airy mousse that is both rich and light. This mousse forms the heart of the dessert, adding a creamy contrast to the crunch of the crust and the tartness of the apples. Transfer the mousse into a large piping bag for easy assembly.
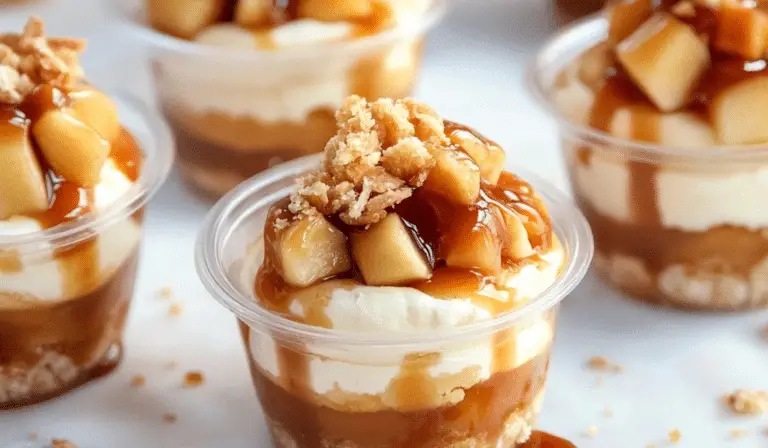
4. Assemble the Dessert Cups
Now comes the fun part: layering. Begin by piping a generous layer of salted caramel mousse over the prepared vanilla wafer crust in each cup. Aim to fill each cup about halfway with mousse to leave room for the remaining components.
Next, spoon a portion of the cooled cinnamon apples onto the mousse layer. The spiced apples add a burst of flavor and a delightful texture that complements the creaminess of the mousse. Pipe another layer of salted caramel mousse on top of the apples, creating a beautiful layered effect.
For the finishing touch, drizzle each cup with additional caramel sauce. This step not only enhances the sweetness but also gives the dessert an elegant appearance. For added flair, sprinkle crushed vanilla wafers, a dash of cinnamon, or a pinch of sea salt on top.
5. Chill and Serve
Seal each cup with its lid and place them in the refrigerator to chill for at least 2 hours before serving. This resting period allows the flavors to meld together while the mousse sets to the perfect consistency. If you’re short on time, you can prepare the components in advance and assemble the cups closer to serving time. These dessert cups can be stored in the refrigerator for up to 3 days, making them an excellent make-ahead option for busy schedules.
Notes
- Apple Selection Matters: Use apple varieties that hold their shape during cooking, such as Granny Smith, Honeycrisp, or Fuji. These apples balance tartness with sweetness, ensuring your dessert isn’t overly sugary.
- Perfecting the Caramel Sauce: While store-bought caramel sauce works well, making your own salted caramel can elevate this dessert to gourmet levels. Homemade caramel offers a deeper, richer flavor that pairs beautifully with the spiced apples.
- Chill for Better Flavor: Don’t skip the chilling step. Allowing the dessert to rest in the fridge enhances the flavors and ensures the mousse has the ideal consistency.
- Prep Time: 45 minutes
- Cook Time: 10 minutes
- Category: Dessert
- Method: No-bake
- Cuisine: American
- Diet: Vegetarian