Ingredients
Scale
- 1 box instant vanilla pudding mix (made according to package directions)
- 3 bananas (sliced just before assembling to prevent browning)
- ¼ cup chopped peanuts (for added crunch and flavor)
- 16 vanilla wafers (these serve as the crunchy base of the dessert)
- ¼ cup chocolate sauce or warmed fudge sauce (for the indulgent chocolate flavor)
- 1 cup whipped cream or Cool Whip (for that creamy, light topping)
Instructions
- Prepare the Pudding
Start by preparing the instant vanilla pudding mix according to the package instructions. Usually, this involves mixing the pudding mix with cold milk and whisking it until it thickens. It only takes a few minutes! Once it’s ready, set it aside to continue thickening while you prep the other ingredients. - Slice the Bananas
Slice the bananas just before you start assembling. Bananas can brown quickly after being cut, so it’s best to slice them last to keep them fresh and visually appealing. Aim for medium-thick slices—about 1/4 inch each—so they hold up well between the layers. - Prepare the Cups
For this dessert, you’ll need individual cups or small glass bowls. These could be small mason jars, dessert cups, or even clear plastic cups. Swirl about a tablespoon of chocolate sauce in the bottom of each cup. You can use pre-made chocolate sauce or warm up some fudge sauce in the microwave for a richer flavor. The chocolate sauce forms a nice base that complements the layers of pudding and bananas. - Layer the Ingredients
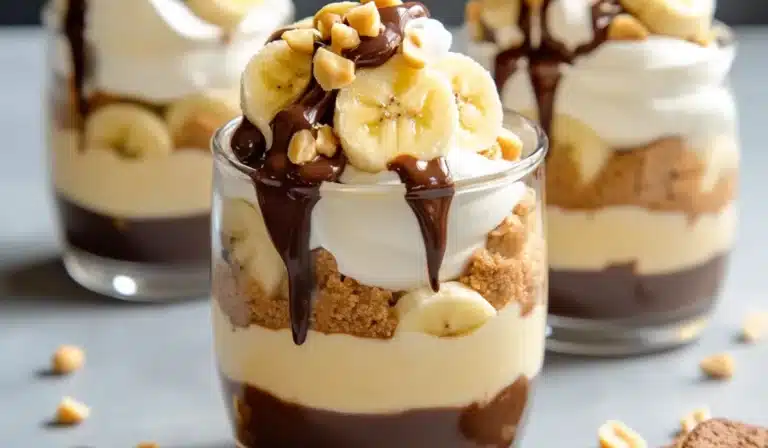
Now comes the fun part—layering! Start by adding 4-5 vanilla wafers to the bottom of each cup. You may need to break them in half to fit the shape of your container. Then, add a layer of banana slices, followed by a generous scoop of prepared vanilla pudding. Repeat the layers: wafers, banana slices, pudding—until the cup is nearly full. You want to end with a final layer of pudding on top. This gives the dessert a smooth, creamy finish. - Top with More Chocolate, Whipped Cream, and Peanuts
Once the layers are assembled, drizzle more chocolate sauce over the top of each cup. This adds an extra layer of indulgence and brings all the flavors together. Then, top each cup with a dollop of whipped cream or Cool Whip. For a crunchy, salty contrast, sprinkle chopped peanuts on top. To finish, garnish with a banana slice and a vanilla wafer for a decorative touch.
Notes
- Prevent Banana Browning: Bananas can brown quickly, especially when exposed to air. To slow down the browning process, slice the bananas just before assembling the cups. If you need to prep ahead of time, you can toss the banana slices in a little lemon juice to keep them fresh.
- Whipped Cream Alternatives: If you don’t have whipped cream or Cool Whip, you can make your own by whipping heavy cream with a bit of sugar and vanilla extract. This homemade whipped cream will add an extra touch of richness to the dessert.
- Layering Tips: Make sure each layer is even for the best presentation. If you’re using clear glass cups, this step is especially important as it allows the layers to show beautifully. If the vanilla wafers break too much, you can crush them and still use them—just be sure to distribute them evenly.
- Keeping It Simple: If you don’t have time to warm the chocolate sauce, you can drizzle it directly from the bottle, but warming it gives the sauce a smooth, glossy finish that makes the dessert feel extra special.
- Prep Time: 15 minutes
- Cook Time: 0 minutes
- Category: Dessert
- Method: No-bake
- Cuisine: American
- Diet: Vegetarian