Garlic swirl rolls are the kind of comfort food that turns a regular dinner into a cozy gathering. In this article, I’ll walk you through how to make garlic swirl rolls from scratch, with a story straight from Paula’s Kitchen. Whether you’re dreaming of soft, buttery garlic herb swirl rolls, craving cheesy garlic swirl dinner rolls, or need an easy garlic swirl bread rolls idea for tonight, this guide covers it all. We’ll also look at the best dough for swirl rolls, freezing tips, and more—all while keeping it delicious, simple, and homemade.
The Story Behind Garlic Swirl Rolls
The First Time I Made Garlic Swirl Rolls
When I was a teenager just learning the ropes of baking, I vividly remember the day I discovered garlic swirl rolls. It started with leftover pizza dough and a big bowl of garlic butter. With no plan other than avoiding food waste, I rolled the dough flat, brushed it generously with garlic and herbs, sprinkled some shredded mozzarella—and that’s how my first batch of garlic swirl rolls came to life.
The smell that filled the kitchen was unlike anything else—warm, garlicky, and soul-soothing. My family gathered at the table before I even had a chance to call them. Those rolls disappeared in minutes. That’s when I knew I’d stumbled upon a lifelong keeper.
Over the years, I’ve refined the recipe into what I now proudly call my homemade garlic swirl rolls recipe. It’s buttery, tender, and infused with enough garlic to satisfy any craving. I often make a double batch, especially when I’m serving it alongside comfort dishes like spaghetti garlic bread bowls or cheesy chicken crescent roll bake. These rolls always bring people together, and that’s exactly what Paula’s Kitchen is all about.
Print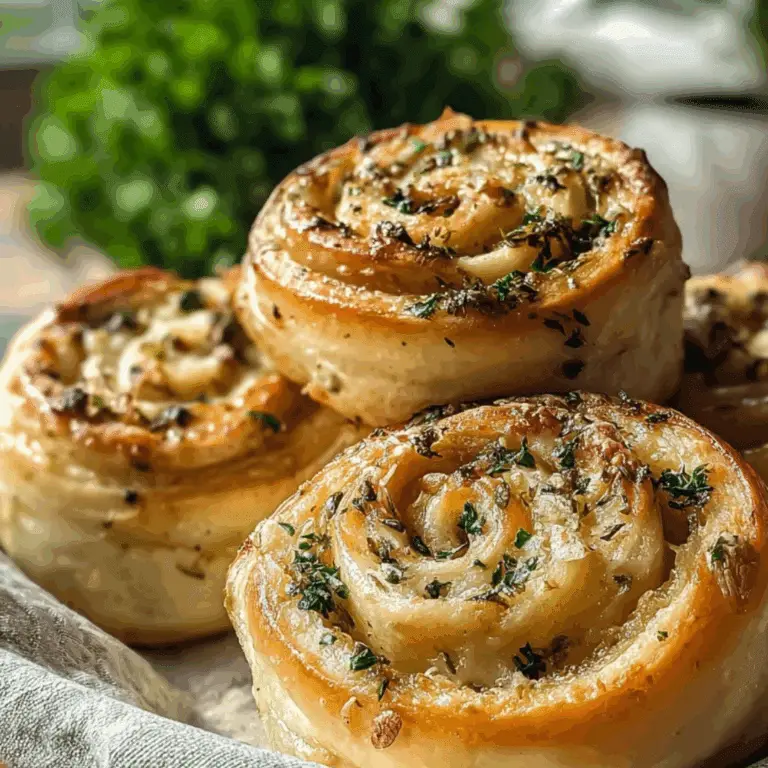
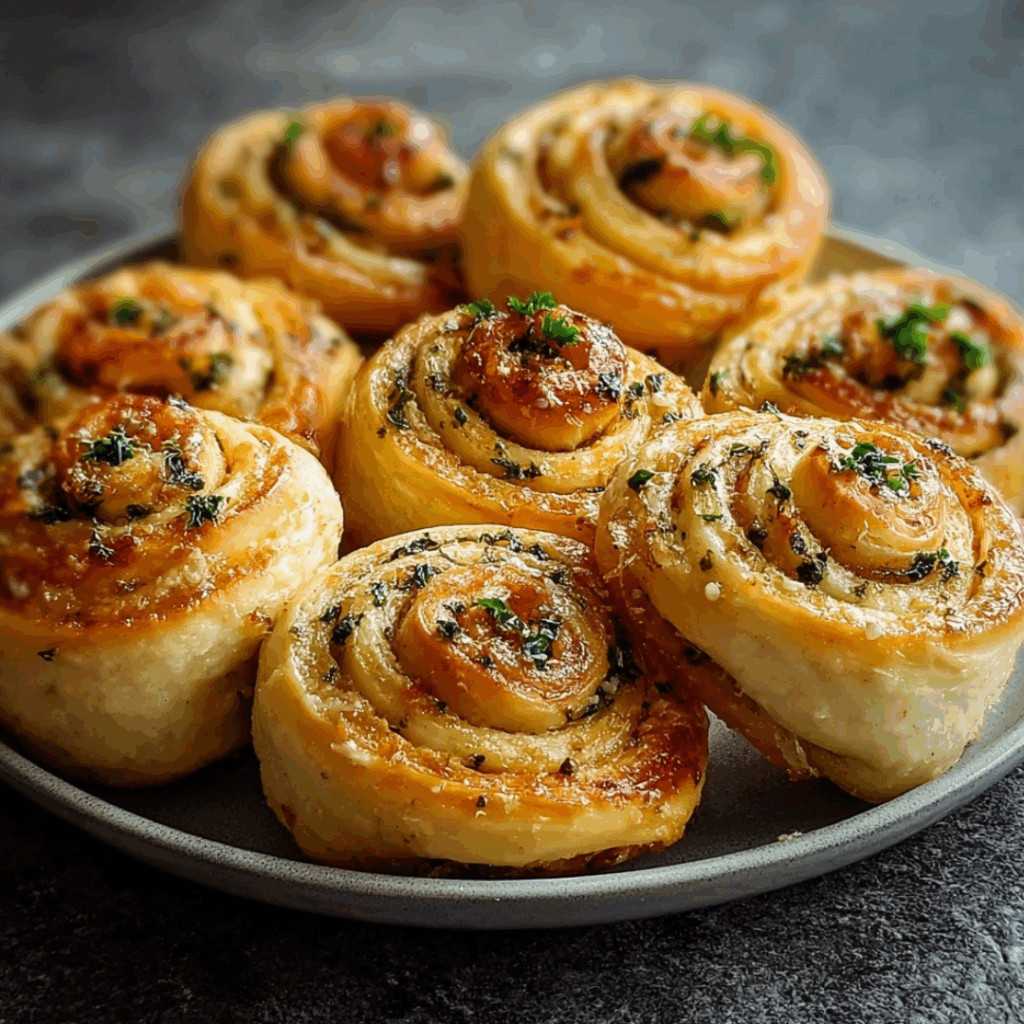
Garlic Swirl Rolls: A Buttery, Cheesy, Homemade Delight
Soft, buttery garlic swirl rolls filled with fresh herbs and melty cheese. These are the perfect dinner rolls to serve warm out of the oven or freeze and reheat for a quick, flavorful side.
- Total Time: 1 hour 45 minutes
- Yield: 12 rolls 1x
Ingredients
- 3 cups all-purpose flour
- 2 tsp instant yeast
- 1 tbsp sugar
- 1 tsp salt
- 1 cup warm milk
- 1/4 cup unsalted butter, softened
- 2 tbsp olive oil
- 1/2 cup melted butter (for filling)
- 4 cloves garlic, minced
- 2 tbsp fresh parsley, chopped
- 1 cup shredded mozzarella
- 1/4 cup grated parmesan
Instructions
- Mix flour, sugar, yeast, and salt in a large bowl.
- Add warm milk, butter, and olive oil. Mix and knead the dough until smooth and elastic.
- Cover and let rise in a warm place until doubled in size, about 1 hour.
- Roll the dough into a large rectangle on a floured surface.
- Mix melted butter, garlic, and parsley. Brush generously over the dough.
- Sprinkle mozzarella and parmesan evenly on top.
- Roll the dough tightly from the long side to form a log. Slice into 12 equal pieces.
- Place rolls in a greased baking pan. Cover and let rise for another 30–45 minutes.
- Preheat oven to 375°F.
- Bake rolls for 20–22 minutes or until golden brown.
- Optional: Brush tops with additional garlic butter after baking.
- Serve warm or store for later use.
Notes
- Freeze baked rolls in an airtight container for up to 2 months.
- For variation, add shredded cheddar or a pinch of chili flakes inside the swirl.
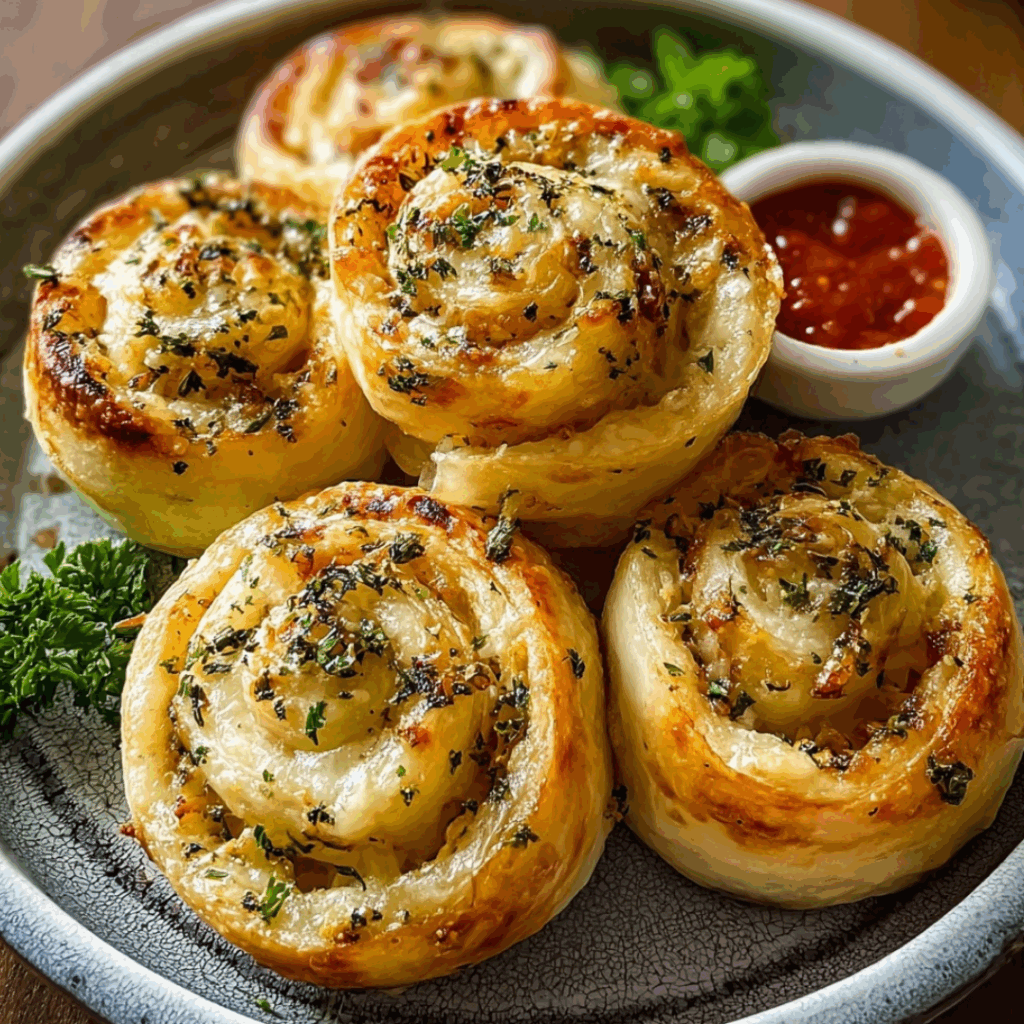
- Serve with soup, pasta, or enjoy solo as a flavorful snack.
- Prep Time: 20 minutes
- Cook Time: 22 minutes
- Category: Dinner
- Method: Baking
- Cuisine: American
- Diet: Vegetarian
Why Garlic Swirl Rolls Deserve a Spot on Your Table
These rolls are more than a side—they’re a centerpiece of flavor. With golden, crisp edges and a soft, cheesy center, each bite offers a burst of garlic-herb goodness. Whether you go for a classic take or add cheese for a cheesy garlic swirl dinner rolls twist, the recipe is flexible and beginner-friendly.
You can pair them with soups, pastas, or just enjoy them solo. They also reheat beautifully, making them perfect for make-ahead meals or potluck contributions. Once you make these easy garlic swirl bread rolls, they’ll be your new favorite, guaranteed.
Crafting the Perfect Garlic Swirl Roll Dough
Choosing the Best Dough for Swirl Rolls
The base of every great swirl roll is the dough—and when it comes to garlic swirl rolls, softness and stretch are key. I always recommend a slightly enriched dough, the kind used in classic dinner rolls. It includes warm milk, a touch of sugar, and butter, which gives it that pillowy texture you want in every bite.
The goal is to strike a balance between structure and tenderness. Too stiff, and your rolls will be dry. Too soft, and they won’t hold the swirl. For best results, let your dough rise until doubled in size—this ensures your homemade garlic swirl rolls recipe turns out perfectly every time.
If you want to make it even easier, store-bought pizza dough works in a pinch. Just remember to let it rest before rolling, so it doesn’t snap back when shaping. Whether homemade or shortcut, the dough is your canvas, and the garlic butter is your paint.
For extra inspiration, check out my banana bread cinnamon rolls where I use a similar rolling technique. The same method applies when transforming your savory version.
How to Add That Buttery Garlic Herb Swirl
Now for the magic: the swirl. Melted butter is the base, but I always load it up with freshly minced garlic, chopped parsley, a little salt, and sometimes a dash of chili flakes for kick. Brush this blend all over your rolled-out dough, getting right to the edges. Then comes the swirl—roll it up like a jelly roll and slice it into thick rounds.
At this stage, you can also sprinkle in shredded cheese to create cheesy garlic swirl dinner rolls. A blend of mozzarella and parmesan melts beautifully. I use the same concept in my garlic butter bread rolls recipe when I want that extra gooey factor.
Let your rolls rise again before baking, and the result will be soft, golden, and incredibly flavorful.
Baking, Cheese Add-Ins, and Flavorful Variations
How to Bake Cheesy Garlic Swirl Dinner Rolls to Golden Perfection
Baking your cheesy garlic swirl dinner rolls is all about timing and temperature. I preheat the oven to 375°F and bake them for about 20–22 minutes until the tops are golden brown and the cheese bubbles through the swirls. Placing the rolls close together in a buttered baking dish helps them rise upward, creating those soft sides we all love.
Halfway through baking, I brush the tops with more garlic butter. It’s optional—but honestly, it elevates the flavor and gives them that bakery-style shine. When they come out of the oven, I let them rest for just a few minutes before serving, though they’re often halfway gone by then!
Want even more layers of flavor? Before the second rise, sprinkle shredded cheddar or gouda between the layers. If you like spice, add a pinch of crushed red pepper. These small twists turn basic rolls into unforgettable ones.
Just like I did with my cheesy parmesan mozzarella bites, layering cheese and herbs into the dough makes a huge difference. Don’t be afraid to get creative.
Flavor Variations: From Buttery Garlic Herb to Bold Twists
While the classic buttery garlic herb swirl rolls are a go-to, there are so many directions you can take this recipe. Add sun-dried tomatoes and feta for a Mediterranean feel. Try a herbed cream cheese layer for richness. Swap parsley for rosemary and thyme for a more earthy, holiday-inspired version.
I’ve even made a batch using the flavor profile from my garlic butter bacon cheeseburger rollups—with bacon bits and sharp cheddar swirled in. They were gone in ten minutes flat.
The beauty of easy garlic swirl bread rolls is that they’re endlessly adaptable. Whatever your flavor mood, the dough and technique stay the same—you just change up what’s inside.
Storing, Reheating, and Make-Ahead Tips
Can Garlic Swirl Rolls Be Frozen and Reheated?
Absolutely. One of the reasons I love these garlic swirl rolls is how well they freeze and reheat. After baking, let them cool completely. Then wrap each roll individually in plastic wrap and store in a zip-top freezer bag. They’ll keep beautifully in the freezer for up to two months.
To reheat, I simply thaw them at room temperature and then pop them in a 300°F oven for about 8–10 minutes. For a quicker method, microwave on medium power in 15-second bursts until warmed through. Just be sure to brush them with a little extra garlic butter to refresh the flavor and texture.
Sometimes, I make a big batch ahead—half for dinner, half for freezing. It saves time later and still tastes like I made them fresh that day. I follow the same technique with my cranberry orange cinnamon rolls and it works every time.
Making Garlic Swirl Rolls Ahead of Time for Events or Dinners
If you’re planning a dinner party or just a busy weeknight, you’ll love how easy it is to prep these rolls ahead. Prepare the rolls completely up to the second rise, then cover tightly and refrigerate overnight. The next day, bring them to room temperature and let them rise for 30–45 minutes before baking.
This method actually helps deepen the flavor because the garlic has more time to infuse into the dough. It’s the same trick I use when prepping raspberry cinnamon rolls the night before a brunch.
Whether fresh, frozen, or prepped in advance, buttery garlic herb swirl rolls remain a dependable, delicious side dish. And that’s the kind of recipe I’ll always make space for in Paula’s Kitchen.
Serving Up the Final Word
There’s something truly special about garlic swirl rolls. They’re warm, comforting, and filled with flavor in every swirl. Whether you make them as buttery garlic herb rolls, stuff them with cheese, or prep them ahead for busy days, they never fail to impress. They bring people together—just like they did in my kitchen growing up.
These rolls are now a staple in my home, much like crescent roll veggie pizza or my go-to sausage French toast roll-ups. They’re versatile, freezer-friendly, and totally delicious.
Give this homemade garlic swirl rolls recipe a try—you’ll see just how easy and unforgettable these rolls can be.
FAQs
How do you make garlic swirl rolls from scratch?
To make garlic swirl rolls from scratch, start with a soft, enriched dough made from flour, warm milk, yeast, sugar, butter, and salt. Once the dough rises, roll it out and brush with a garlic-herb butter mixture. Add cheese if desired, roll tightly, slice, and let rise again. Bake until golden. This process is very similar to what I follow in my cheese breadsticks recipe, which also uses flavorful butter spreads.
Can I add cheese to garlic swirl rolls?
Yes! Adding cheese turns them into cheesy garlic swirl dinner rolls, which are even more irresistible. Mozzarella, parmesan, or a blend of both work beautifully. The cheese melts between the layers, creating gooey, savory swirls in every bite. Try using the same cheesy combo I use in my fried cheese bites for a melty texture.
What’s the best dough for swirl rolls?
The best dough is a slightly sweet, buttery bread dough with milk and butter. It should be elastic but soft, rising well for a pillowy texture. Pizza dough can work in a pinch, but for authentic homemade garlic swirl rolls recipe flavor, enriched dough is the way to go.
Can garlic swirl rolls be frozen and reheated?
Definitely. Bake them first, cool, then freeze in airtight packaging. Reheat in the oven or microwave with a touch of garlic butter to restore softness and taste. This method keeps the easy garlic swirl bread rolls fresh for weeks.