
I’ve always had a soft spot for Panda Express’s Honey Sesame Chicken. That perfect symphony of sweet, savory, crispy, and tangy is just so incredibly satisfying. But let’s face it, sometimes the craving hits, but the motivation to leave the house, battle traffic, and wait in line just isn’t there. That’s precisely why I decided to embark on a culinary adventure and try my hand at recreating this beloved takeout classic in the comfort of my own kitchen. And let me tell you, I was absolutely blown away by how surprisingly simple it was! This Honey Sesame Chicken recipe is a total game-changer. It’s easy enough for even the most novice cook, it’s ready in under 30 minutes, and the end result tastes just like (if not even better than!) the restaurant version. I remember the first time I made it – the aroma wafting through my kitchen was absolutely intoxicating, and my family devoured it in minutes. It was a resounding success, and I knew I had stumbled upon a real winner. This recipe is absolutely perfect for beginner cooks. It breaks down the entire process into manageable, easy-to-follow steps, it’s incredibly time-efficient, and it’s a much healthier and more budget-friendly alternative to constantly ordering takeout. If you’re looking for a quick, delicious, and satisfying meal that the whole family will love, and you want to avoid the hassle and expense of takeout, this Honey Sesame Chicken is an absolute must-try!


Honey Sesame Chicken: A Beginner’s Guide to Panda Express Deliciousness at Home
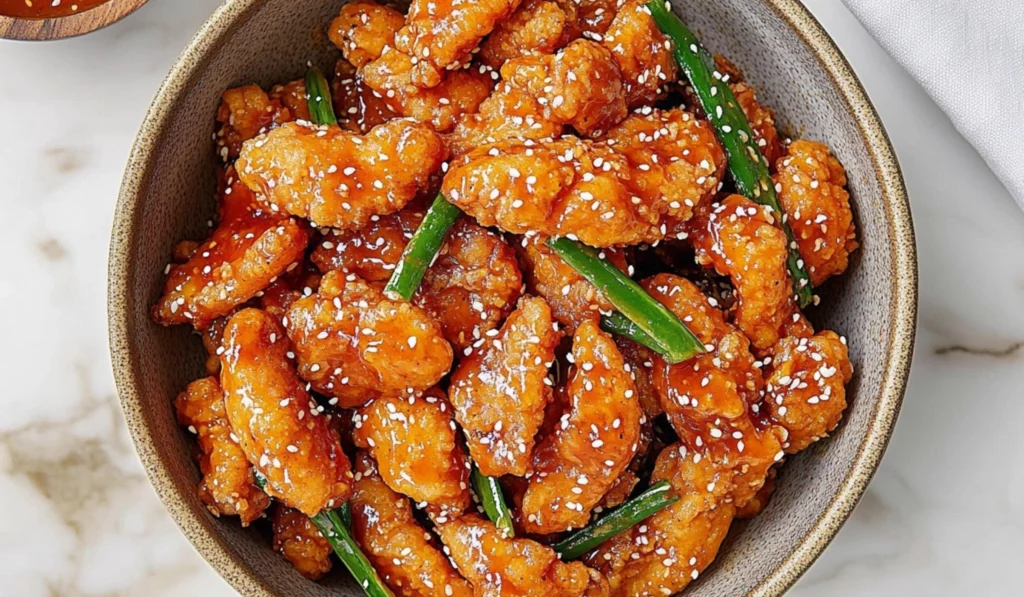
Craving Panda Express but don’t want to leave the house? This Honey Sesame Chicken recipe is your answer! Crispy chicken pieces coated in a sweet and tangy honey sesame sauce, served with your favorite sides, make for a satisfying and easy weeknight meal. Imagine golden-brown chicken glistening with the flavorful sauce, ready to be devoured. It’s a feast for the senses and a perfect way to satisfy your takeout cravings at home. This easy recipe is ideal for beginner cooks, requiring minimal prep and delivering maximum flavor.
- Total Time: 30 minutes
- Yield: 4 servings 1x
Ingredients
- 1 ½ pounds boneless, skinless chicken breast, diced
- 1 large egg
- 1 teaspoon salt
- ½ teaspoon pepper
- 1 cup cornstarch
- ⅓ cup all-purpose flour
- Canola or vegetable oil, for frying
- 1 pound green string beans, trimmed
- 1 yellow bell pepper, thinly sliced
- 1 tablespoon canola or vegetable oil
- ⅓ cup sweet chili sauce
- 3 tablespoons honey
- 2 tablespoons water
- 1 tablespoon ketchup
- 1 tablespoon low sodium soy sauce
- 1 tablespoon rice vinegar
- 1 teaspoon cornstarch
- Salt and pepper, to taste
- 1 tablespoon sesame seeds
Instructions
-
- Prepare the Sauce: In a small mixing bowl, whisk together all of the sauce ingredients: sweet chili sauce, honey, water, ketchup, low sodium soy sauce, rice vinegar, cornstarch, salt, and pepper. Whisk the sauce vigorously until the cornstarch is fully dissolved and there are no lumps. Set the sauce aside.
-
- Prepare the Chicken: In a medium bowl, whisk together the egg, salt, and pepper. In a separate bowl, mix together the cornstarch and flour.
-
- Coat the Chicken: This is a crucial step for achieving crispy chicken. Take each piece of chicken and first dredge it into the egg mixture, ensuring it is fully coated. Then, immediately transfer the chicken to the cornstarch and flour mixture, coating it thoroughly on all sides. Shake off any excess coating. Repeat this process for all of the chicken pieces. Set the coated chicken pieces on a plate while you prepare to fry them.
-
- Fry the Chicken: Heat enough oil in a large pot or skillet to fully submerge the chicken pieces. The oil temperature is critical for achieving crispy and evenly cooked chicken. Use a thermometer to check the oil temperature; aim for around 350°F. If you don’t have a thermometer, you can test the oil by dropping a small piece of bread into it. If the bread browns quickly (within about 30 seconds), the oil is hot enough. Add the coated chicken to the hot oil, working in batches to avoid overcrowding the pan. Crowding the pan will lower the oil temperature and prevent the chicken from getting crispy. Fry the chicken for 3-4 minutes per side, or until it is golden brown and cooked through. Use a meat thermometer to check the internal temperature of the chicken; it should reach 165°F.
-
- Drain the Chicken: Once the chicken is cooked through and crispy, transfer it to a plate lined with paper towels to absorb any excess oil. This will help to keep the chicken crispy.
-
- Sauté the Vegetables: Heat a tablespoon of oil in a large skillet (you can use the same skillet you used to fry the chicken, but be sure to remove any remaining oil and bits of coating from the frying process). Add the trimmed green beans and thinly sliced yellow bell pepper. Sauté the vegetables for 3-4 minutes, or until they are softened but still slightly crisp. You want the vegetables to retain some of their crunch. Don’t overcook them.
-
- Combine Chicken and Sauce: Pour the prepared honey sesame sauce into the hot skillet with the sautéed vegetables. Let the sauce simmer for 1-2 minutes, or until it slightly thickens. Stir the sauce frequently to prevent it from sticking to the pan. The sauce should thicken enough to coat the chicken and vegetables.
-
- Coat the Chicken: Add the cooked and crispy chicken to the pan with the thickened sauce and vegetables. Toss the chicken gently but thoroughly to coat it evenly in the delicious honey sesame sauce. Make sure every piece of chicken is glistening with the sauce.
-
- Garnish and Serve: Garnish the Honey Sesame Chicken with sesame seeds for a nutty flavor and a beautiful presentation. Serve immediately over steamed rice or noodles.
Notes
- Ensure oil is hot enough for crispy chicken.
- Don’t overcrowd the pan when frying.
- Adjust sauce sweetness/spiciness to your liking.
- Serve with rice or noodles.
- Prep Time: 10 minutes
- Cook Time: 20 minutes
- Category: Dinner, Main Course
- Method: Frying, Sautéing
- Cuisine: American, Asian-Fusion
Ingredients and Preparation: The Building Blocks of Flavor
This recipe uses a combination of simple, readily available ingredients that, when combined, create a symphony of delicious flavors. Here’s a detailed list with added tips and tricks:
For the Sauce:
- Sweet Chili Sauce: 1/3 cup. Sweet chili sauce provides the crucial sweet and subtly spicy base for the sauce. It adds a touch of complexity and prevents the sauce from being overly sweet. Look for a brand that isn’t too high in sugar.
- Honey: 3 tablespoons. Honey adds a touch of golden sweetness and richness to the sauce, complementing the sweet chili sauce perfectly. Use a good quality honey for the best flavor.
- Water: 2 tablespoons. Water helps to thin the sauce to the desired consistency, making it easier to coat the chicken and vegetables.
- Ketchup: 1 tablespoon. Ketchup adds a touch of tanginess and depth to the sauce, balancing the sweetness and adding a subtle savory note. Don’t be tempted to add more; a little goes a long way.
- Low Sodium Soy Sauce: 1 tablespoon (can use gluten-free soy sauce). Soy sauce provides a savory umami flavor that is essential for many Asian-inspired dishes. Using low sodium soy sauce helps to control the salt content of the dish. If you are gluten-free, be sure to use a gluten-free soy sauce or tamari.
- Rice Vinegar: 1 tablespoon. Rice vinegar adds a touch of acidity and brightness to the sauce, balancing the sweetness and adding a subtle tang. It also helps to tenderize the chicken slightly.
- Cornstarch: 1 teaspoon. Cornstarch is the secret ingredient for creating a glossy and luscious sauce. It acts as a thickener, creating a silky smooth texture that clings to the chicken and vegetables.
- Salt and Pepper: To taste. Salt and pepper are essential for enhancing the flavors of all the ingredients. Use kosher salt for the best results, as it distributes more evenly than table salt. Freshly ground black pepper is also preferred for its superior flavor.
For the Chicken:
- Large Egg: 1. The egg acts as a binder, helping the cornstarch and flour coating adhere to the chicken. It also adds a little richness to the coating.
- Salt: 1 teaspoon. Salt is crucial for seasoning the chicken and enhancing its natural flavor. Don’t be afraid to season the chicken generously.
- Pepper: ½ teaspoon. Pepper adds a bit of heat and depth to the chicken, complementing the sweetness of the sauce.
- Cornstarch: 1 cup. Cornstarch is the key to creating a light and crispy coating for the chicken. It absorbs moisture and helps the chicken to brown beautifully.
- All-Purpose Flour: 1/3 cup (can use gluten-free flour). Flour adds to the coating and helps it to brown evenly. If you are gluten-free, use a gluten-free all-purpose flour blend that is designed for frying.
- Boneless, Skinless Chicken Breast: 1 ½ pounds, diced into 1-inch pieces. Chicken breast is a lean and healthy protein source that cooks quickly and evenly. Dicing the chicken into 1-inch pieces ensures that it cooks through quickly and evenly.
- Canola or Vegetable Oil: For frying. You’ll need enough oil to fully submerge the chicken pieces. Canola or vegetable oil are good choices for frying because they have a high smoke point, meaning they can withstand high temperatures without breaking down.
For the Vegetables:
- Canola or Vegetable Oil: 1 tablespoon. This is for sautéing the vegetables.
- Green String Beans: 1 pound, trimmed. Green string beans add a touch of freshness, color, and a slightly crunchy texture to the dish. Be sure to trim the ends of the green beans before cooking.
- Yellow Bell Pepper: 1, thinly sliced. Yellow bell pepper adds sweetness, crunch, and a vibrant pop of color to the dish. You can also use other colors of bell peppers, such as red or orange.
- Sesame Seeds: 1 tablespoon. Sesame seeds add a nutty flavor and a beautiful garnish to the finished dish. They also add a subtle crunch.
Alternative Ingredient Suggestions (Expanded):
- Vegetables: You can customize this dish with your favorite vegetables. Broccoli florets, carrots (sliced or julienned), snap peas, snow peas, onions (sliced), mushrooms, or even zucchini are all delicious additions. Consider the cooking times of different vegetables and add them accordingly.
- Sauce: Feel free to adjust the sweetness or spiciness of the sauce to your liking. If you prefer a spicier sauce, add a pinch of red pepper flakes or a few dashes of your favorite hot sauce. If you prefer a sweeter sauce, add a little more honey. You can also add a small amount of ginger (freshly grated or ground) for a more complex flavor.
- Chicken: Chicken thighs can be used instead of chicken breast for a richer and more flavorful option. Just be sure to adjust the cooking time as needed, as chicken thighs typically take a little longer to cook than chicken breast. You can also use boneless, skinless chicken thighs for a slightly healthier option.
- Flour: For a gluten-free version, use a gluten-free all-purpose flour blend. There are many gluten-free flour blends available on the market that are specifically designed for frying. You can also use cornstarch or tapioca starch for a gluten-free coating, but the texture may be slightly different.
Step-by-Step Instructions: Creating Your Honey Sesame Chicken Masterpiece
- Prepare the Sauce: In a small mixing bowl, whisk together all of the sauce ingredients: sweet chili sauce, honey, water, ketchup, low sodium soy sauce, rice vinegar, cornstarch, salt, and pepper. Whisk the sauce vigorously until the cornstarch is fully dissolved and there are no lumps. Set the sauce aside.
- Prepare the Chicken: In a medium bowl, whisk together the egg, salt, and pepper. In a separate bowl, mix together the cornstarch and flour.
- Coat the Chicken: This is a crucial step for achieving crispy chicken. Take each piece of chicken and first dredge it into the egg mixture, ensuring it is fully coated. Then, immediately transfer the chicken to the cornstarch and flour mixture, coating it thoroughly on all sides. Shake off any excess coating. Repeat this process for all of the chicken pieces. Set the coated chicken pieces on a plate while you prepare to fry them.
- Fry the Chicken: Heat enough oil in a large pot or skillet to fully submerge the chicken pieces. The oil temperature is critical for achieving crispy and evenly cooked chicken. Use a thermometer to check the oil temperature; aim for around 350°F. If you don’t have a thermometer, you can test the oil by dropping a small piece of bread into it. If the bread browns quickly (within about 30 seconds), the oil is hot enough. Add the coated chicken to the hot oil, working in batches to avoid overcrowding the pan. Crowding the pan will lower the oil temperature and prevent the chicken from getting crispy. Fry the chicken for 3-4 minutes per side, or until it is golden brown and cooked through. Use a meat thermometer to check the internal temperature of the chicken; it should reach 165°F.
- Drain the Chicken: Once the chicken is cooked through and crispy, transfer it to a plate lined with paper towels to absorb any excess oil. This will help to keep the chicken crispy.
- Sauté the Vegetables: Heat a tablespoon of oil in a large skillet (you can use the same skillet you used to fry the chicken, but be sure to remove any remaining oil and bits of coating from the frying process). Add the trimmed green beans and thinly sliced yellow bell pepper. Sauté the vegetables for 3-4 minutes, or until they are softened but still slightly crisp. You want the vegetables to retain some of their crunch. Don’t overcook them.
- Combine Chicken and Sauce: Pour the prepared honey sesame sauce into the hot skillet with the sautéed vegetables. Let the sauce simmer for 1-2 minutes, or until it slightly thickens. Stir the sauce frequently to prevent it from sticking to the pan. The sauce should thicken enough to coat the chicken and vegetables.
- Coat the Chicken: Add the cooked and crispy chicken to the pan with the thickened sauce and vegetables. Toss the chicken gently but thoroughly to coat it evenly in the delicious honey sesame sauce. Make sure every piece of chicken is glistening with the sauce.
- Garnish and Serve: Garnish the Honey Sesame Chicken with sesame seeds for a nutty flavor and a beautiful presentation. Serve immediately over steamed rice or noodles.
Beginner Tips and Notes: Mastering the Art of Honey Sesame Chicken
- Troubleshooting: Chicken is not crispy: Achieving crispy chicken is all about maintaining the correct oil temperature and avoiding overcrowding the pan. If the oil is not hot enough, the chicken will absorb the oil and become soggy. If the pan is overcrowded, the oil temperature will drop, and the chicken will steam instead of fry. Fry the chicken in batches, ensuring that each piece has enough space to cook properly. You can also double-fry the chicken for extra crispiness. Fry it once until it is lightly golden, remove it from the oil, let it rest for a few minutes, and then fry it again until it is deeply golden brown.
- Troubleshooting: Sauce is too thick: If your honey sesame sauce is too thick, add a little more water or chicken broth (1-2 tablespoons at a time) to thin it out. You can also add a splash of rice vinegar to loosen the sauce.
- Troubleshooting: Sauce is too thin: If your sauce is too thin, simmer it for a longer period of time (a few minutes) to allow it to reduce and thicken naturally. You can also thicken it quickly by adding a slurry of cornstarch and water (1 teaspoon cornstarch mixed with 1 tablespoon cold water). Whisk the slurry into the sauce and simmer for a minute or two until it thickens.
- Efficient Prep: Preparing the sauce and chopping the vegetables ahead of time can significantly reduce your cooking time. You can store the sauce in an airtight container in the refrigerator for up to 3 days. You can also chop the vegetables and store them in a separate airtight container in the refrigerator for up to 2 days. This way, when you’re ready to cook, all you have to do is fry the chicken and combine everything.
Serving Suggestions: Completing Your Honey Sesame Chicken Feast
This Honey Sesame Chicken is incredibly versatile and can be served in a variety of ways. While it is traditionally served with steamed rice, here are some additional serving suggestions to enhance your meal:
- Noodles: Lo mein noodles, chow mein noodles, or even spaghetti noodles are all delicious options. Toss the noodles with a little sesame oil and soy sauce before adding the chicken and sauce.
- Fried Rice: Serve the Honey Sesame Chicken over a bed of homemade fried rice. This creates a complete and satisfying meal.
- Quinoa: For a healthier alternative to rice, serve the chicken and sauce over quinoa. Quinoa is a grain that is packed with protein and fiber.
- Lettuce Wraps: For a lighter and more refreshing meal, serve the Honey Sesame Chicken in lettuce wraps. Use large lettuce leaves, such as butter lettuce or romaine lettuce, to create wraps.
- Steamed Vegetables: Add some extra steamed vegetables, such as broccoli, carrots, or snap peas, for a more balanced and nutritious meal.
Storage Tips for Leftovers (Even More Detailed):
Store leftover Honey Sesame Chicken in an airtight container in the refrigerator for up to 3 days. The chicken will likely lose some of its crispiness after being stored in the refrigerator, but it will still be delicious. Reheat the chicken and sauce in the microwave or on the stovetop. Reheating in the oven is not recommended as it can dry out the chicken. To reheat in the microwave, heat the chicken and sauce for about 1-2 minutes, or until heated through. To reheat on the stovetop, heat a small amount of oil in a skillet and add the chicken and sauce. Heat for a few minutes, stirring occasionally, until heated through. If the sauce is too thick, add a little water or chicken broth.

Conclusion: Share Your Culinary Creations!
This Honey Sesame Chicken is a fantastic and easy way to enjoy a restaurant-quality meal in the comfort of your own home. I highly encourage you to try this recipe out and let me know how it turns out in the comments below! I genuinely love hearing about your cooking adventures and any modifications you make to the recipe. Did you try a different type of vegetable? Did you adjust the sweetness or spiciness of the sauce? Did you use chicken thighs instead of chicken breast? Share your tips, tricks, and photos with other readers! Your feedback is invaluable and helps others who are trying the recipe for the first time.
Don’t be afraid to get creative and experiment with different ingredients and flavors to create your own unique version of this dish. Perhaps you’ll discover a new family favorite! Get creative and have fun with it! Cooking should be an enjoyable experience! Share your photos and tag me on social media so I can see your Honey Sesame Chicken masterpieces! Use #HoneySesameChicken and #EasyChickenRecipes so I can find your creations. I also love seeing your variations on Instagram stories – tag me so I can see what you’re cooking up in your kitchen! Happy cooking, and I can’t wait to hear from you!


