

If you’ve ever tasted Lotus Biscoff cookies, you know how addictive their unique spiced flavor can be. Now, imagine pairing that irresistible cookie butter with a creamy, velvety cheesecake filling—no baking required! That’s exactly what you get with No-Bake Biscoff Cheesecake Cups. This dessert is not only delicious but also super easy to make, making it a perfect choice for beginner bakers. Whether you’re preparing for a family gathering, a special occasion, or just craving a sweet treat, these little cups will surely impress.
No-Bake Biscoff Cheesecake Cups: A Simple, Irresistible Dessert for Beginners
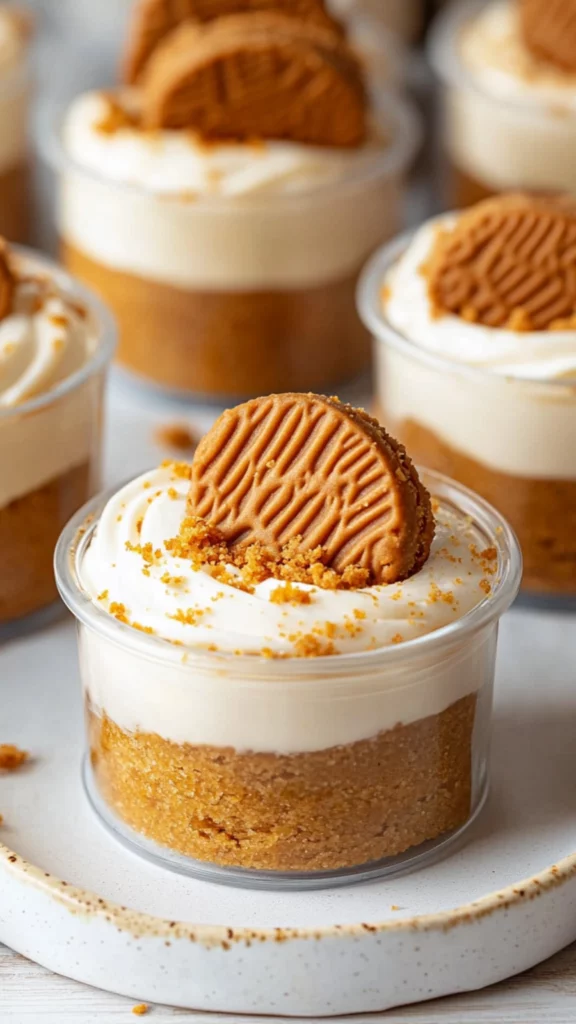
If you’re craving a delicious, no-bake dessert that’s easy to make and sure to impress, No-Bake Biscoff Cheesecake Cups are the perfect treat. With creamy cheesecake filling and the irresistible flavor of Biscoff cookies, this dessert comes together in no time—no oven required! Perfect for beginners and any occasion, it’s simple, indulgent, and absolutely delicious. Ready to dig in? Let’s get started!
- Total Time: 4 hours 20 minutes (includes refrigeration time)
- Yield: 8 cups 1x
Ingredients
For the Crumb Base:
- 30 Lotus Biscoff biscuits
- 2 tablespoons unsalted butter, melted
For the Cheesecake Filling:
- 16 oz heavy cream (2 cups)
- 8 oz cream cheese, at room temperature
- 1/2 cup powdered sugar
- 1/2 cup Biscoff spread
- 1 teaspoon vanilla extract
For the Garnish:
- 1/2 cup Biscoff spread (melted)
- 8 Biscoff cookies, cut in half
Instructions
Step 1: Make the Crumb Base
Start by crushing the Lotus Biscoff biscuits into fine crumbs. You can do this by either using a food processor or by placing the biscuits in a zip-top bag and using a rolling pin to crush them. Once you have the crumbs, add 2 tablespoons of melted butter and mix well. The butter helps bind the crumbs together, giving you that perfect crunchy base.
Reserve a few tablespoons of the crumb mixture for decoration later. Divide the remaining crumb mixture into your dessert cups. This recipe will make about 8 standard-sized cups or 16 smaller “shot” cups, depending on your preference. Aim to add about 2-3 tablespoons of the crumb mixture into each cup and press down gently to create an even layer. Set the cups aside while you prepare the filling.
Step 2: Prepare the Cheesecake Filling
In a large bowl, pour the heavy cream and begin whisking it until stiff peaks form. This will take a few minutes, so be patient! You’ll know it’s ready when the cream holds its shape and doesn’t slump down when you lift the whisk.
In a separate bowl, whisk together the room-temperature cream cheese, powdered sugar, Biscoff spread, and vanilla extract. Continue whisking until the mixture becomes smooth and creamy, with no lumps. Next, gently fold the whipped cream into the cream cheese mixture. Use a spatula to combine the two, taking care not to deflate the whipped cream too much. The goal is to keep the mixture light and airy.
Step 3: Assemble the Cups
Once the cheesecake filling is ready, transfer it into a large piping bag. If you don’t have a piping bag, you can simply use a plastic zip-top bag and snip off the corner. Pipe the cheesecake mixture into each of the dessert cups, filling them generously.
Now, take the 1/2 cup of Biscoff spread and melt it in the microwave for about 20 seconds or until it becomes liquid. Drizzle the melted spread over the top of each cheesecake cup, creating a smooth, glossy layer.
For the final touch, decorate each cup with a half of a Biscoff cookie. If you saved a bit of the crumb mixture, sprinkle it on top for extra crunch and flavor.
Step 4: Refrigerate and Set
Place the cups in the refrigerator and allow them to chill for at least 4 hours. The cheesecake will firm up as it cools, creating a rich, creamy texture that’s perfect for enjoying after a meal. Once chilled, you’re ready to serve these no-bake wonders!
Notes
- Whipping the Cream: When whipping heavy cream, make sure your bowl and whisk are clean and dry. Even a tiny bit of moisture or fat can prevent the cream from whipping properly. For best results, chill the bowl and whisk in the freezer for 10-15 minutes before use.
- Room Temperature Cream Cheese: This is crucial! Cold cream cheese can result in lumps in your cheesecake filling. Let it sit at room temperature for about 30 minutes before using it to make sure it blends smoothly with the other ingredients.
- Mixing the Whipped Cream: When folding the whipped cream into the cream cheese mixture, be gentle. Use a folding motion rather than stirring to preserve the air in the whipped cream, which gives the filling its light texture.
- Substitute Biscoff Spread: If you can’t find Biscoff spread, you can substitute with other cookie butters like Speculoos or even Nutella for a chocolatey twist. While it won’t have the same spiced flavor, it will still taste delicious.
- Substitute Tools: If you don’t have a piping bag, a plastic sandwich bag with the tip cut off works just as well. Similarly, if you don’t have a food processor, simply crush the cookies in a zip-top bag with a rolling pin until fine crumbs form.
- Prep Time: 20 minutes
- Cook Time: 0 minutes
- Category: Dessert
- Method: No-bake
- Cuisine: American
- Diet: Vegetarian
I first stumbled upon this recipe when I was looking for an effortless yet crowd-pleasing dessert. With just a handful of ingredients and a bit of patience, I was able to create a delightful dessert that everyone devoured. The best part? You don’t even need an oven! For those who are new to baking or simply want something simple and stress-free, this no-bake cheesecake is the way to go.
When you’re new to baking, sometimes the idea of making a cheesecake can be a bit intimidating. The thought of using a water bath, dealing with cracks, or getting the right texture might seem daunting. But this no-bake version takes all those worries away. It’s creamy, dreamy, and all about simplicity. If you’ve been thinking about tackling a cheesecake but haven’t quite been ready to take on the challenge of baking one, this recipe is the perfect way to dip your toes into the world of cheesecakes.
Why This Recipe Is Perfect for Beginners
The No-Bake Biscoff Cheesecake Cups require no complicated techniques, and the ingredients are easy to find in most grocery stores. Even if you’ve never made cheesecake before, this recipe will guide you step by step, ensuring that you end up with a delicious, picture-perfect dessert. Plus, the time-saving aspect makes it even more beginner-friendly—there’s no need to wait for an oven to preheat, and the fridge does most of the work. The result? A rich, indulgent treat that tastes like you’ve spent hours in the kitchen.
Let’s also talk about the health factor—this recipe is great for those who want a treat without the long baking process, which sometimes involves more oil, butter, or sugar than necessary. With this no-bake version, you can focus on high-quality ingredients, giving you a delicious cheesecake that doesn’t require excessive baking or high heat. Plus, you can even control the sweetness with the amount of powdered sugar and Biscoff spread you add.
Ingredients and Preparation
For these No-Bake Biscoff Cheesecake Cups, you’ll need the following ingredients:
For the Crumb Base:
- 30 Lotus Biscoff biscuits
- 2 tablespoons unsalted butter, melted
For the Cheesecake Filling:
- 16 oz heavy cream (2 cups)
- 8 oz cream cheese, at room temperature
- 1/2 cup powdered sugar
- 1/2 cup Biscoff spread
- 1 teaspoon vanilla extract
For the Garnish:
- 1/2 cup Biscoff spread (melted)
- 8 Biscoff cookies, cut in half
You may be wondering if there are any alternatives to these ingredients, and the answer is yes! You can switch up the cookies and use graham crackers or digestive biscuits for the crumb base if you’re unable to find Lotus Biscoff biscuits. For a lighter version, you can substitute the heavy cream with whipped topping, though this will change the texture slightly. Additionally, if you don’t have Biscoff spread, a similar spiced cookie butter or even Nutella can be used for a different flavor twist.
In terms of cream cheese, if you’re aiming to make a lighter version of the cheesecake, you can opt for low-fat cream cheese, though the texture may not be as rich. The heavy cream is essential for the smooth, thick consistency of the filling, so it’s important not to substitute it unless you’re going for a different style altogether. You can also use a dairy-free heavy cream alternative if you need to make this recipe dairy-free. Just be sure to check if it whips properly.
Step-by-Step Instructions
Now let’s dive into the steps! Follow this simple, beginner-friendly process, and you’ll have a batch of No-Bake Biscoff Cheesecake Cups ready to enjoy.
Step 1: Make the Crumb Base
Start by crushing the Lotus Biscoff biscuits into fine crumbs. You can do this by either using a food processor or by placing the biscuits in a zip-top bag and using a rolling pin to crush them. Once you have the crumbs, add 2 tablespoons of melted butter and mix well. The butter helps bind the crumbs together, giving you that perfect crunchy base.
Reserve a few tablespoons of the crumb mixture for decoration later. Divide the remaining crumb mixture into your dessert cups. This recipe will make about 8 standard-sized cups or 16 smaller “shot” cups, depending on your preference. Aim to add about 2-3 tablespoons of the crumb mixture into each cup and press down gently to create an even layer. Set the cups aside while you prepare the filling.
Step 2: Prepare the Cheesecake Filling
In a large bowl, pour the heavy cream and begin whisking it until stiff peaks form. This will take a few minutes, so be patient! You’ll know it’s ready when the cream holds its shape and doesn’t slump down when you lift the whisk.
In a separate bowl, whisk together the room-temperature cream cheese, powdered sugar, Biscoff spread, and vanilla extract. Continue whisking until the mixture becomes smooth and creamy, with no lumps. Next, gently fold the whipped cream into the cream cheese mixture. Use a spatula to combine the two, taking care not to deflate the whipped cream too much. The goal is to keep the mixture light and airy.
Step 3: Assemble the Cups
Once the cheesecake filling is ready, transfer it into a large piping bag. If you don’t have a piping bag, you can simply use a plastic zip-top bag and snip off the corner. Pipe the cheesecake mixture into each of the dessert cups, filling them generously.
Now, take the 1/2 cup of Biscoff spread and melt it in the microwave for about 20 seconds or until it becomes liquid. Drizzle the melted spread over the top of each cheesecake cup, creating a smooth, glossy layer.
For the final touch, decorate each cup with a half of a Biscoff cookie. If you saved a bit of the crumb mixture, sprinkle it on top for extra crunch and flavor.
Step 4: Refrigerate and Set
Place the cups in the refrigerator and allow them to chill for at least 4 hours. The cheesecake will firm up as it cools, creating a rich, creamy texture that’s perfect for enjoying after a meal. Once chilled, you’re ready to serve these no-bake wonders!
Beginner Tips and Notes
- Whipping the Cream: When whipping heavy cream, make sure your bowl and whisk are clean and dry. Even a tiny bit of moisture or fat can prevent the cream from whipping properly. For best results, chill the bowl and whisk in the freezer for 10-15 minutes before use.
- Room Temperature Cream Cheese: This is crucial! Cold cream cheese can result in lumps in your cheesecake filling. Let it sit at room temperature for about 30 minutes before using it to make sure it blends smoothly with the other ingredients.
- Mixing the Whipped Cream: When folding the whipped cream into the cream cheese mixture, be gentle. Use a folding motion rather than stirring to preserve the air in the whipped cream, which gives the filling its light texture.
- Substitute Biscoff Spread: If you can’t find Biscoff spread, you can substitute with other cookie butters like Speculoos or even Nutella for a chocolatey twist. While it won’t have the same spiced flavor, it will still taste delicious.
- Substitute Tools: If you don’t have a piping bag, a plastic sandwich bag with the tip cut off works just as well. Similarly, if you don’t have a food processor, simply crush the cookies in a zip-top bag with a rolling pin until fine crumbs form.
Serving Suggestions
These No-Bake Biscoff Cheesecake Cups are the perfect standalone dessert, but you can easily elevate them with some complementary sides or sauces. Pair them with fresh berries, such as strawberries or raspberries, for a refreshing contrast to the creamy richness. A drizzle of caramel sauce or a sprinkle of crushed Biscoff cookies will take these cups to the next level. You could also serve them alongside a hot beverage like coffee or tea for a perfect afternoon treat.
If you have leftovers (though they’re unlikely!), store the cups in an airtight container in the fridge for up to 3 days. The cheesecake will remain creamy and delicious, though it’s best served within a day or two for optimal freshness.
For an extra indulgent experience, you can serve these cups with a scoop of vanilla ice cream or a side of whipped cream. The cold, creamy texture of the cheesecake pairs wonderfully with the smoothness of the ice cream.

Conclusion
These No-Bake Biscoff Cheesecake Cups are a game-changer for beginner bakers and seasoned dessert lovers alike. They’re easy to make, require minimal ingredients, and are perfect for any occasion. The combination of creamy cheesecake and the irresistible flavor of Biscoff spread is truly a match made in dessert heaven. Whether you’re preparing a special treat for a family gathering or just want to enjoy a little something sweet at home, these cheesecake cups are sure to impress.
So, what are you waiting for? Gather your ingredients, follow the simple steps, and create your own batch of No-Bake Biscoff Cheesecake Cups. Don’t forget to share your creations in the comments or tag me on social media—I’d love to see how your cups turn out!
Feel free to experiment with this recipe by trying different cookie butters or adding your favorite toppings. No matter how you make them, these cheesecake cups will always be a hit. Happy baking!


