
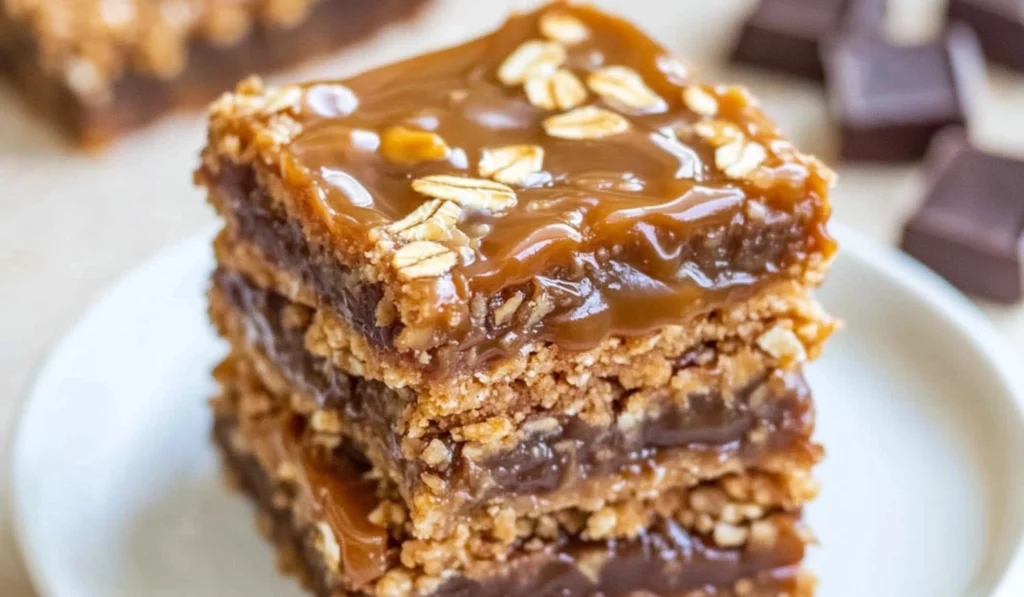
There’s something about a dessert that combines gooey caramel, rich chocolate, and a hearty oat base that feels like a warm hug for the soul. For those who are true caramel lovers, Carmelitas are the ultimate treat. These soft, chewy bars are dripping with caramel and stuffed with chocolate, making them the perfect dessert to satisfy your sweet tooth. But what makes this Carmelitas recipe even more special is that it’s incredibly easy to make, even for beginner cooks. With just one bowl and no mixer required, this dessert is about as low-effort as it gets, but the result is undeniably delicious.

Ultimate Carmelitas: The Irresistible Caramel Oat Bars You’ll Love to Make
Carmelitas are the perfect treat for anyone who loves gooey caramel, rich chocolate, and a hearty oat base. These soft, chewy bars are incredibly easy to make—no mixer required—making them perfect for beginners. With just one bowl and a few simple ingredients, you can create a dessert that’s sure to impress. I first made these Carmelitas on a whim, and they quickly became a family favorite. Whether for a special occasion or a simple sweet craving, Carmelitas are a deliciously effortless dessert.
- Total Time: 40 minutes
- Yield: 16 bars 1x
Ingredients
- ¾ cup butter, melted (1 ½ stick; unsalted butter is recommended, but salted butter can also be used)
- ¾ cup light brown sugar, packed
- 1 tablespoon vanilla extract
- 1 cup all-purpose flour
- 1 cup whole-rolled old fashioned oats (do not use instant or quick-cook oats)
- 1 teaspoon baking soda
- ½ teaspoon salt (optional, or adjust to taste)
- 35 caramel squares, unwrapped (Werther’s Originals Soft Caramels work great here, but feel free to use any soft caramel variety)
- ½ cup heavy cream
- 1 cup semi-sweet chocolate chips or chunks (or a mix of both for extra texture)
Instructions
Step 1: Preheat Your Oven and Prepare the Pan
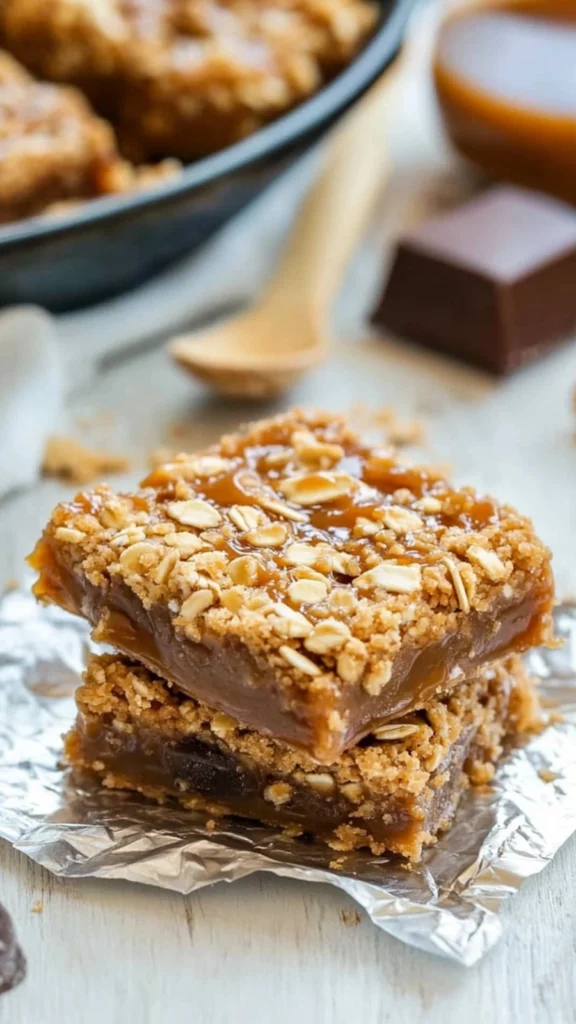
Start by preheating your oven to 350°F (175°C). While the oven is warming up, line an 8×8-inch baking pan with aluminum foil and spray it with cooking spray. The foil makes cleanup a breeze and prevents the sticky caramel from sticking to the pan. Once the pan is ready, set it aside.
Step 2: Make the Base Layer
In a large microwave-safe mixing bowl, add the butter and microwave it on high for about 90 seconds, or until fully melted. Once the butter is melted, add the brown sugar and vanilla extract. Whisk the mixture together until it becomes smooth and fully combined.
Next, add the flour, oats, baking soda, and salt (if using) to the bowl. Stir everything together until it’s evenly mixed. The dough will be thick, but that’s normal. This will form the base of your Carmelitas, so press it into the bottom of the prepared pan. Use a spatula or the back of a spoon to smooth it into an even layer.
Step 3: Bake the Base
Place the pan in the preheated oven and bake for about 10 minutes. The base should start to firm up and turn a light golden color. This step is important because it gives the base a bit of structure before adding the caramel and chocolate layers.
Step 4: Prepare the Caramel Sauce
While the base is baking, it’s time to make the luscious caramel sauce. In a separate microwave-safe bowl, add the caramel squares, heavy cream, and a pinch of salt (if desired). Microwave the mixture in 60-second intervals, stirring after each burst, until the caramels are fully melted and the sauce is smooth. This should take about 4 to 5 minutes in total.
Alternatively, you can melt the caramels and cream together in a saucepan over medium-low heat, stirring constantly to prevent the caramel from burning. Either method works, so choose whichever you find easiest.
Step 5: Add Chocolate Chips
Once the base is done baking, remove the pan from the oven and sprinkle the chocolate chips or chunks evenly over the warm base. Then, carefully pour the hot caramel sauce over the chocolate. The caramel will seep into the chocolate, creating a beautiful and gooey layer.
Step 6: Add the Second Oat Layer
Now it’s time for the second oat layer! Take the remaining oat mixture and crumble it evenly over the caramel layer. It doesn’t have to be perfect—just make sure the oat crumble covers the surface of the caramel. This creates that delicious topping that will crisp up in the oven.
Step 7: Bake Again
Return the pan to the oven and bake for another 15 to 18 minutes. You’ll know the Carmelitas are done when the edges are lightly browned and the center is bubbling slightly. Don’t over-bake, as this can make the bars dry. Keep a close eye on them to get the perfect texture.
Step 8: Cool Completely
This is the hardest part—waiting! After baking, allow the Carmelitas to cool completely in the pan before slicing. The caramel needs time to firm up, and if you try to cut into them too soon, the caramel will be too runny. Let the bars cool at room temperature for about 4 hours, or you can speed up the process by placing the pan in the fridge for a couple of hours.
Notes
- Don’t skip the cooling time: The caramel will firm up as it cools, and it’s important to give it time to do so. If you don’t wait, the bars will be a sticky mess when you cut into them.
- Use a sharp knife: When it’s time to slice, make sure to use a sharp knife. This will give you clean, neat cuts that show off the beautiful layers.
- Be careful when melting caramel: Whether you use the microwave or stovetop, be sure to melt the caramel slowly. If you rush it, the caramel could scorch, which will affect the taste.
- Add nuts for extra crunch: If you enjoy a bit of crunch in your desserts, try adding some chopped walnuts or pecans to the oat layer. It adds texture and a wonderful nutty flavor.
- Prep Time: 15 minutes
- Cook Time: 25 minutes
- Category: Dessert
- Method: Baking
- Cuisine: American
- Diet: Vegetarian
I remember the first time I baked Carmelitas. I was in the mood for something sweet, but I didn’t want to spend hours in the kitchen. I found this simple recipe, and after making just a few small adjustments, I was hooked. The caramel oozing out from the bars was perfection, the oats added a satisfying chewiness, and the chocolate chunks melted beautifully throughout the layers. Not only did my family love it, but they were surprised when I told them how easy it was to make. This is the kind of recipe that turns baking into a joy rather than a chore—and it’s perfect for beginner cooks looking for an easy yet impressive dessert.
Why Carmelitas are Perfect for Beginners
For beginner bakers, there’s nothing worse than feeling overwhelmed by complicated recipes, long ingredient lists, and time-consuming steps. But with this Carmelitas recipe, you get the best of both worlds: a decadent dessert that’s quick, easy, and made with simple ingredients. The fact that it requires no mixer and only a few basic kitchen tools makes it an ideal option for beginners. Plus, the entire process is easy to follow, and there’s little room for error. Even if you’re a total novice in the kitchen, you’ll still manage to make a batch of these Carmelitas with confidence.
One of the best parts about this recipe is the flexibility. You don’t need to worry about complex techniques or special equipment, and if you don’t have one ingredient, you can easily swap it for another. The caramel layer is rich and indulgent, while the oat base adds just the right amount of texture. It’s truly a dessert that everyone can enjoy—whether you’re baking for a family gathering, a party, or just a cozy night at home.
Ingredients and Preparation
Before we dive into the recipe, let’s take a closer look at the ingredients that will come together to create these heavenly Carmelitas. As with any great recipe, using the right ingredients will ensure you get the best possible results.
Ingredients:
- ¾ cup butter, melted (1 ½ stick; unsalted butter is recommended, but salted butter can also be used)
- ¾ cup light brown sugar, packed
- 1 tablespoon vanilla extract
- 1 cup all-purpose flour
- 1 cup whole-rolled old fashioned oats (do not use instant or quick-cook oats)
- 1 teaspoon baking soda
- ½ teaspoon salt (optional, or adjust to taste)
- 35 caramel squares, unwrapped (Werther’s Originals Soft Caramels work great here, but feel free to use any soft caramel variety)
- ½ cup heavy cream
- 1 cup semi-sweet chocolate chips or chunks (or a mix of both for extra texture)
Ingredient Substitutions:
- Butter: If you’re out of butter or prefer a non-dairy alternative, you can use margarine or coconut oil. Just keep in mind that coconut oil will add a slight coconut flavor.
- Flour: For a slightly healthier twist, you can substitute all-purpose flour with whole wheat flour. You may notice a slight change in texture, but the flavor will still be great!
- Caramel: If you can’t find caramel squares, you can use pre-made caramel sauce or individually wrapped caramel candies. You might need to adjust the quantity slightly depending on the consistency of the caramel sauce you use.
- Oats: Stick with old-fashioned oats for the best texture, as quick oats may not provide the same chewy texture in the bars.
- Chocolate Chips: You can experiment with different types of chocolate—milk, dark, or even white chocolate chips. Each will bring its own unique flavor to the dessert.
Step-by-Step Instructions
Now that you have all your ingredients ready, let’s go through the easy steps to make these Carmelitas. Trust me, you’ll be amazed at how simple the process is!
Step 1: Preheat Your Oven and Prepare the Pan
Start by preheating your oven to 350°F (175°C). While the oven is warming up, line an 8×8-inch baking pan with aluminum foil and spray it with cooking spray. The foil makes cleanup a breeze and prevents the sticky caramel from sticking to the pan. Once the pan is ready, set it aside.
Step 2: Make the Base Layer
In a large microwave-safe mixing bowl, add the butter and microwave it on high for about 90 seconds, or until fully melted. Once the butter is melted, add the brown sugar and vanilla extract. Whisk the mixture together until it becomes smooth and fully combined.
Next, add the flour, oats, baking soda, and salt (if using) to the bowl. Stir everything together until it’s evenly mixed. The dough will be thick, but that’s normal. This will form the base of your Carmelitas, so press it into the bottom of the prepared pan. Use a spatula or the back of a spoon to smooth it into an even layer.
Step 3: Bake the Base
Place the pan in the preheated oven and bake for about 10 minutes. The base should start to firm up and turn a light golden color. This step is important because it gives the base a bit of structure before adding the caramel and chocolate layers.
Step 4: Prepare the Caramel Sauce
While the base is baking, it’s time to make the luscious caramel sauce. In a separate microwave-safe bowl, add the caramel squares, heavy cream, and a pinch of salt (if desired). Microwave the mixture in 60-second intervals, stirring after each burst, until the caramels are fully melted and the sauce is smooth. This should take about 4 to 5 minutes in total.
Alternatively, you can melt the caramels and cream together in a saucepan over medium-low heat, stirring constantly to prevent the caramel from burning. Either method works, so choose whichever you find easiest.
Step 5: Add Chocolate Chips
Once the base is done baking, remove the pan from the oven and sprinkle the chocolate chips or chunks evenly over the warm base. Then, carefully pour the hot caramel sauce over the chocolate. The caramel will seep into the chocolate, creating a beautiful and gooey layer.
Step 6: Add the Second Oat Layer
Now it’s time for the second oat layer! Take the remaining oat mixture and crumble it evenly over the caramel layer. It doesn’t have to be perfect—just make sure the oat crumble covers the surface of the caramel. This creates that delicious topping that will crisp up in the oven.
Step 7: Bake Again
Return the pan to the oven and bake for another 15 to 18 minutes. You’ll know the Carmelitas are done when the edges are lightly browned and the center is bubbling slightly. Don’t over-bake, as this can make the bars dry. Keep a close eye on them to get the perfect texture.
Step 8: Cool Completely
This is the hardest part—waiting! After baking, allow the Carmelitas to cool completely in the pan before slicing. The caramel needs time to firm up, and if you try to cut into them too soon, the caramel will be too runny. Let the bars cool at room temperature for about 4 hours, or you can speed up the process by placing the pan in the fridge for a couple of hours.
Beginner Tips and Notes
As a beginner baker, it’s always helpful to know a few tricks to ensure your Carmelitas turn out perfectly:
- Don’t skip the cooling time: The caramel will firm up as it cools, and it’s important to give it time to do so. If you don’t wait, the bars will be a sticky mess when you cut into them.
- Use a sharp knife: When it’s time to slice, make sure to use a sharp knife. This will give you clean, neat cuts that show off the beautiful layers.
- Be careful when melting caramel: Whether you use the microwave or stovetop, be sure to melt the caramel slowly. If you rush it, the caramel could scorch, which will affect the taste.
- Add nuts for extra crunch: If you enjoy a bit of crunch in your desserts, try adding some chopped walnuts or pecans to the oat layer. It adds texture and a wonderful nutty flavor.
Serving Suggestions
These Carmelitas are incredible on their own, but you can elevate them with a few simple additions:
- Serve with ice cream: A scoop of vanilla ice cream makes the perfect pairing with these warm, gooey bars. The cool ice cream complements the warm caramel beautifully.
- Top with extra caramel: For those who just can’t get enough caramel, drizzle a little extra caramel sauce on top of each bar before serving.
- Enjoy with a warm beverage: Pair these bars with a cup of coffee, hot chocolate, or even tea for a comforting treat.
Storing Your Carmelitas
If you somehow have leftovers (though that’s unlikely!), you can store the Carmelitas in an airtight container at room temperature for up to 3 days. For longer storage, keep them in the fridge for up to a week. If you want to keep them for even longer, they freeze beautifully! Just wrap them tightly in foil or plastic wrap and store them in a freezer-safe container for up to 3 months.

Conclusion
Making Carmelitas is a fun and rewarding experience, and I’m sure once you try this recipe, you’ll find yourself making these bars over and over again. With their irresistible combination of caramel, oats, and chocolate, these bars are a perfect treat for any occasion. Plus, they’re incredibly easy to make, even for beginners! I hope this recipe inspires you to get into the kitchen and enjoy baking. Don’t forget to share your results in the comments below—I’d love to hear how your Carmelitas turn out! Happy baking!


