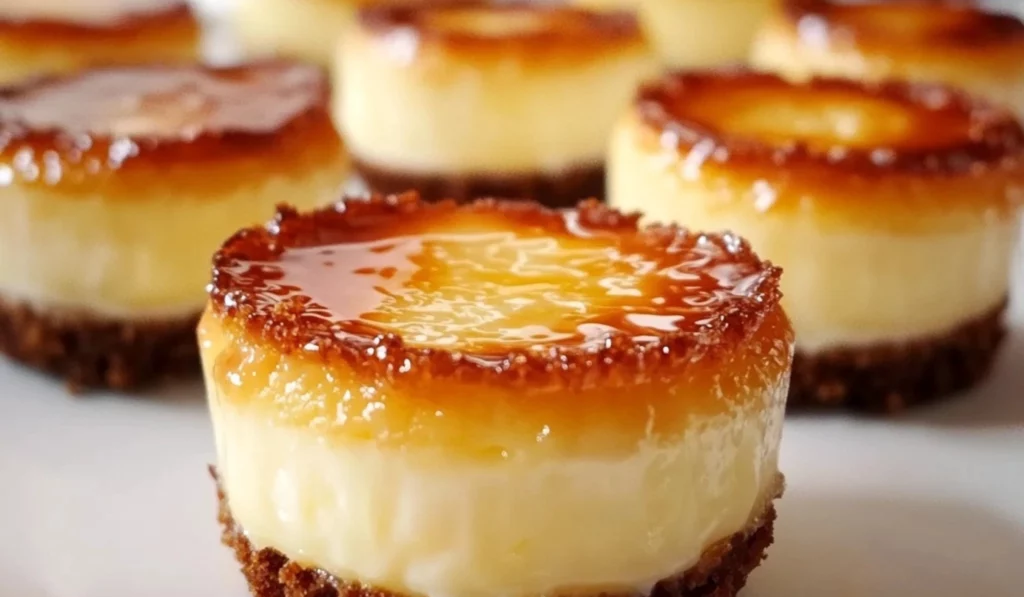
Imagine a delicate, creamy cheesecake, perfectly portioned into mini delights, topped with a crisp, caramelized sugar crust that cracks satisfyingly with each bite. That’s the magic of Mini Crème Brûlée Cheesecakes. I remember the first time I made these for a small gathering. I was looking for a dessert that was both elegant and approachable, something that would impress without being overly complicated. These mini cheesecakes were a hit! The combination of the smooth cheesecake and the crunchy brûlée topping was a textural and flavor sensation. This recipe is perfect for beginner cooks because it breaks down the cheesecake-making process into simple, manageable steps, and the mini format makes it less intimidating than a full-sized cheesecake. You’ll learn the basics of creating a graham cracker crust, blending a smooth cheesecake filling, and mastering the art of caramelizing sugar with a kitchen torch (or even without one!). Plus, these mini cheesecakes are perfect for portion control and are ideal for parties or individual desserts.

Mini Crème Brûlée Cheesecakes: A Decadent Delight for Beginner Bakers
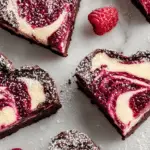
These Mini Crème Brûlée Cheesecakes are creamy, rich desserts with a crisp, caramelized sugar topping. Perfect for beginner bakers, offering individual portions of classic flavor.
- Total Time: 2 hours 45 minutes (including chilling)
- Yield: 12 mini cheesecakes 1x
Ingredients
- 1 cup graham cracker crumbs
- 3 tablespoons melted butter
- 2 tablespoons granulated sugar (crust)
- 16 oz cream cheese, softened
- ½ cup granulated sugar (filling)
- 2 large eggs
- 1 teaspoon vanilla extract
- ¼ cup heavy cream
- ¼ cup granulated sugar (topping)
Instructions
- Preheat and Prep: Preheat your oven to 325°F (163°C). Line a muffin tin with cupcake liners for easy removal and presentation. Preheat the oven for at least 15 minutes. Use an oven thermometer to verify the temperature. Use cupcake liners. Use a muffin tin. Beginner Note: Preheat the oven thoroughly for even baking.
- Make the Crust: In a medium bowl, combine the graham cracker crumbs, melted butter, and 2 tablespoons of sugar. Press this mixture firmly into the bottom of each cupcake liner to create the crust. Bake for about 5 minutes, just until set, then set aside. Press the crust firmly and evenly for a solid base. Bake until the edges are lightly golden. Use a medium mixing bowl. Use a spoon or your fingers to press the crust. Use a timer. Beginner Note: Press the crust firmly and evenly for a sturdy base.
- Prepare the Cheesecake Filling: In a large bowl, beat the softened cream cheese and ½ cup of sugar until smooth and creamy. Add the eggs, one at a time, beating well after each addition. Stir in the vanilla extract and heavy cream until everything is fully combined and creamy. Use a hand mixer or stand mixer for a smooth filling. Beat until no lumps remain. Add eggs one at a time to ensure they are fully incorporated. Use a large mixing bowl. Use a hand mixer or stand mixer. Use a spatula to scrape the sides of the bowl. Beginner Note: Beat the cream cheese and sugar until completely smooth.
- Fill and Bake: Pour the cheesecake batter over the prepared crusts, filling each liner about three-quarters full. Bake for 18-20 minutes, or until the cheesecakes are set but still slightly jiggly in the center. Do not overfill the liners. Bake until the edges are set and the center jiggles slightly. Overbaking can result in a dry cheesecake. Use a spoon or a small scoop to fill the liners. Use a timer. Beginner Note: Bake until the edges are set and the center jiggles slightly.
- Cool and Chill: Allow the cheesecakes to cool to room temperature, then transfer them to the refrigerator to chill for at least 2 hours or overnight. Chilling is crucial for setting the cheesecake. Allow them to cool completely before chilling to prevent condensation. Use a cooling rack. Use a refrigerator. Beginner Note: Chill the cheesecakes for at least 2 hours, or preferably overnight.
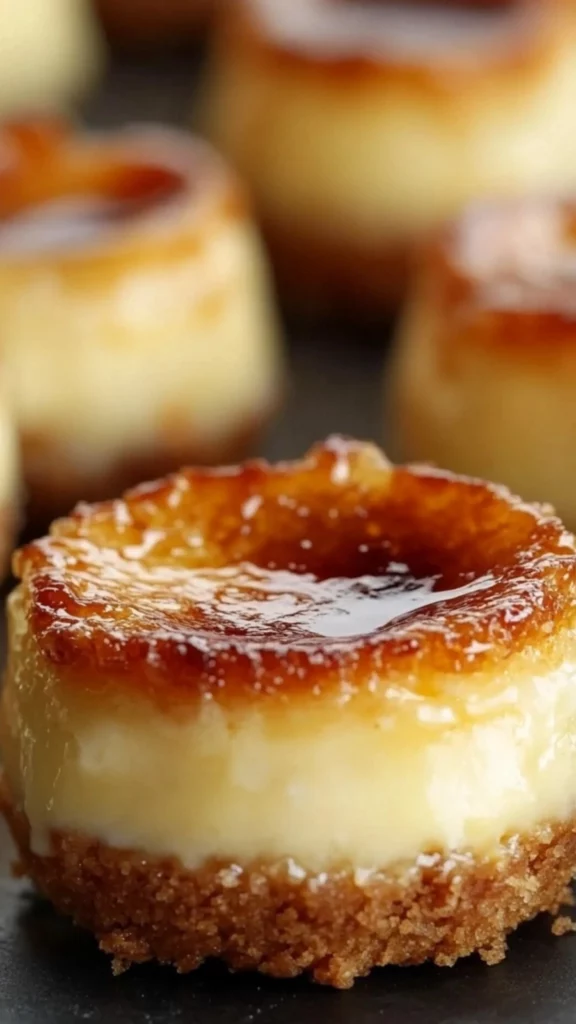
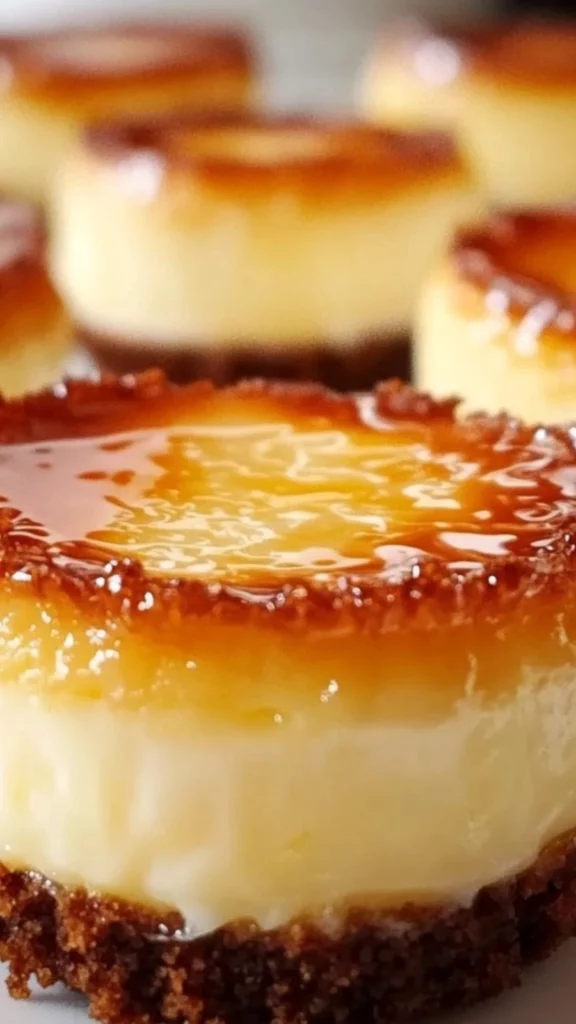
- Create the Brûlée Topping: Once the cheesecakes are chilled, sprinkle about 1 teaspoon of sugar evenly over the top of each one. Using a kitchen torch, carefully caramelize the sugar until it turns golden and forms a crispy layer. Sprinkle the sugar evenly for a uniform brûlée. Use a kitchen torch for best results. If you don’t have a torch, you can broil them in the oven for a few minutes, watching closely to prevent burning. Use a kitchen torch or an oven broiler. Use a small sieve or a spoon to sprinkle the sugar. Beginner Note: Caramelize the sugar until it is golden brown and crispy.
- Serve: Your Mini Crème Brûlée Cheesecakes are now ready to serve! Serve immediately after brûléeing for the best texture. Use a serving plate. Beginner Note: Serve the cheesecakes immediately after brûléeing for the best texture.
Notes
- Soften cream cheese fully.
- Don’t overmix batter.
- Chill well before brûléeing.
- Even sugar layer for brûlée.
- Prep Time: 20 minutes
- Cook Time: 25 minutes
- Category: Dessert
- Method: Baking, Chilling, Brûléeing, Mixing
- Cuisine: American
If you’re looking for a dessert that’s both impressive and easy to make, Mini Crème Brûlée Cheesecakes are the perfect choice. It’s a culinary journey that’s accessible to everyone, regardless of their baking experience. This recipe also offers a great opportunity to learn about the science of baking cheesecakes, the importance of chilling, and the fun of creating a brûlée topping. This recipe also helps build confidence in baking, showing that even with simple steps, a beautiful and delicious dessert is achievable. It also introduces the concept of using a kitchen torch, a tool that can add a professional touch to many desserts.
Ingredients and Preparation: A Symphony of Sweetness
This recipe uses readily available ingredients, making it easy for even the most novice cooks to assemble.
For the Crust:
- 1 cup graham cracker crumbs – Alternative: You can use digestive biscuits, shortbread cookies, or gluten-free graham crackers. Graham cracker crumbs provide a sturdy base. Use a food processor or a zip-top bag and rolling pin to crush the crackers. Use a measuring cup for accuracy. Use a spoon to fill the measuring cup. Use a leveler to level the crumbs.
- 3 tablespoons melted butter – Alternative: You can use coconut oil or a dairy-free butter substitute. Melted butter binds the crust ingredients. Melt the butter in the microwave or on the stovetop. Use a measuring spoon for accuracy. Use a microwave-safe bowl or a small saucepan. Use a spoon to measure the melted butter.
- 2 tablespoons granulated sugar – Alternative: You can use brown sugar for a richer flavor. Sugar adds sweetness to the crust. Use a measuring spoon for accuracy. Use a sugar container. Use a spoon to measure the sugar.
For the Cheesecake Filling:
- 16 oz cream cheese, softened – Alternative: You can use Neufchâtel cheese, but cream cheese provides a richer flavor. Softened cream cheese ensures a smooth filling. Allow the cream cheese to come to room temperature for at least 30 minutes. Use a measuring scale for accuracy. Use a cream cheese package. Use a spoon to measure the cream cheese.
- ½ cup granulated sugar – Alternative: You can use caster sugar for a finer texture. Sugar sweetens the filling. Use a measuring cup for accuracy. Use a sugar container. Use a spoon to measure the sugar.
- 2 large eggs – Alternative: You can use 3 small eggs. Eggs bind the filling and add richness. Use fresh eggs. Crack the eggs into a separate bowl before adding them to the mixture. Use an egg carton. Use a small bowl to crack the eggs.
- 1 teaspoon vanilla extract – Alternative: You can use vanilla bean paste or almond extract. Vanilla extract adds flavor to the filling. Use a measuring spoon for accuracy. Use a vanilla extract bottle. Use a spoon to measure the vanilla extract.
- ¼ cup heavy cream – Alternative: You can use half-and-half or full-fat coconut cream. Heavy cream adds richness and creaminess to the filling. Use a measuring cup for accuracy. Use a cream carton. Use a liquid measuring cup.
For the Brûlée Topping:
- ¼ cup granulated sugar – Alternative: You can use turbinado sugar for a coarser texture and deeper caramel flavor. Sugar caramelizes to create the brûlée topping. Use a measuring cup for accuracy. Use a sugar container. Use a spoon to measure the sugar.
Step-by-Step Instructions: Creating Your Mini Crème Brûlée Cheesecake Masterpiece
These easy-to-follow instructions will guide you through each step of creating your delicious Mini Crème Brûlée Cheesecakes:
- Preheat and Prep: Preheat your oven to 325°F (163°C). Line a muffin tin with cupcake liners for easy removal and presentation. Preheat the oven for at least 15 minutes. Use an oven thermometer to verify the temperature. Use cupcake liners. Use a muffin tin. Beginner Note: Preheat the oven thoroughly for even baking.
- Make the Crust: In a medium bowl, combine the graham cracker crumbs, melted butter, and 2 tablespoons of sugar. Press this mixture firmly into the bottom of each cupcake liner to create the crust. Bake for about 5 minutes, just until set, then set aside. Press the crust firmly and evenly for a solid base. Bake until the edges are lightly golden. Use a medium mixing bowl. Use a spoon or your fingers to press the crust. Use a timer. Beginner Note: Press the crust firmly and evenly for a sturdy base.
- Prepare the Cheesecake Filling: In a large bowl, beat the softened cream cheese and ½ cup of sugar until smooth and creamy. Add the eggs, one at a time, beating well after each addition. Stir in the vanilla extract and heavy cream until everything is fully combined and creamy. Use a hand mixer or stand mixer for a smooth filling. Beat until no lumps remain. Add eggs one at a time to ensure they are fully incorporated. Use a large mixing bowl. Use a hand mixer or stand mixer. Use a spatula to scrape the sides of the bowl. Beginner Note: Beat the cream cheese and sugar until completely smooth.
- Fill and Bake: Pour the cheesecake batter over the prepared crusts, filling each liner about three-quarters full. Bake for 18-20 minutes, or until the cheesecakes are set but still slightly jiggly in the center. Do not overfill the liners. Bake until the edges are set and the center jiggles slightly. Overbaking can result in a dry cheesecake. Use a spoon or a small scoop to fill the liners. Use a timer. Beginner Note: Bake until the edges are set and the center jiggles slightly.
- Cool and Chill: Allow the cheesecakes to cool to room temperature, then transfer them to the refrigerator to chill for at least 2 hours or overnight. Chilling is crucial for setting the cheesecake. Allow them to cool completely before chilling to prevent condensation. Use a cooling rack. Use a refrigerator. Beginner Note: Chill the cheesecakes for at least 2 hours, or preferably overnight.
- Create the Brûlée Topping: Once the cheesecakes are chilled, sprinkle about 1 teaspoon of sugar evenly over the top of each one. Using a kitchen torch, carefully caramelize the sugar until it turns golden and forms a crispy layer. Sprinkle the sugar evenly for a uniform brûlée. Use a kitchen torch for best results. If you don’t have a torch, you can broil them in the oven for a few minutes, watching closely to prevent burning. Use a kitchen torch or an oven broiler. Use a small sieve or a spoon to sprinkle the sugar. Beginner Note: Caramelize the sugar until it is golden brown and crispy.
- Serve: Your Mini Crème Brûlée Cheesecakes are now ready to serve! Serve immediately after brûléeing for the best texture. Use a serving plate. Beginner Note: Serve the cheesecakes immediately after brûléeing for the best texture.
Beginner Tips and Notes: Your Cheesecake-Making Guide
Even simple recipes have a few tricks to make them even better:
- Soften Cream Cheese: Softened cream cheese is crucial for a smooth filling. Allow the cream cheese to come to room temperature for at least 30 minutes.
- Don’t Overmix: Overmixing can incorporate too much air and cause the cheesecake to crack. Mix until just combined.
- Use Room Temperature Eggs: Room temperature eggs incorporate better into the batter, creating a smoother filling.
- Chill Thoroughly: Chilling is essential for setting the cheesecake and developing its flavor. Chill for at least 2 hours, or preferably overnight.
Storage Tips for Leftovers:
Store leftover Mini Crème Brûlée Cheesecakes in an airtight container in the refrigerator for up to 3 days. The brûlée topping may soften over time, but the cheesecake will still be delicious. Use an airtight container that is the appropriate size for the amount of leftover cheesecakes. Use parchment paper to separate layers of cheesecakes. Use a refrigerator that is clean and organized.
Conclusion: A Sweet, Sophisticated, and Simple Dessert for Home Bakers
These Mini Crème Brûlée Cheesecakes are a delightful and impressive dessert that’s perfect for beginner bakers. They’re a fantastic way to learn the basics of cheesecake making and create a delicious treat that’s sure to impress. I encourage you to try this recipe and make it your own. Don’t be afraid to experiment with different toppings and garnishes to create your perfect cheesecake masterpiece. Share your culinary creations and experiences in the comments below – I’d love to see your variations! This easy and versatile recipe is a game-changer for casual gatherings, holiday desserts, or any time you need a sweet and satisfying treat. It’s a flavorful way to get a delicious and impressive dessert on the table without any fuss. And the best part? It’s so easy to customize! You can adjust the toppings to your liking, and even make them ahead of time.
These Mini Crème Brûlée Cheesecakes are more than just a recipe; they’re an experience. It’s a celebration of flavor, texture, and the joy of creating a delicious and satisfying treat. It’s a perfect blend of creamy cheesecake and crunchy brûlée topping, a delightful way to nourish your body and your soul. It’s a testament to the fact that baking doesn’t have to be complicated or intimidating; it can be fun, creative, and incredibly rewarding. It’s a reminder that even the simplest ingredients, when combined with a little creativity and love, can create something truly special. It’s a chance to explore new flavors and create your own cheesecake masterpieces. It’s an invitation to gather around the table with loved ones and share a treat that’s both comforting and delicious. So, what are you waiting for? Get baking and create some cheesecake magic!