
I remember the first time I tried a cheesecake parfait. It was at a summer picnic, and the layers of creamy filling, crunchy graham crackers, and sweet cherry pie filling were a delightful surprise. The combination of textures and flavors was simply irresistible. This No-Bake Cheesecake Parfait recipe brings that delightful experience into your own kitchen, and it’s surprisingly easy to make. These parfaits are perfect for beginner cooks. They require no baking, minimal preparation, and use readily available ingredients. They’re a guaranteed crowd-pleaser and a delightful treat for any occasion. If you’re looking for an easy, indulgent, and classic dessert, these cheesecake parfaits are your perfect solution. They offer a delightful balance of creamy, sweet, and crunchy textures, making them a perfect treat for any gathering. It’s a fantastic addition to your repertoire of quick and healthy meals, especially when you’re craving something sweet without the fuss.

No-Bake Cheesecake Parfaits: A Sweet Symphony of Simplicity
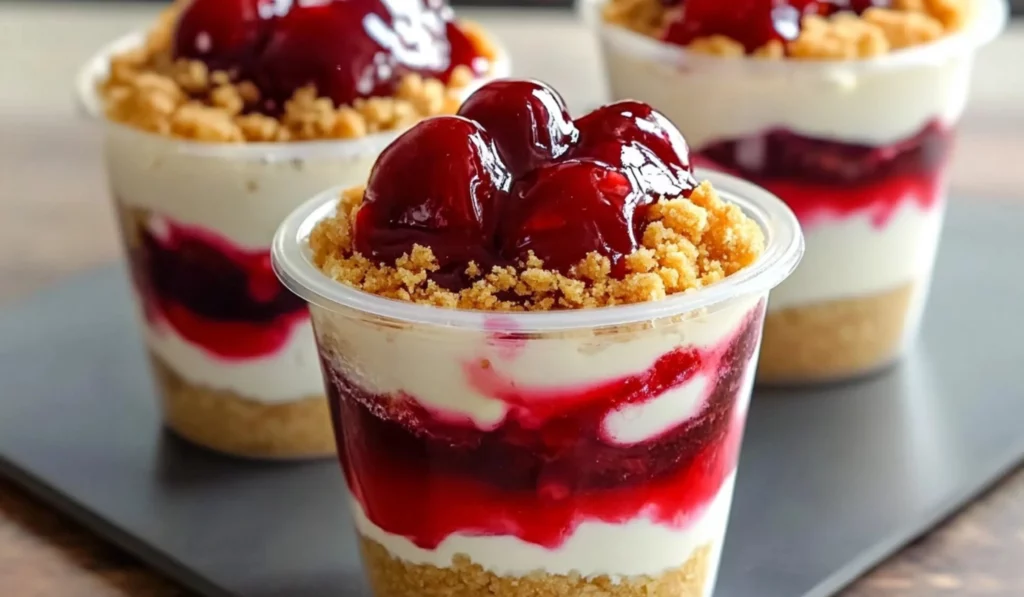
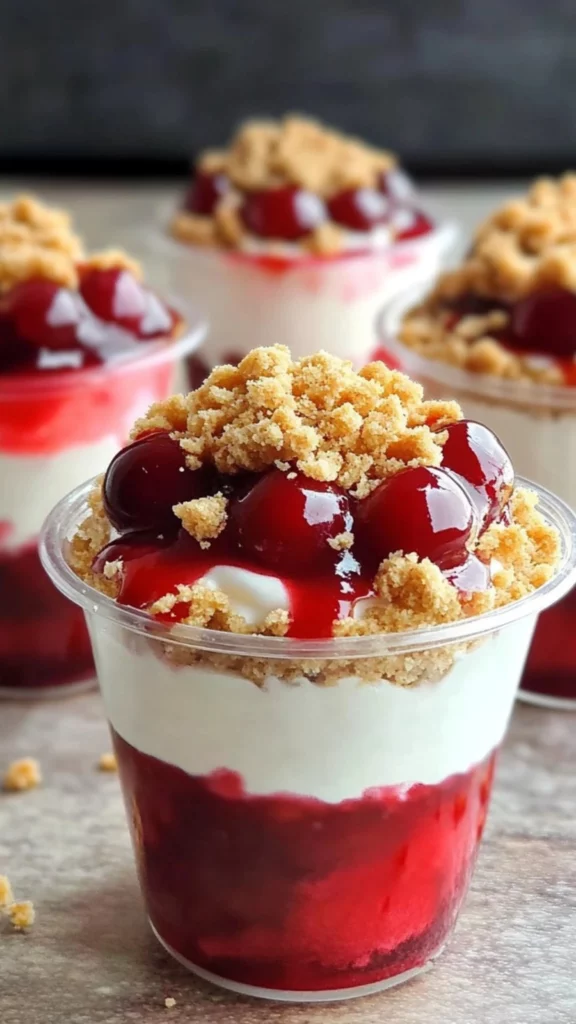
No-Bake Cheesecake Parfaits feature creamy cheesecake filling, graham cracker crust, and cherry pie filling. It’s a simple, layered dessert perfect for beginner cooks.
- Total Time: 15 minutes (plus chilling time)
- Yield: 6 servings 1x
Ingredients
- 1 ½ cups finely crushed graham cracker crumbs
- 3 tablespoons granulated sugar
- 7 tablespoons melted butter
- 1 8-ounce package cream cheese, softened
- 1 14-ounce can sweetened condensed milk
- ⅓ cup freshly squeezed lemon juice
- 1 teaspoon vanilla extract
- 1 21-ounce can cherry pie filling
Instructions
-
Prepare the Crust: In a small mixing bowl, combine the graham cracker crumbs, granulated sugar, and melted butter. Mix well until the crumbs are evenly coated. Setting aside ensures the crust is ready when needed.
-
Prepare the Cheesecake Filling: In a medium mixing bowl, beat the softened cream cheese with an electric mixer on medium speed until smooth. Beating until smooth ensures a creamy filling.
-
Add Sweetened Condensed Milk: Beat in the sweetened condensed milk until combined. Mixing thoroughly ensures a smooth and consistent filling.
-
Add Lemon Juice and Vanilla: Add the freshly squeezed lemon juice and vanilla extract, and stir well. Stirring well ensures even distribution of flavor.
-
Assemble the Parfaits: Set 6 plastic, 9-ounce punch cups on the counter or a cookie sheet. Using punch cups or similar glassware allows for clear layering.
-
Add Crust Layer: Scoop 2 tablespoons of the graham cracker crumb mixture into the bottom of each cup and press down lightly. Pressing lightly creates a firm base.
-
Add Cheesecake Layer: Add 3 tablespoons of the cheesecake mixture to each cup and spread out evenly. Spreading evenly ensures consistent layers.
-
Add Cherry Layer (First Half): Evenly distribute half of the cherry pie filling between the 6 cups, reserving the other half for another layer. Reserving half ensures layers are balanced.
-
Add Crust Layer (Second Time): Sprinkle 2 tablespoons of the graham cracker crumb mixture over the cherry layer. Adding another crust layer adds texture.
-
Add Cheesecake Layer (Second Time): Divide the remaining cheesecake mixture between the 6 cups and spread out evenly. Using the remaining mixture completes the cheesecake filling.
-
Add Cherry Layer (Second Half): Divide the reserved cherry pie filling evenly between the 6 cups, then sprinkle the top with a little graham cracker crumb mixture. Adding the final cherry layer and crumbs completes the parfaits.
-
Serve or Chill: Serve immediately or chill for up to 24 hours before serving. Chilling allows the flavors to meld and the parfaits to set.
Notes
- Use softened cream cheese for a smooth filling.
- Press graham cracker crust lightly for a firm base.
- Chill parfaits for a firmer consistency.
- Get creative with pie filling flavors.
- Prep Time: 15 minutes
- Cook Time: 0 minutes
- Category: Dessert
- Method: Mixing, Assembling, Chilling
- Cuisine: American
Ingredients and Preparation: Your Parfait Pantry – The Building Blocks of Flavor
This No-Bake Cheesecake Parfait is wonderfully simple, but the quality of the ingredients matters. Remember, the key to stress-free dessert making is having all your ingredients and tools ready before you start assembling. This preparation ensures a smooth and enjoyable process. It also prevents you from forgetting a crucial ingredient mid-assembly.
The Crust: The Crunchy Foundation – The Base of the Parfait:
- 1 ½ cups finely crushed graham cracker crumbs – Provides a crunchy base. Alternatives: You can use other crushed cookies, such as digestive biscuits or Oreos (without the cream filling). Finely crushed crumbs ensure a consistent texture.
- 3 tablespoons granulated sugar – Adds sweetness to the crust. Alternatives: You can use brown sugar for a deeper flavor. Granulated sugar provides a classic sweetness.
- 7 tablespoons melted butter – Binds the crumbs together. Alternatives: You can use coconut oil for a dairy-free option. Melted butter ensures the crust holds its shape.
The Cheesecake Filling: The Creamy Heart – The Soul of the Dessert:
- 1 8-ounce package cream cheese, softened – Provides the creamy texture. Alternatives: You can use a low-fat cream cheese, but the texture may be slightly different. Softened cream cheese is easier to blend.
- 1 14-ounce can sweetened condensed milk – Adds sweetness and creaminess. Alternatives: You can use a sugar substitute for a lower-sugar version, but the texture may change slightly. Sweetened condensed milk creates a rich filling.
- ⅓ cup freshly squeezed lemon juice – Adds a tangy flavor. Alternatives: You can use bottled lemon juice, but fresh is best. Fresh lemon juice adds a bright flavor.
- 1 teaspoon vanilla extract – Enhances the flavor. Alternatives: You can use almond extract or other flavor extracts. Vanilla extract adds a warm aroma.
The Topping: The Sweet Finish – The Crowning Glory:
- 1 21-ounce can cherry pie filling – Provides a sweet and fruity topping. Alternatives: You can use other pie fillings, such as blueberry, strawberry, or apple. Cherry pie filling provides a classic topping.
Step-by-Step Instructions: Your Guide to Parfait Perfection – Easy and Clear
- Prepare the Crust: In a small mixing bowl, combine the graham cracker crumbs, granulated sugar, and melted butter. Mix well until the crumbs are evenly coated. Setting aside ensures the crust is ready when needed.
- Prepare the Cheesecake Filling: In a medium mixing bowl, beat the softened cream cheese with an electric mixer on medium speed until smooth. Beating until smooth ensures a creamy filling.
- Add Sweetened Condensed Milk: Beat in the sweetened condensed milk until combined. Mixing thoroughly ensures a smooth and consistent filling.
- Add Lemon Juice and Vanilla: Add the freshly squeezed lemon juice and vanilla extract, and stir well. Stirring well ensures even distribution of flavor.
- Assemble the Parfaits: Set 6 plastic, 9-ounce punch cups on the counter or a cookie sheet. Using punch cups or similar glassware allows for clear layering.
- Add Crust Layer: Scoop 2 tablespoons of the graham cracker crumb mixture into the bottom of each cup and press down lightly. Pressing lightly creates a firm base.
- Add Cheesecake Layer: Add 3 tablespoons of the cheesecake mixture to each cup and spread out evenly. Spreading evenly ensures consistent layers.
- Add Cherry Layer (First Half): Evenly distribute half of the cherry pie filling between the 6 cups, reserving the other half for another layer. Reserving half ensures layers are balanced.
- Add Crust Layer (Second Time): Sprinkle 2 tablespoons of the graham cracker crumb mixture over the cherry layer. Adding another crust layer adds texture.
- Add Cheesecake Layer (Second Time): Divide the remaining cheesecake mixture between the 6 cups and spread out evenly. Using the remaining mixture completes the cheesecake filling.
- Add Cherry Layer (Second Half): Divide the reserved cherry pie filling evenly between the 6 cups, then sprinkle the top with a little graham cracker crumb mixture. Adding the final cherry layer and crumbs completes the parfaits.
- Serve or Chill: Serve immediately or chill for up to 24 hours before serving. Chilling allows the flavors to meld and the parfaits to set.
Beginner Tips and Notes: Your Kitchen Companion – Helpful Advice and Hacks
- Troubleshooting: Parfait Problems Solved:
- Crumbly Crust: Ensure the graham cracker crumbs are finely crushed and evenly coated with melted butter. Fine crumbs and even coating prevents crumbling.
- Lumpy Filling: Beat the cream cheese until smooth before adding the sweetened condensed milk. Smooth cream cheese prevents lumps.
- Runny Filling: Chill the parfaits for at least an hour to allow the filling to set. Proper chilling sets the filling.
- Uneven Layers: Use a measuring spoon or scoop to ensure even distribution of ingredients. Consistent measurements ensure even layers.
- Prep Efficiency: Time-Saving Strategies:
- Crush Graham Crackers in a Food Processor: Using a food processor saves time and effort. A food processor speeds up the process.
- Soften Cream Cheese at Room Temperature: Softened cream cheese is easier to beat. Room temperature cream cheese blends easily.
- Use Pre-Made Pie Filling: Pre-made pie filling simplifies the process. Pre-made filling saves preparation time.
- Assemble Parfaits in Advance: Assemble the parfaits a few hours before serving to save time. Advance preparation saves time.
- Tool Substitutions: Making Do with What You Have:
- No Food Processor: Use a zip-top bag and a rolling pin to crush the graham crackers. A rolling pin works as an alternative.
- No Electric Mixer: Use a whisk and some elbow grease to beat the cream cheese. Manual mixing is an alternative.
- No Punch Cups: Use clear glasses or mason jars for assembling the parfaits. Clear glasses work as serving dishes.
- No Measuring Spoons: Use a regular spoon or scoop, but try to be consistent with the amounts. Consistent amounts are important.
- Flavor Boosters: Adding Your Personal Touch:
- Add Lemon Zest: A teaspoon of lemon zest to the cheesecake filling enhances the lemon flavor. Lemon zest intensifies lemon flavor.
- Use Different Pie Fillings: Experiment with other pie fillings, such as blueberry, strawberry, or apple. Variety adds interest.
- Add Chocolate Chips: Sprinkle chocolate chips between the layers for added sweetness. Chocolate chips add sweetness.
- Use Different Extracts: Use other extracts, such as almond extract or peppermint extract, for different flavor profiles. Extracts add unique flavors.
Serving Suggestions: Elevating Your Parfait Experience
These No-Bake Cheesecake Parfaits are a delightful treat on their own, but you can enhance the experience with complementary sides and toppings.
- Sides: A Perfect Pairing:
- Whipped Cream: Top with a dollop of fresh whipped cream for added lightness. Whipped cream adds lightness.
- Fresh Berries: Serve with fresh berries like strawberries or raspberries for a fruity contrast. Berries add a refreshing contrast.
- Chocolate Sauce: Drizzle chocolate sauce over the top for a decadent touch. Chocolate sauce adds richness.
- Caramel Sauce: Drizzle caramel sauce over the top for added sweetness. Caramel sauce adds sweetness.
- Toppings: A Flavor Boost:
- Crushed Nuts: Add crushed nuts like pecans or walnuts for added texture. Nuts add a crunchy texture.
- Cookie Crumbs: Sprinkle cookie crumbs on top for added crunch. Cookie crumbs add crunchiness.
- Sprinkles: Add sprinkles for a festive and colorful touch. Sprinkles add color.
- Chocolate Shavings: Sprinkle chocolate shavings on top for a decadent touch. Chocolate shavings add richness.
- Storage: Keeping Leftovers Fresh:
- Refrigerate: Store leftover parfaits in an airtight container in the refrigerator for up to 3 days. Proper storage maintains freshness.
- Do Not Freeze: Do not freeze the parfaits, as the texture of the filling may change. Freezing alters the texture.
- Assemble Shortly Before Serving: If possible, assemble the parfaits shortly before serving to maintain the texture of the crust. Fresh assembly maintains crust texture.

A Sweet Ending: Sharing the Joy of No-Bake Cheesecake Parfaits
These No-Bake Cheesecake Parfaits are a testament to how easy and delicious a homemade dessert can be. They’re perfect for potlucks, picnics, or any time you want a sweet treat. So, gather your ingredients, follow the instructions, and get ready to enjoy a creamy, crunchy, and fruity dessert! Don’t be afraid to experiment with different variations and add your personal touch. And most importantly, have fun! We’d love to see your No-Bake Cheesecake Parfait creations! Share your photos and any variations you try in the comments below. Happy parfait making!
What other quick, easy, and flavorful desserts would you like to see us explore? Are you interested in learning more about different dessert techniques or perhaps mastering other culinary skills? Let us know in the comments! We’re here to support you on your culinary journey, one delicious bite at a time. We can’t wait to hear about your culinary triumphs! Share your photos and tag us in your creations – we’re excited to see what you make! We’re confident that this recipe will become a regular part of your dessert repertoire. It’s a guaranteed way to bring some sweet, creamy, and crunchy goodness to your table. Enjoy!


