
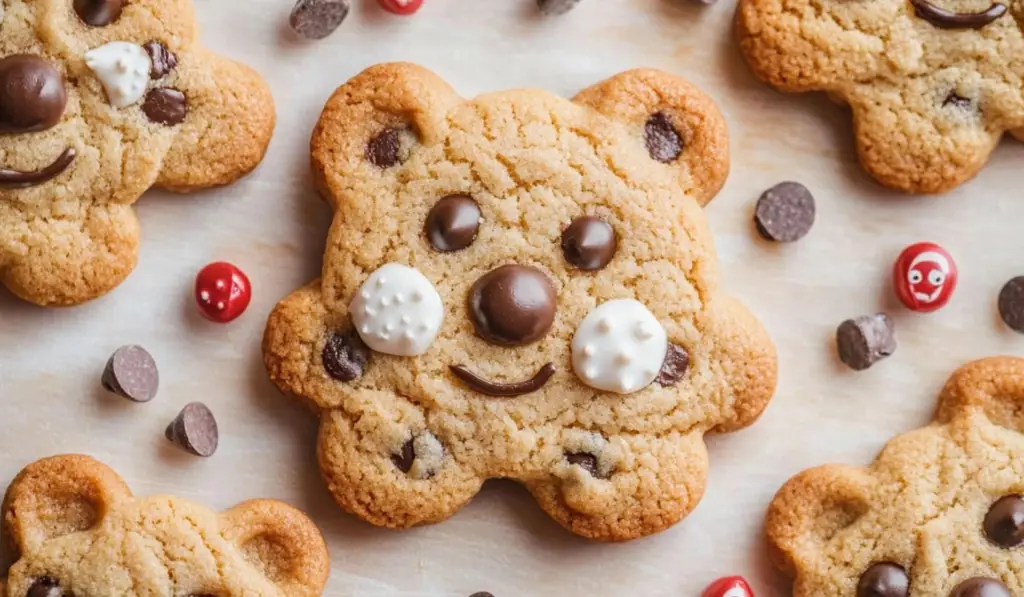
Who can resist a soft, chewy chocolate chip cookie, especially one that is transformed into an adorable teddy bear shape? These Teddy Bear Chocolate Chip Cookies are not only delicious but also bring a touch of whimsy to your kitchen. The classic chocolate chip cookie meets kawaii baking with this fun and easy-to-make treat. These cookies are wonderfully soft with a slight chew, perfectly balanced with the right amount of sweetness and a subtle saltiness. But the best part? They come to life with cute little faces and blushing cheeks, thanks to a simple but effective icing recipe. Perfect for all ages, these cookies are ideal for birthdays, tea parties, or any occasion that calls for a little extra joy. Whether you’re baking for a special event or just looking to brighten your day, these teddy bear cookies are sure to put a smile on your face.
Print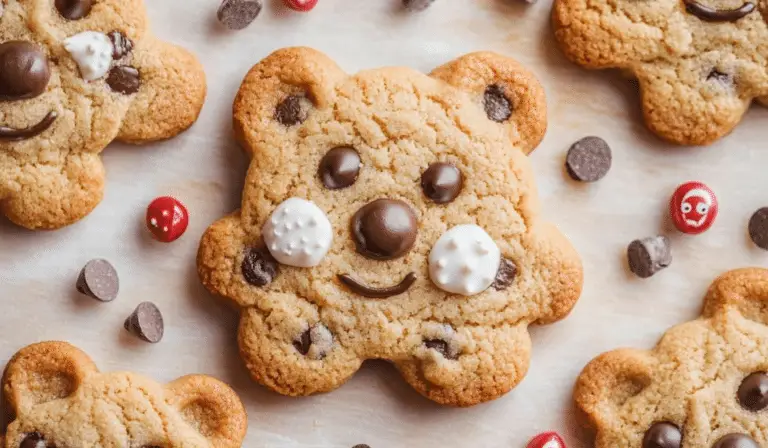
Teddy Bear Chocolate Chip Cookies (with Easy Icing Recipe!)
Who can resist a soft, chewy chocolate chip cookie, especially one that is transformed into an adorable teddy bear shape? These Teddy Bear Chocolate Chip Cookies are not only delicious but also bring a touch of whimsy to your kitchen. The classic chocolate chip cookie meets kawaii baking with this fun and easy-to-make treat. These cookies are wonderfully soft with a slight chew, perfectly balanced with the right amount of sweetness and a subtle saltiness. But the best part? They come to life with cute little faces and blushing cheeks, thanks to a simple but effective icing recipe. Perfect for all ages, these cookies are ideal for birthdays, tea parties, or any occasion that calls for a little extra joy. Whether you’re baking for a special event or just looking to brighten your day, these teddy bear cookies are sure to put a smile on your face.
- Total Time: 33 minutes
- Yield: 12 bear cookies 1x
Ingredients
Dry Ingredients:
- All-Purpose Flour (1 ½ cups or 187.5g): The backbone of any cookie, flour provides structure and texture. For the best results, make sure to measure the flour correctly. If using a kitchen scale, weigh it out for accuracy. If using measuring cups, spoon the flour into the cup and level it off for the perfect measurement.
- Baking Powder (¼ tsp or 1g): This leavening agent helps the cookies rise slightly, giving them that soft, chewy texture. Be sure not to overuse, as it can cause a bitter taste.
- Baking Soda (½ tsp or 2g): A must for chocolate chip cookies, baking soda helps the dough spread as it bakes, creating the perfect cookie texture. It also contributes to the cookies’ lightness.
- Table Salt (¾ tsp or 4.5g): Salt is a key flavor enhancer, balancing the sweetness of the sugars and chocolate. It’s a small ingredient, but it plays a big role in rounding out the flavors.
Wet Ingredients:
- Unsalted Butter (½ cup or 113.5g, melted and cooled): Butter provides moisture and richness, making the cookies soft and tender. It’s essential to melt the butter and allow it to cool slightly before mixing it into the dough to ensure the perfect consistency.
- Brown Sugar (⅓ cup or 73.33g, packed): Brown sugar adds a hint of caramel flavor and contributes to the chewiness of the cookies. Its moisture also helps create a soft texture.
- Granulated Sugar (½ cup or 100g): Granulated sugar sweetens the dough and helps the cookies spread during baking. Together with brown sugar, it creates the perfect balance of sweetness and texture.
- Egg (1): Eggs provide structure and moisture to the dough. They help bind all the ingredients together and contribute to the cookies’ soft texture.
- Vanilla Extract (1 tsp or 4g): Vanilla adds depth and warmth to the flavor of the cookies. A splash of vanilla is the secret ingredient that makes chocolate chip cookies irresistible.
Mix-Ins:
- Chocolate Chips (1 cup or 180g): The star of the show! Chocolate chips melt during baking, creating gooey pockets of rich chocolate throughout each cookie. You can use semi-sweet or milk chocolate chips, depending on your preference.
Decorations for Face:
- Powdered Sugar (4 tbsp or 32g): This ingredient is used to make the icing for the teddy bear faces. It’s the key to achieving a smooth, pipeable consistency.
- Water (1-2½ tsp or 7.5-18.75g): Water is gradually added to the powdered sugar to form the icing. Adjust the amount based on the desired thickness of the icing.
- Pink Food Coloring: Used to add a blush to the teddy bear faces, giving them a cute and playful look.
- Black Food Coloring: For the eyes and nose of the teddy bear, black food coloring is a must to create striking contrast against the white icing.
Instructions
Making the Cookie Dough:
- Prepare Dry Ingredients: In a medium bowl, whisk together the dry ingredients: flour, baking powder, baking soda, and salt. Make sure they’re evenly mixed to avoid clumps in the dough.
- Mix Wet Ingredients: In a large bowl, melt the butter and allow it to cool slightly. Using a silicone spatula, combine the melted butter with the brown sugar and granulated sugar. Mix until smooth and fully incorporated. Add the egg and vanilla extract, stirring until the mixture is smooth and well-blended.
- Combine Dry and Wet Ingredients: Gradually add the dry ingredients to the wet mixture. Stir with the silicone spatula until everything is well combined. Be careful not to overmix, as this can result in dense cookies.
- Add Chocolate Chips: Once the dough is ready, fold in the chocolate chips. Make sure they are evenly distributed throughout the dough.
Scoop & Bake the Cookies:
- Preheat the Oven: Place the oven rack in the middle and preheat the oven to 350°F (177°C). Line two baking sheets with parchment paper or silicone mats to prevent the cookies from sticking.
- Shape the Cookies: Use a medium cookie scoop (about 2-3 tablespoons each) to portion out the dough. Place the scooped dough onto the lined baking sheets, spacing them about 3-4 inches apart. For the bear ears, place a small ball (about 1 tsp) of dough on the top left and right sides of each cookie.
- Bake: Bake the cookies for 11-13 minutes, or until the edges are golden brown and the centers are set. The cookies will continue to firm up as they cool. Let them cool on the baking sheet for about 5 minutes before transferring them to a wire rack to cool completely.
- Shape (Optional): If you prefer rounder teddy bears, gently press the edges of the cookies with a silicone spatula while they’re still hot. This will help shape them into a more rounded, bear-like appearance.
Decorate the Cookies:
- Make the Icing: In a small bowl, combine the powdered sugar and a little water, mixing until you achieve a smooth, pipeable icing consistency. Add water gradually—start with ¼ tsp at a time. If the icing is too thick, add more water; if it’s too thin, add more powdered sugar. Divide the icing into three parts: one for the snout and ears, one for the blush, and one for the eyes and nose.
- Add Color: To the first portion of icing, add a drop of pink food coloring and mix until well combined. For the second portion, add black food coloring for the nose and eyes. Leave the last portion of icing white for the snout and ears.
- Pipe the Faces: Using a piping bag (or a toothpick or cookie scribe if you prefer), carefully pipe the white icing onto the cookies to create the snouts and ears. Once the snouts are semi-dry, use the black icing to pipe the eyes and noses. Finally, use the pink icing to add blush to the cheeks.
- Let the Icing Set: Allow the icing to dry completely before serving the cookies. This ensures that the faces hold their shape and don’t smudge.
Notes
- Flavor Variations: While the chocolate chip version is classic, you can easily swap in different mix-ins to suit your tastes. Try adding white chocolate chips, peanut butter chips, or even crushed candies for a fun twist.
- Cookie Shapes: If you’re short on time or prefer a more traditional cookie, you can skip the bear faces and simply shape the cookies into rounds. These still taste delicious and have that same soft, chewy texture.
- Decorating Tips: If you’re not familiar with piping, you can also use a toothpick or a small scribe tool to draw the faces. It takes a little more time, but it’s an easy way to create the bear faces without piping bags.
- Prep Time: 15 minutes
- Cook Time: 13 minutes
- Category: Dessert
- Method: Baking
- Cuisine: American
- Diet: Vegetarian
Ingredients Breakdown:
Before diving into the baking process, let’s take a closer look at the ingredients that come together to create these charming and irresistible cookies. There are three main components to this recipe: dry ingredients, wet ingredients, and mix-ins. Each one plays an essential role in the overall texture, flavor, and appearance of the cookies.
Dry Ingredients:
- All-Purpose Flour (1 ½ cups or 187.5g): The backbone of any cookie, flour provides structure and texture. For the best results, make sure to measure the flour correctly. If using a kitchen scale, weigh it out for accuracy. If using measuring cups, spoon the flour into the cup and level it off for the perfect measurement.
- Baking Powder (¼ tsp or 1g): This leavening agent helps the cookies rise slightly, giving them that soft, chewy texture. Be sure not to overuse, as it can cause a bitter taste.
- Baking Soda (½ tsp or 2g): A must for chocolate chip cookies, baking soda helps the dough spread as it bakes, creating the perfect cookie texture. It also contributes to the cookies’ lightness.
- Table Salt (¾ tsp or 4.5g): Salt is a key flavor enhancer, balancing the sweetness of the sugars and chocolate. It’s a small ingredient, but it plays a big role in rounding out the flavors.
Wet Ingredients:
- Unsalted Butter (½ cup or 113.5g, melted and cooled): Butter provides moisture and richness, making the cookies soft and tender. It’s essential to melt the butter and allow it to cool slightly before mixing it into the dough to ensure the perfect consistency.
- Brown Sugar (⅓ cup or 73.33g, packed): Brown sugar adds a hint of caramel flavor and contributes to the chewiness of the cookies. Its moisture also helps create a soft texture.
- Granulated Sugar (½ cup or 100g): Granulated sugar sweetens the dough and helps the cookies spread during baking. Together with brown sugar, it creates the perfect balance of sweetness and texture.
- Egg (1): Eggs provide structure and moisture to the dough. They help bind all the ingredients together and contribute to the cookies’ soft texture.
- Vanilla Extract (1 tsp or 4g): Vanilla adds depth and warmth to the flavor of the cookies. A splash of vanilla is the secret ingredient that makes chocolate chip cookies irresistible.
Mix-Ins:
- Chocolate Chips (1 cup or 180g): The star of the show! Chocolate chips melt during baking, creating gooey pockets of rich chocolate throughout each cookie. You can use semi-sweet or milk chocolate chips, depending on your preference.
Decorations for Face:
- Powdered Sugar (4 tbsp or 32g): This ingredient is used to make the icing for the teddy bear faces. It’s the key to achieving a smooth, pipeable consistency.
- Water (1-2½ tsp or 7.5-18.75g): Water is gradually added to the powdered sugar to form the icing. Adjust the amount based on the desired thickness of the icing.
- Pink Food Coloring: Used to add a blush to the teddy bear faces, giving them a cute and playful look.
- Black Food Coloring: For the eyes and nose of the teddy bear, black food coloring is a must to create striking contrast against the white icing.
Step-by-Step Instructions:
Making the Cookie Dough:
- Prepare Dry Ingredients: In a medium bowl, whisk together the dry ingredients: flour, baking powder, baking soda, and salt. Make sure they’re evenly mixed to avoid clumps in the dough.
- Mix Wet Ingredients: In a large bowl, melt the butter and allow it to cool slightly. Using a silicone spatula, combine the melted butter with the brown sugar and granulated sugar. Mix until smooth and fully incorporated. Add the egg and vanilla extract, stirring until the mixture is smooth and well-blended.
- Combine Dry and Wet Ingredients: Gradually add the dry ingredients to the wet mixture. Stir with the silicone spatula until everything is well combined. Be careful not to overmix, as this can result in dense cookies.
- Add Chocolate Chips: Once the dough is ready, fold in the chocolate chips. Make sure they are evenly distributed throughout the dough.
Scoop & Bake the Cookies:
- Preheat the Oven: Place the oven rack in the middle and preheat the oven to 350°F (177°C). Line two baking sheets with parchment paper or silicone mats to prevent the cookies from sticking.
- Shape the Cookies: Use a medium cookie scoop (about 2-3 tablespoons each) to portion out the dough. Place the scooped dough onto the lined baking sheets, spacing them about 3-4 inches apart. For the bear ears, place a small ball (about 1 tsp) of dough on the top left and right sides of each cookie.
- Bake: Bake the cookies for 11-13 minutes, or until the edges are golden brown and the centers are set. The cookies will continue to firm up as they cool. Let them cool on the baking sheet for about 5 minutes before transferring them to a wire rack to cool completely.
- Shape (Optional): If you prefer rounder teddy bears, gently press the edges of the cookies with a silicone spatula while they’re still hot. This will help shape them into a more rounded, bear-like appearance.
Decorate the Cookies:
- Make the Icing: In a small bowl, combine the powdered sugar and a little water, mixing until you achieve a smooth, pipeable icing consistency. Add water gradually—start with ¼ tsp at a time. If the icing is too thick, add more water; if it’s too thin, add more powdered sugar. Divide the icing into three parts: one for the snout and ears, one for the blush, and one for the eyes and nose.
- Add Color: To the first portion of icing, add a drop of pink food coloring and mix until well combined. For the second portion, add black food coloring for the nose and eyes. Leave the last portion of icing white for the snout and ears.
- Pipe the Faces: Using a piping bag (or a toothpick or cookie scribe if you prefer), carefully pipe the white icing onto the cookies to create the snouts and ears. Once the snouts are semi-dry, use the black icing to pipe the eyes and noses. Finally, use the pink icing to add blush to the cheeks.
- Let the Icing Set: Allow the icing to dry completely before serving the cookies. This ensures that the faces hold their shape and don’t smudge.
Variations & Tips:
- Flavor Variations: While the chocolate chip version is classic, you can easily swap in different mix-ins to suit your tastes. Try adding white chocolate chips, peanut butter chips, or even crushed candies for a fun twist.
- Cookie Shapes: If you’re short on time or prefer a more traditional cookie, you can skip the bear faces and simply shape the cookies into rounds. These still taste delicious and have that same soft, chewy texture.
- Decorating Tips: If you’re not familiar with piping, you can also use a toothpick or a small scribe tool to draw the faces. It takes a little more time, but it’s an easy way to create the bear faces without piping bags.
Serving Suggestions:
- Pairing with Drinks: These cookies are perfect with a cup of hot cocoa, milk, or even coffee for an afternoon treat. The sweetness of the cookies pairs wonderfully with a rich beverage.
- Gift Idea: These teddy bear cookies make great gifts. Package them in a cute box or cellophane bag, and they’ll make a charming present for birthdays, holidays, or just because.
- For Parties: Serve these cookies as part of a dessert spread at a party or bake them for a bake sale. Their adorable faces make them a crowd-pleaser, and they’ll surely stand out among other baked goods.

Storage:
Once the cookies have cooled completely, store them in an airtight container at room temperature for up to 5 days. If you’re making these ahead of time, you can freeze the dough (before baking) or the finished cookies for longer storage. Simply freeze the dough balls on a baking sheet, then transfer them to a ziplock bag once frozen. Bake them straight from the freezer, adding a minute or two to the baking time.
Conclusion:
These Teddy Bear Chocolate Chip Cookies are the perfect blend of fun, flavor, and texture. With a soft, chewy base and a simple icing recipe, they come together quickly and are guaranteed to bring smiles to everyone who sees them. Whether you’re a novice baker or an experienced one, this recipe offers a delightful twist on a beloved classic. Plus, with the added charm of the teddy bear faces, these cookies are sure to be a hit with kids and adults alike. Try them today, and enjoy the sweet joy of creating these cute and delicious treats!


