
When you think of nostalgic desserts, few things bring the same joy as a classic Choco Taco. This sweet, crunchy, and creamy dessert combines everything we love about ice cream, chocolate, and waffles, making it the perfect indulgence for a warm day. If you’ve ever had the pleasure of biting into a frozen Choco Taco, you already know how wonderfully satisfying it is. But have you ever tried making them at home? Homemade Choco Tacos elevate the beloved treat to a whole new level of deliciousness and customization.
Print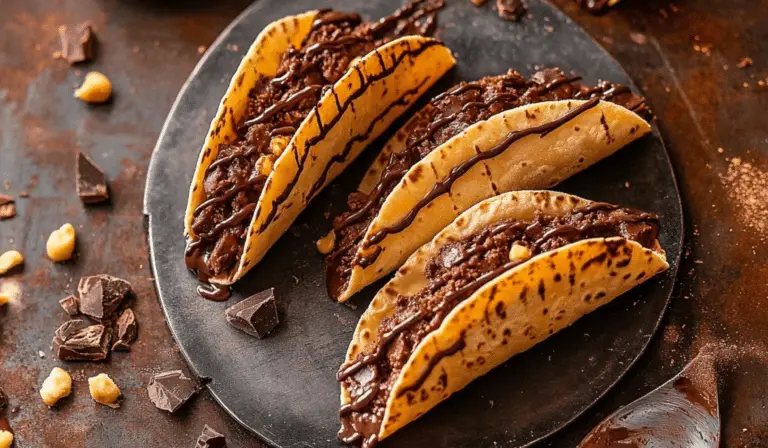
Homemade Choco Tacos: A Nostalgic Summer Treat
When you think of nostalgic desserts, few things bring the same joy as a classic Choco Taco. This sweet, crunchy, and creamy dessert combines everything we love about ice cream, chocolate, and waffles, making it the perfect indulgence for a warm day. If you’ve ever had the pleasure of biting into a frozen Choco Taco, you already know how wonderfully satisfying it is. But have you ever tried making them at home? Homemade Choco Tacos elevate the beloved treat to a whole new level of deliciousness and customization.
- Total Time: 4 hours 55 minutes
- Yield: 8–10 Choco Tacos 1x
Ingredients
Ice Cream Base:
The foundation of this dessert is a creamy, dreamy vanilla ice cream that is no-churn, meaning you don’t need an ice cream maker. This ice cream will be swirled with a rich fudge ripple that provides a perfect balance of sweetness and indulgence.
- 2 cups heavy cream (cold)
- 1 can (14 oz) sweetened condensed milk
- 1 tablespoon vanilla bean paste or 2 teaspoons vanilla extract
- A pinch of salt
Fudge Ripple:
The fudge ripple is the twist that takes this homemade Choco Taco to the next level. It’s a silky smooth and indulgent fudge sauce that’s swirled into the ice cream, creating a ribbon of rich chocolate flavor throughout.
- 2 tablespoons cocoa powder
- 2 tablespoons granulated sugar
- 2 tablespoons heavy cream
- 1 tablespoon unsalted butter
- ½ teaspoon vanilla extract
- A pinch of salt
Waffle Cones:
The waffle cone is, of course, the most important component of a Choco Taco. Making your own cones is simple, and it adds an extra layer of freshness to your dessert. The waffle cones will be soft when freshly made and should be molded into a taco shape before they fully cool to create that signature taco form.
- 2 egg whites
- 3 ½ tablespoons granulated sugar
- 3 ½ tablespoons brown sugar
- ¾ teaspoon vanilla extract
- ⅛ teaspoon salt
- ⅔ cup flour
- 2 tablespoons melted butter
For Coating:
The chocolate and peanut coating is the crowning glory of these Choco Tacos. It adds a satisfying crunch and a layer of rich flavor that pairs perfectly with the creamy ice cream and crispy waffle cone.
- 1 ½ cups chocolate chips
- 1 ½ tablespoons coconut oil
- ¾ cup finely chopped peanuts
Instructions
1. Making the Fudge Ripple:
Start by making the fudge sauce that will swirl through your ice cream. In a small saucepan, whisk together the cocoa powder, sugar, and heavy cream over medium-low heat. Allow the mixture to come to a gentle simmer. Once it starts to heat up, add the unsalted butter and whisk until the butter melts and the mixture becomes smooth and glossy. Afterward, remove the saucepan from the heat and stir in the vanilla extract and a pinch of salt. Set the fudge aside to cool to room temperature while you prepare the ice cream base.
2. Preparing the Ice Cream Base:
The ice cream base is what gives your Choco Tacos that ultra-creamy texture. In a stand mixer (or a hand mixer if you don’t have one), beat the cold heavy cream until stiff peaks form. This process should only take a few minutes. In a separate large bowl, combine the sweetened condensed milk, vanilla bean paste (or vanilla extract), and a pinch of salt. Once the heavy cream is whipped, gently fold about one cup of the whipped cream into the condensed milk mixture. This will help lighten the mixture. Then, fold in the remaining whipped cream until the mixture is completely smooth, making sure there are no lumps. This whipped cream mixture will become your ice cream base.
3. Layering the Ice Cream:
Now comes the fun part: layering the ice cream with the fudge ripple! Start by pouring one-quarter of the ice cream base into a loaf pan or an airtight container. Drizzle one-third of the cooled fudge sauce over the ice cream. Repeat this process, layering the ice cream base and fudge sauce until you use up all the ingredients. Make sure to finish with a layer of ice cream on top. Once layered, freeze the mixture for about three hours, or until the ice cream is firm and set.
4. Making the Waffle Cones:
While the ice cream is freezing, it’s time to make the waffle cones. In a mixing bowl, whisk together the egg whites, granulated sugar, brown sugar, and vanilla extract until the mixture is well combined. Add the salt, then fold in half of the flour. Mix until smooth. Afterward, add the remaining flour and melted butter, stirring until the batter is thick and smooth. Preheat your waffle cone maker to just above medium heat. Place a heaping tablespoon of the batter in the center of the waffle cone maker and close the lid. The cooking time will vary depending on your waffle cone maker, but it typically takes about three minutes for the cone to turn golden brown. Carefully remove the cone with tongs and shape it into a taco form while it’s still soft. Hold the shape for about 15 seconds until the cone firms up. Allow the taco shells to cool completely before moving on to the next step.
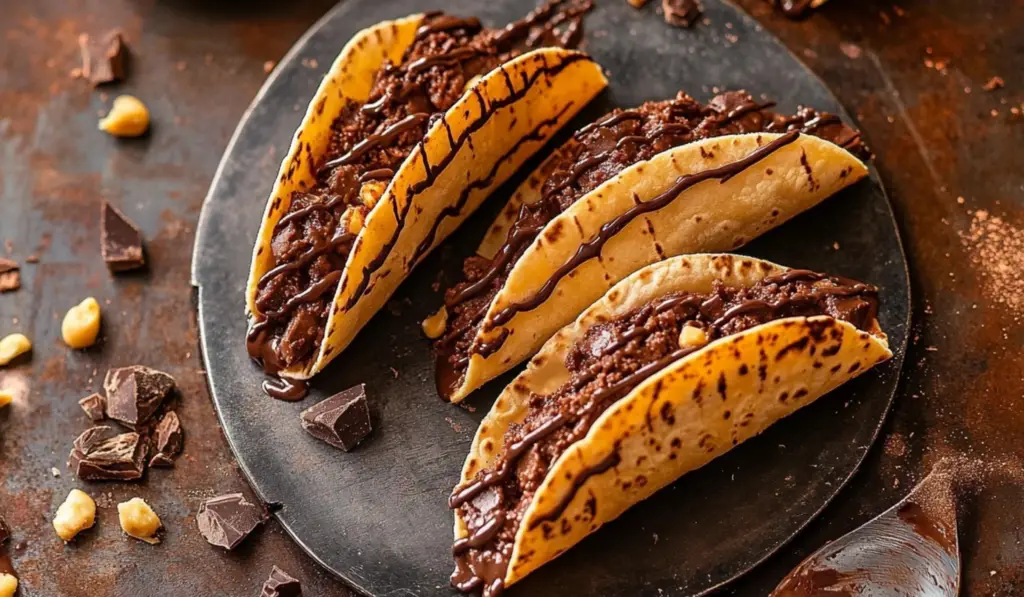
5. Assembling the Choco Tacos:
Once the ice cream is fully set and the taco shells have cooled, it’s time to assemble the Choco Tacos. Scoop slightly softened ice cream into each taco shell. Use a small spatula or the back of a spoon to smooth out the ice cream and fill the taco shell completely. Once all the taco shells are filled, place them in the freezer for about 10 to 15 minutes to allow the ice cream to firm up once more.
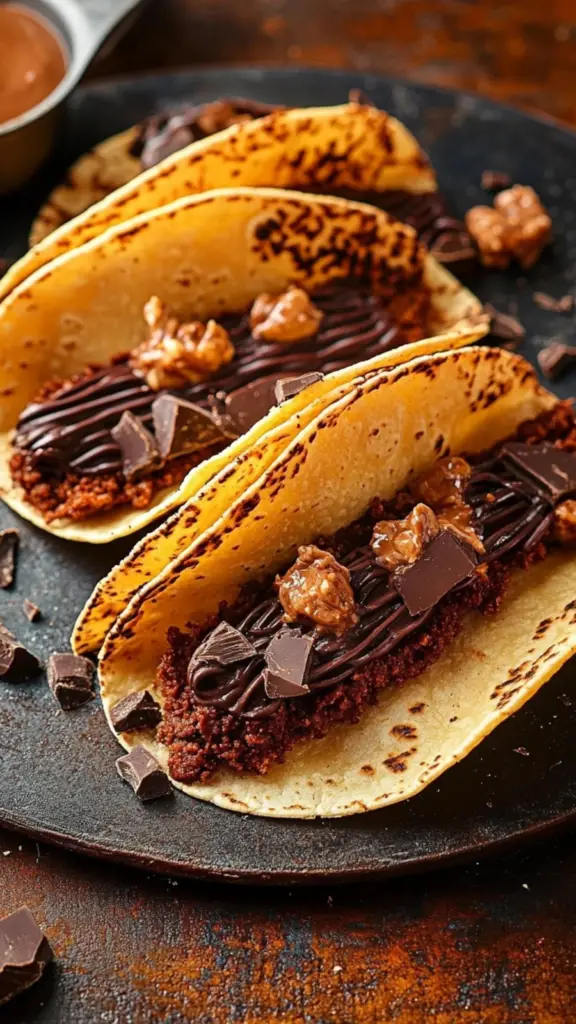
6. Preparing the Peanut-Chocolate Coating:
While the ice cream is setting, it’s time to make the chocolate and peanut coating. In a microwave-safe bowl, combine the chocolate chips and coconut oil. Microwave the mixture in 30-second intervals, stirring well after each interval, until the chocolate is completely melted and smooth. Once melted, stir in the finely chopped peanuts.
7. Dipping and Freezing:
Once the ice cream has set in the taco shells, dip the top of each ice cream-filled taco into the chocolate-peanut mixture. Make sure the coating is thick and evenly covers the top of the taco. After dipping, return the tacos to the freezer for 5 to 10 minutes or until the chocolate coating has hardened completely. At this point, your homemade Choco Tacos are ready to be enjoyed!
Notes
- Chill Ingredients: Be sure to chill the waffle cones and the ice cream base before you assemble the tacos. This helps to avoid melting and ensures that the chocolate coating sets properly when dipped.
- Customize the Ice Cream: Feel free to use different ice cream flavors! You can swap vanilla for chocolate, strawberry, or any flavor you prefer. The fudge ripple pairs wonderfully with many ice cream bases.
- Making Dairy-Free Choco Tacos: For a dairy-free version, simply use a non-dairy ice cream and substitute the butter in the waffle cone batter with dairy-free butter.
- Use Store-Bought Ice Cream: If you’re short on time, you can skip making the ice cream from scratch and use store-bought ice cream instead. Just make sure to soften it slightly before filling the cones.
- Storage: These homemade Choco Tacos can be stored in the freezer for up to a week. Be sure to keep them in an airtight container to prevent freezer burn.
- Prep Time: 1 hour 30 minutes
- Cook Time: 20 minutes
- Category: Dessert, Frozen Treat, Ice Cream
- Method: No-Churn Ice Cream, Waffle Cone Making
- Cuisine: American
- Diet: Vegetarian
This detailed guide will walk you through the steps of creating your very own homemade Choco Tacos, from making a no-churn fudge-swirled ice cream to crafting crispy waffle cones and finishing with a decadent chocolate and peanut coating. The beauty of this recipe lies not only in its fun and whimsical appearance but also in the freedom to adjust the flavors and textures to your liking. Whether you’re an experienced baker or a beginner, making these treats at home will be a rewarding experience that you’ll want to repeat again and again.
A Journey into Nostalgia: The Appeal of Choco Tacos
Choco Tacos, first introduced by Klondike in the 1980s, quickly became a summer favorite across the country. Their playful taco shape made them unique, while the combination of rich vanilla ice cream, crunchy waffle cone, and a smooth chocolate coating was irresistible. It was the kind of treat you could pick up at an ice cream truck, eat during a summer outing, or enjoy on a lazy afternoon. It wasn’t just a dessert; it was an experience—one that we associate with warm weather, fun, and the carefree days of childhood.
But as delicious as the original Choco Taco is, homemade versions offer an opportunity for you to infuse more flavor and creativity into this already delightful dessert. By making Choco Tacos from scratch, you can control every aspect, from the ice cream’s texture to the waffle cone’s crispiness, ensuring the dessert is just the way you like it.
The Ingredients: A Symphony of Flavors and Textures
The secret to a great homemade Choco Taco lies in the ingredients. Each component of the taco adds its own special touch, from the smooth, creamy ice cream to the crispy taco shell and the chocolate-peanut coating that finishes everything off. Below is a breakdown of the ingredients needed to create the perfect homemade Choco Tacos.
Ice Cream Base:
The foundation of this dessert is a creamy, dreamy vanilla ice cream that is no-churn, meaning you don’t need an ice cream maker. This ice cream will be swirled with a rich fudge ripple that provides a perfect balance of sweetness and indulgence.
- 2 cups heavy cream (cold)
- 1 can (14 oz) sweetened condensed milk
- 1 tablespoon vanilla bean paste or 2 teaspoons vanilla extract
- A pinch of salt
Fudge Ripple:
The fudge ripple is the twist that takes this homemade Choco Taco to the next level. It’s a silky smooth and indulgent fudge sauce that’s swirled into the ice cream, creating a ribbon of rich chocolate flavor throughout.
- 2 tablespoons cocoa powder
- 2 tablespoons granulated sugar
- 2 tablespoons heavy cream
- 1 tablespoon unsalted butter
- ½ teaspoon vanilla extract
- A pinch of salt
Waffle Cones:
The waffle cone is, of course, the most important component of a Choco Taco. Making your own cones is simple, and it adds an extra layer of freshness to your dessert. The waffle cones will be soft when freshly made and should be molded into a taco shape before they fully cool to create that signature taco form.
- 2 egg whites
- 3 ½ tablespoons granulated sugar
- 3 ½ tablespoons brown sugar
- ¾ teaspoon vanilla extract
- ⅛ teaspoon salt
- ⅔ cup flour
- 2 tablespoons melted butter
For Coating:
The chocolate and peanut coating is the crowning glory of these Choco Tacos. It adds a satisfying crunch and a layer of rich flavor that pairs perfectly with the creamy ice cream and crispy waffle cone.
- 1 ½ cups chocolate chips
- 1 ½ tablespoons coconut oil
- ¾ cup finely chopped peanuts
Step-by-Step Instructions: How to Make Homemade Choco Tacos
Now that you have all your ingredients ready, it’s time to get started on making these incredible treats. The process requires several steps, but don’t be intimidated! The result is totally worth the effort, and each step is simple enough to follow. Let’s go through the process one step at a time to ensure you make the perfect homemade Choco Tacos.
1. Making the Fudge Ripple:
Start by making the fudge sauce that will swirl through your ice cream. In a small saucepan, whisk together the cocoa powder, sugar, and heavy cream over medium-low heat. Allow the mixture to come to a gentle simmer. Once it starts to heat up, add the unsalted butter and whisk until the butter melts and the mixture becomes smooth and glossy. Afterward, remove the saucepan from the heat and stir in the vanilla extract and a pinch of salt. Set the fudge aside to cool to room temperature while you prepare the ice cream base.
2. Preparing the Ice Cream Base:
The ice cream base is what gives your Choco Tacos that ultra-creamy texture. In a stand mixer (or a hand mixer if you don’t have one), beat the cold heavy cream until stiff peaks form. This process should only take a few minutes. In a separate large bowl, combine the sweetened condensed milk, vanilla bean paste (or vanilla extract), and a pinch of salt. Once the heavy cream is whipped, gently fold about one cup of the whipped cream into the condensed milk mixture. This will help lighten the mixture. Then, fold in the remaining whipped cream until the mixture is completely smooth, making sure there are no lumps. This whipped cream mixture will become your ice cream base.
3. Layering the Ice Cream:
Now comes the fun part: layering the ice cream with the fudge ripple! Start by pouring one-quarter of the ice cream base into a loaf pan or an airtight container. Drizzle one-third of the cooled fudge sauce over the ice cream. Repeat this process, layering the ice cream base and fudge sauce until you use up all the ingredients. Make sure to finish with a layer of ice cream on top. Once layered, freeze the mixture for about three hours, or until the ice cream is firm and set.
4. Making the Waffle Cones:
While the ice cream is freezing, it’s time to make the waffle cones. In a mixing bowl, whisk together the egg whites, granulated sugar, brown sugar, and vanilla extract until the mixture is well combined. Add the salt, then fold in half of the flour. Mix until smooth. Afterward, add the remaining flour and melted butter, stirring until the batter is thick and smooth. Preheat your waffle cone maker to just above medium heat. Place a heaping tablespoon of the batter in the center of the waffle cone maker and close the lid. The cooking time will vary depending on your waffle cone maker, but it typically takes about three minutes for the cone to turn golden brown. Carefully remove the cone with tongs and shape it into a taco form while it’s still soft. Hold the shape for about 15 seconds until the cone firms up. Allow the taco shells to cool completely before moving on to the next step.
5. Assembling the Choco Tacos:
Once the ice cream is fully set and the taco shells have cooled, it’s time to assemble the Choco Tacos. Scoop slightly softened ice cream into each taco shell. Use a small spatula or the back of a spoon to smooth out the ice cream and fill the taco shell completely. Once all the taco shells are filled, place them in the freezer for about 10 to 15 minutes to allow the ice cream to firm up once more.
6. Preparing the Peanut-Chocolate Coating:
While the ice cream is setting, it’s time to make the chocolate and peanut coating. In a microwave-safe bowl, combine the chocolate chips and coconut oil. Microwave the mixture in 30-second intervals, stirring well after each interval, until the chocolate is completely melted and smooth. Once melted, stir in the finely chopped peanuts.
7. Dipping and Freezing:
Once the ice cream has set in the taco shells, dip the top of each ice cream-filled taco into the chocolate-peanut mixture. Make sure the coating is thick and evenly covers the top of the taco. After dipping, return the tacos to the freezer for 5 to 10 minutes or until the chocolate coating has hardened completely. At this point, your homemade Choco Tacos are ready to be enjoyed!
Tips for the Perfect Choco Tacos
- Chill Ingredients: Be sure to chill the waffle cones and the ice cream base before you assemble the tacos. This helps to avoid melting and ensures that the chocolate coating sets properly when dipped.
- Customize the Ice Cream: Feel free to use different ice cream flavors! You can swap vanilla for chocolate, strawberry, or any flavor you prefer. The fudge ripple pairs wonderfully with many ice cream bases.
- Making Dairy-Free Choco Tacos: For a dairy-free version, simply use a non-dairy ice cream and substitute the butter in the waffle cone batter with dairy-free butter.
- Use Store-Bought Ice Cream: If you’re short on time, you can skip making the ice cream from scratch and use store-bought ice cream instead. Just make sure to soften it slightly before filling the cones.
- Storage: These homemade Choco Tacos can be stored in the freezer for up to a week. Be sure to keep them in an airtight container to prevent freezer burn.
Variations to Try
- Caramel Swirl: Instead of fudge, use a salted caramel swirl for a different take on this classic dessert.
- Nut-Free Version: If you or someone you know has a nut allergy, you can skip the peanuts in the chocolate coating and instead use crushed cookies or colorful sprinkles.
- Chocolate Shells: For an even richer treat, dip the Choco Tacos in pure melted chocolate and sprinkle with crushed candy bars or even marshmallows for a s’mores-inspired twist.
Serving Suggestions
These homemade Choco Tacos are the ultimate crowd-pleaser and are perfect for a summer party, a birthday celebration, or a family movie night. Serve them on a platter alongside other fun desserts like brownies or fruit sorbet for a dessert spread that will make everyone smile. If you’re feeling extra creative, serve with a drizzle of hot fudge, a scoop of fresh fruit, or a dollop of whipped cream.
Conclusion
Homemade Choco Tacos bring together the perfect combination of textures and flavors—creamy, crispy, chocolaty, and crunchy. Not only are they a treat for the taste buds, but they also offer a fun and nostalgic dessert-making experience. Making these Choco Tacos from scratch gives you complete control over the quality of ingredients and allows you to customize the recipe to suit your preferences. Whether you’re making them for a special occasion or simply indulging in a sweet treat, homemade Choco Tacos are guaranteed to impress. So roll up your sleeves, get your ingredients ready, and dive into making this amazing frozen treat that’s bound to become a favorite in your home. Enjoy every bite!


