
When you think of a classic campfire treat, what comes to mind? For many, it’s the gooey, sticky, and utterly satisfying combination of chocolate, graham crackers, and toasted marshmallows—the quintessential s’mores! But what if I told you that you could take this childhood favorite and transform it into an indulgent cheesecake? That’s right—this Perfect S’mores Cheesecake brings together the creamy richness of cheesecake with the nostalgic flavors of s’mores. The best part? It’s perfect for beginner cooks!


The Perfect S’mores Cheesecake Recipe: A Beginner-Friendly Guide to an Irresistible Dessert
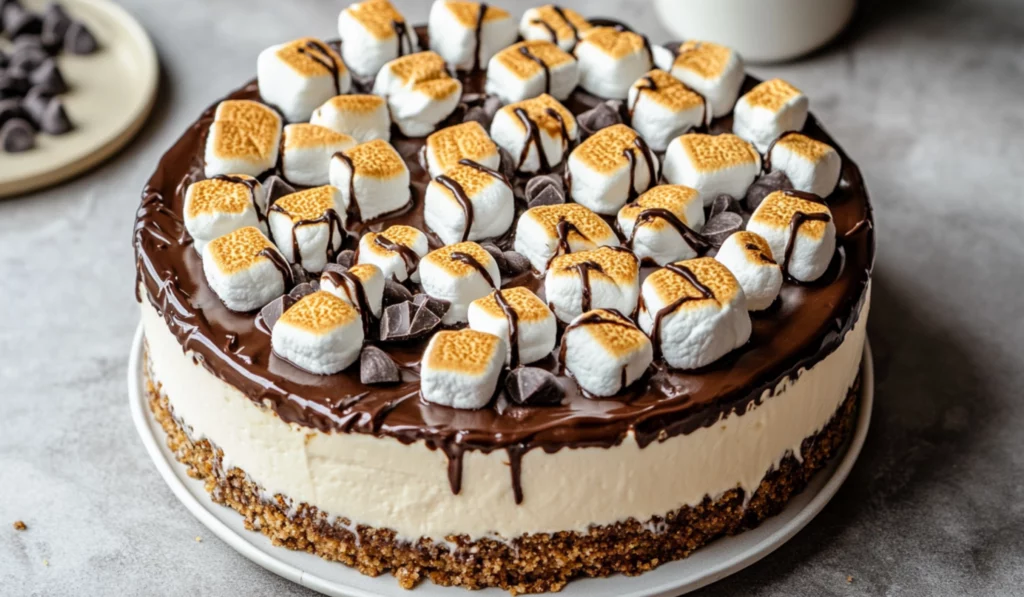
Who doesn’t love the irresistible combination of graham crackers, gooey marshmallows, and rich chocolate? This Perfect S’mores Cheesecake brings that campfire classic into your kitchen with a creamy, decadent twist. Easy enough for beginners, this recipe features a simple graham cracker crust, a marshmallow-filled cheesecake, and a luscious chocolate ganache. Perfect for any occasion, it’s a fun and delicious way to enjoy the flavors of s’mores all year round!
- Total Time: 1 hour 30 minutes
- Yield: 12 servings 1x
Ingredients
Crust Ingredients:
- 1 1/2 cups (213 grams) finely crushed graham cracker crumbs (about 14 full-sized sheets)
- 1/3 cup (66 grams) granulated sugar
- 6 tablespoons (85 grams) unsalted butter, melted
Marshmallow Cheesecake Filling:
- 32 ounces (908 grams) cream cheese, softened to room temperature
- 1 cup (198 grams) granulated sugar
- 2/3 cup (151 grams) sour cream, at room temperature
- 2 teaspoons vanilla extract
- 1/4 teaspoon salt
- 4 large eggs, at room temperature
- 1 cup (43 grams) mini marshmallows
- 1/2 cup (90 grams) mini chocolate chips
Ganache Topping:
- 1 cup (170 grams) chocolate chips or chopped milk chocolate
- 3/4 cup (170 grams) heavy cream
For the Toasted Marshmallows:
- Jumbo marshmallows (for toasting)
Instructions
1. Prepare the Crust:
- Preheat your oven to 325°F (163°C).
- In a medium-sized bowl, combine the graham cracker crumbs and granulated sugar. Stir them together until they’re well mixed.
- Pour the melted butter into the crumb mixture and stir until the crumbs are evenly coated. The butter helps the crumbs stick together to form a solid base.
- Press this mixture firmly into the bottom of a 9-inch springform pan, making sure the crumbs cover the entire bottom. Use the back of a spoon or your hands to pack it down tightly.
- Bake the crust for 8-10 minutes until it’s lightly golden. This will help it set and form a crunchy base for the cheesecake. Once done, set it aside to cool.
2. Make the Cheesecake Filling:
- In a large mixing bowl, beat the softened cream cheese with an electric mixer until smooth and creamy. This should take about 1-2 minutes.
- Gradually add the sugar to the cream cheese, mixing until fully incorporated.
- Add the sour cream, vanilla extract, and salt to the mixture. Stir until everything is well combined. The sour cream helps create a rich, tangy flavor that balances out the sweetness.
- Beat in the eggs one at a time, making sure each egg is fully mixed before adding the next. You can do this at a low speed to avoid overmixing. Overmixing the eggs could cause cracks in your cheesecake.
- Gently fold in the mini marshmallows and mini chocolate chips. These will melt slightly during baking, adding pockets of gooey marshmallow and chocolate goodness throughout the cheesecake.
- Pour the cheesecake filling over the cooled graham cracker crust. Spread it evenly with a spatula.
3. Bake the Cheesecake:
- Bake the cheesecake in the preheated oven for 60-70 minutes. The edges should be set, but the center should still be a little jiggly when you gently shake the pan.
- Turn off the oven and let the cheesecake cool in the oven for 1 hour. This helps prevent cracks from forming as it cools.
- After the hour, remove the cheesecake from the oven and let it cool completely at room temperature.
- Once it has cooled, refrigerate the cheesecake for at least 4 hours or, ideally, overnight. This allows the flavors to develop and the texture to firm up.
4. Prepare the Ganache:
- In a small saucepan, heat the heavy cream over medium heat until it just begins to simmer. Don’t let it boil.
- Remove the saucepan from the heat and pour the hot cream over the chocolate chips in a heatproof bowl. Let it sit for 2-3 minutes to allow the chocolate to melt.
- Whisk the mixture until it’s smooth and glossy. The ganache should have a velvety texture.
- Allow the ganache to cool slightly before pouring it over the chilled cheesecake.
5. Top with Toasted Marshmallows:
- Arrange jumbo marshmallows on top of the ganache, leaving a little space between each one. You’ll want the marshmallows to have room to expand as they toast.
- Use a kitchen torch to toast the marshmallows until they’re golden brown and crispy on the outside. If you don’t have a kitchen torch, you can also broil them in the oven for 1-2 minutes, but keep a close eye on them so they don’t burn!
Notes
- Crust Troubleshooting: If your graham cracker crust is too crumbly and doesn’t hold together, try adding a bit more melted butter. If it’s too wet, add more graham cracker crumbs to achieve the right consistency.
- Cheesecake Texture: Make sure your cream cheese is softened to room temperature before mixing. Cold cream cheese can result in lumps.
- Avoid Overbaking: The cheesecake will continue to firm up as it cools, so it’s okay if the center is a little jiggly when you take it out of the oven. If you overbake it, the cheesecake might crack or become too dry.
- Storage: Leftover cheesecake can be stored in an airtight container in the refrigerator for up to 5 days. It also freezes well for up to 3 months—just wrap it tightly in plastic wrap and foil.
- Prep Time: 20 minutes
- Cook Time: 70 minutes
- Category: Dessert
- Method: Baking, No-Bake
- Cuisine: American
- Diet: Vegetarian
If you’ve never made a cheesecake before, don’t worry! This recipe is straightforward and involves simple ingredients, easy-to-follow instructions, and minimal prep time. Plus, the end result is so impressive that it will have your friends and family thinking you’re a dessert pro. In this guide, I’ll walk you through every step of making the perfect s’mores cheesecake, offering helpful tips along the way to ensure your dessert turns out beautifully. So grab your apron, and let’s get started!
Why This Recipe is Perfect for Beginners
Making a cheesecake may seem intimidating at first, but this s’mores cheesecake recipe is beginner-friendly and full of simple, approachable steps. The crust requires only a few ingredients and is baked in the same pan you’ll use for the cheesecake. The filling is smooth and creamy, and the addition of mini marshmallows and chocolate chips makes it easy to incorporate the s’mores flavor without needing any special techniques.
Additionally, there’s no need for a water bath or complex baking techniques. This cheesecake is designed to minimize the stress and maximize the fun, which is why it’s ideal for anyone who’s new to baking or wants a quick and delicious dessert.
Not only is it easy, but it’s also a healthier option compared to other desserts. While it’s rich and indulgent, the combination of ingredients like sour cream and cream cheese gives the cheesecake a smooth and satisfying texture without overloading it with sugar. And, of course, the toasted marshmallows add that sweet and fluffy treat element we all love.
Whether you’re a complete beginner or someone who enjoys baking but is looking for an uncomplicated yet impressive recipe, this s’mores cheesecake is perfect for you. It’s a simple dessert to prepare for your next family gathering, casual dinner party, or just to satisfy your own cravings for something sweet.
Ingredients and Preparation
Before we dive into the steps, let’s go over what you’ll need to create this mouthwatering cheesecake. Gather your ingredients, and don’t worry—this list is short and simple, so it’s perfect for beginners.
Crust Ingredients:
- 1 1/2 cups (213 grams) finely crushed graham cracker crumbs (about 14 full-sized sheets)
- 1/3 cup (66 grams) granulated sugar
- 6 tablespoons (85 grams) unsalted butter, melted
The crust is the foundation of the cheesecake and brings that classic s’mores flavor to the dessert. The graham cracker crumbs add a sweet and slightly crunchy base, while the melted butter helps the crumbs stick together, creating a solid structure for the creamy filling.
Marshmallow Cheesecake Filling:
- 32 ounces (908 grams) cream cheese, softened to room temperature
- 1 cup (198 grams) granulated sugar
- 2/3 cup (151 grams) sour cream, at room temperature
- 2 teaspoons vanilla extract
- 1/4 teaspoon salt
- 4 large eggs, at room temperature
- 1 cup (43 grams) mini marshmallows
- 1/2 cup (90 grams) mini chocolate chips
The filling is where the magic happens—smooth, creamy, and indulgent, this cheesecake filling combines the tanginess of cream cheese with the sweetness of mini marshmallows and chocolate chips. The mini marshmallows melt into the batter during baking, creating pockets of gooey marshmallow that are simply irresistible. The chocolate chips give it that signature s’mores flavor, balancing the richness of the cream cheese with a hint of sweetness and chocolatey goodness.
Ganache Topping:
- 1 cup (170 grams) chocolate chips or chopped milk chocolate
- 3/4 cup (170 grams) heavy cream
The ganache topping adds a luxurious, glossy finish to the cheesecake. The rich, silky texture of the ganache complements the creamy cheesecake filling perfectly, enhancing the overall flavor of the dessert.
For the Toasted Marshmallows:
- Jumbo marshmallows (for toasting)
To finish off the s’mores cheesecake, we top it with jumbo marshmallows, which are toasted to perfection. The marshmallows add an extra layer of texture and flavor, bringing that campfire s’mores experience right to your plate.
Optional Ingredient Substitutions:
- Crust: If you’re not a fan of graham crackers, you can easily swap them out with digestive biscuits or even chocolate cookies for a richer base.
- Cream Cheese: For a lighter version, you can use reduced-fat cream cheese. It will still work perfectly, although the texture might be slightly less creamy.
- Chocolate Chips: For a fun twist, try using dark chocolate chips or a combination of milk and dark chocolate for a more complex flavor profile.
Step-by-Step Instructions
Now that you have everything ready, it’s time to roll up your sleeves and start baking. Don’t be intimidated—each step is simple, and you’ll be enjoying your cheesecake in no time!
1. Prepare the Crust:
- Preheat your oven to 325°F (163°C).
- In a medium-sized bowl, combine the graham cracker crumbs and granulated sugar. Stir them together until they’re well mixed.
- Pour the melted butter into the crumb mixture and stir until the crumbs are evenly coated. The butter helps the crumbs stick together to form a solid base.
- Press this mixture firmly into the bottom of a 9-inch springform pan, making sure the crumbs cover the entire bottom. Use the back of a spoon or your hands to pack it down tightly.
- Bake the crust for 8-10 minutes until it’s lightly golden. This will help it set and form a crunchy base for the cheesecake. Once done, set it aside to cool.
2. Make the Cheesecake Filling:
- In a large mixing bowl, beat the softened cream cheese with an electric mixer until smooth and creamy. This should take about 1-2 minutes.
- Gradually add the sugar to the cream cheese, mixing until fully incorporated.
- Add the sour cream, vanilla extract, and salt to the mixture. Stir until everything is well combined. The sour cream helps create a rich, tangy flavor that balances out the sweetness.
- Beat in the eggs one at a time, making sure each egg is fully mixed before adding the next. You can do this at a low speed to avoid overmixing. Overmixing the eggs could cause cracks in your cheesecake.
- Gently fold in the mini marshmallows and mini chocolate chips. These will melt slightly during baking, adding pockets of gooey marshmallow and chocolate goodness throughout the cheesecake.
- Pour the cheesecake filling over the cooled graham cracker crust. Spread it evenly with a spatula.
3. Bake the Cheesecake:
- Bake the cheesecake in the preheated oven for 60-70 minutes. The edges should be set, but the center should still be a little jiggly when you gently shake the pan.
- Turn off the oven and let the cheesecake cool in the oven for 1 hour. This helps prevent cracks from forming as it cools.
- After the hour, remove the cheesecake from the oven and let it cool completely at room temperature.
- Once it has cooled, refrigerate the cheesecake for at least 4 hours or, ideally, overnight. This allows the flavors to develop and the texture to firm up.
4. Prepare the Ganache:
- In a small saucepan, heat the heavy cream over medium heat until it just begins to simmer. Don’t let it boil.
- Remove the saucepan from the heat and pour the hot cream over the chocolate chips in a heatproof bowl. Let it sit for 2-3 minutes to allow the chocolate to melt.
- Whisk the mixture until it’s smooth and glossy. The ganache should have a velvety texture.
- Allow the ganache to cool slightly before pouring it over the chilled cheesecake.
5. Top with Toasted Marshmallows:
- Arrange jumbo marshmallows on top of the ganache, leaving a little space between each one. You’ll want the marshmallows to have room to expand as they toast.
- Use a kitchen torch to toast the marshmallows until they’re golden brown and crispy on the outside. If you don’t have a kitchen torch, you can also broil them in the oven for 1-2 minutes, but keep a close eye on them so they don’t burn!
Beginner Tips and Notes
Here are some helpful tips to ensure your cheesecake turns out perfect every time:
- Crust Troubleshooting: If your graham cracker crust is too crumbly and doesn’t hold together, try adding a bit more melted butter. If it’s too wet, add more graham cracker crumbs to achieve the right consistency.
- Cheesecake Texture: Make sure your cream cheese is softened to room temperature before mixing. Cold cream cheese can result in lumps.
- Avoid Overbaking: The cheesecake will continue to firm up as it cools, so it’s okay if the center is a little jiggly when you take it out of the oven. If you overbake it, the cheesecake might crack or become too dry.
- Storage: Leftover cheesecake can be stored in an airtight container in the refrigerator for up to 5 days. It also freezes well for up to 3 months—just wrap it tightly in plastic wrap and foil.
Serving Suggestions
This s’mores cheesecake is rich and indulgent on its own, but here are a few ideas to elevate your presentation:
- Complementary Sides: Serve the cheesecake with a side of fresh berries like raspberries or strawberries to add a burst of color and tangy contrast.
- Sauces: A drizzle of caramel or chocolate syrup can take the flavor to the next level. You can even serve it with a scoop of vanilla ice cream for the ultimate dessert experience.

Conclusion: Ready to Bake?
There you have it—the perfect s’mores cheesecake! With a buttery graham cracker crust, a creamy marshmallow filling, and a decadent chocolate ganache topping, this dessert is sure to impress. Whether you’re a seasoned baker or a beginner, you’ll find that this recipe is easy to follow and the results are absolutely delicious.
Now, it’s your turn! Try making this s’mores cheesecake at home, and let me know how it turns out. Did you try any fun variations? Share your thoughts and experiences in the comments below—I’d love to hear how it goes!
And don’t forget—baking is about enjoying the process as much as the end result. So take your time, have fun, and most importantly, enjoy a slice (or two) of your delicious creation!


