There’s something magical about red velvet desserts, isn’t there? The rich, deep red color, the velvety texture, and the heavenly combination of flavors make them irresistible. Red Velvet Truffles, in particular, are one of those desserts that evoke excitement the moment you see them. Whether you’re preparing for a special occasion like Valentine’s Day or simply indulging in a sweet treat to brighten your day, these truffles are sure to make an impression. Their beautiful appearance and delightful taste will leave everyone reaching for more. The best part? They’re incredibly easy to make, which makes them perfect for beginners.

Red Velvet Truffles: A Sweet Treat for Beginners

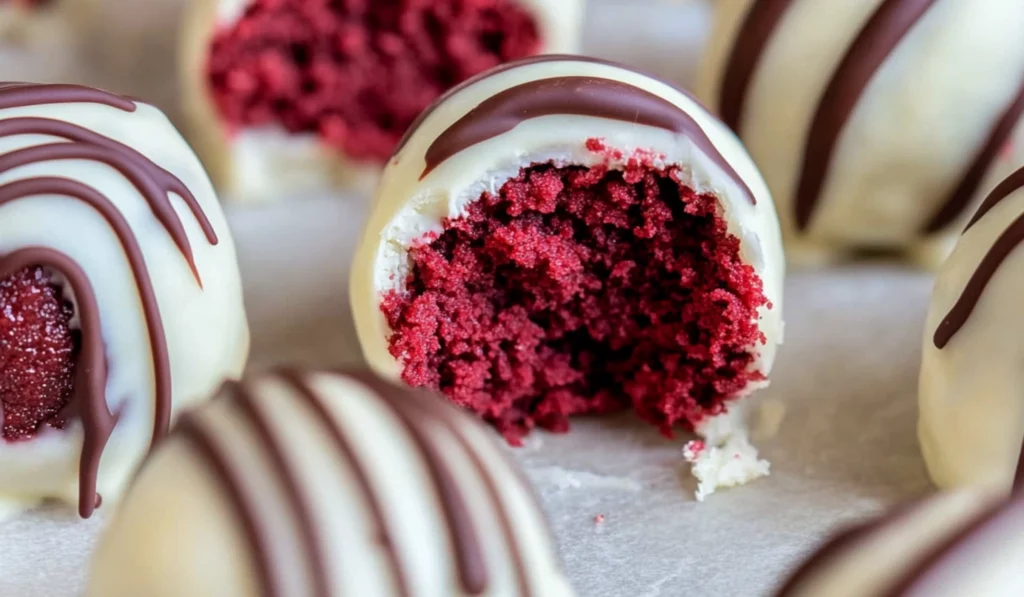
Red Velvet Truffles are the perfect treat—beautiful, bite-sized, and bursting with flavor. These creamy, velvety truffles are easy to make and require no advanced baking skills, making them ideal for beginners. Whether you’re preparing for a special occasion or craving something sweet, these truffles will impress with their vibrant color and irresistible taste. Let’s dive into this simple and delicious recipe!
- Prep Time: 35 minutes
- Cook Time: 0 minutes
- Total Time: 35 minutes
- Yield: 40 truffles 1x
- Category: Dessert
- Method: No-Bake
- Cuisine: American
- Diet: Vegetarian
Ingredients
- 1 box of red velvet cake mix (plus the ingredients listed on the box to prepare the cake)
- 8 oz cream cheese, softened
- 16 oz white chocolate (you’ll melt this for the coating)
- 2 oz dark or semi-sweet chocolate (for the drizzle on top)
Instructions
Step 1: Prepare the Red Velvet Cake
Start by preparing the red velvet cake according to the package instructions. Typically, you’ll need eggs, oil, and water, but refer to the back of your cake mix box for specific quantities. Bake the cake in a 9 x 13-inch pan. Make sure to follow the baking time listed on the box to ensure the cake is cooked perfectly. Once baked, allow it to cool completely before proceeding.
Step 2: Crumble the Cake
After your cake has cooled, crumble it into small pieces. You can use your fingers to break it apart, or a fork will work too. The goal is to create small crumbs, as this will help the cream cheese incorporate well into the mixture. The texture of the crumbled cake should resemble coarse sand.
Step 3: Add the Cream Cheese
Next, add the softened cream cheese to the crumbled cake. Use your fingers or a spatula to knead the mixture together until the cream cheese is fully incorporated. The cream cheese should bind the cake crumbs into a dough-like consistency. It’s important to knead gently to avoid making the mixture too wet or sticky. Once you have a smooth, cohesive mixture, you’re ready to form the truffles.
Step 4: Form the Truffles
Take about one heaping tablespoon of the mixture and roll it between your palms to form a ball. You should get about 35-40 truffles from this recipe, depending on how large you roll them. Once you’ve rolled all the truffles, place them on a baking sheet lined with parchment paper. This will keep them from sticking while they chill. Place the baking sheet in the fridge for at least 15 minutes to help the truffles firm up before dipping them in chocolate.
Step 5: Melt the White Chocolate
While the truffles chill, melt the white chocolate. You can do this in a microwave-safe bowl, heating in 20-second intervals and stirring after each interval. Alternatively, you can melt the chocolate using a double boiler. Just make sure to stir frequently to avoid burning the chocolate. Once melted, set the bowl aside and get ready to coat the truffles.
Step 6: Dip the Truffles in White Chocolate
Once the truffles are firm and ready, use a fork to dip them into the melted white chocolate. Roll each truffle around to ensure it’s evenly coated. Once coated, gently tap the fork on the side of the bowl to remove any excess chocolate. Place each truffle back on the parchment paper to set. Repeat this for all the truffles.
Step 7: Drizzle the Dark Chocolate
Melt the dark chocolate in the same way as the white chocolate, either in the microwave or using a double boiler. Once melted, transfer the chocolate into a small piping bag or a Ziploc bag with a corner snipped off. Drizzle the dark chocolate over the white chocolate-coated truffles in a decorative pattern. This adds a touch of elegance and extra flavor to the truffles.
Step 8: Let the Truffles Set
Return the truffles to the fridge and let them chill until the chocolate has set, about 30 minutes. The truffles will firm up and be ready to enjoy. If you want to speed up the process, you can place them in the freezer for about 10 minutes.
Notes
- Overcooked Cake: If you accidentally overbake your red velvet cake, don’t panic! You can still salvage it by crumbling it into small pieces and mixing it with cream cheese. Just be mindful that overly dry cake may need a little more cream cheese to reach the right consistency.
- Chilling the Truffles: Chilling the truffles is an essential step. If you skip it, the cake mixture may be too soft and difficult to handle when dipping in chocolate. If the mixture is too soft, refrigerate it for an additional 10-15 minutes to firm it up.
- Melting Chocolate: Be patient when melting chocolate. Always use a low heat setting, and stir frequently to prevent the chocolate from seizing up. If the chocolate gets too thick, add a small amount of vegetable oil to thin it out.
- Handling the Truffles: If the mixture is sticking to your hands when rolling, lightly coat your palms with a bit of powdered sugar or butter to make the process smoother.
I still remember the first time I made Red Velvet Truffles. It was for a Valentine’s Day party, and I was looking for something that was both festive and easy to prepare. When I stumbled across this recipe, I was instantly drawn to how simple yet elegant the truffles looked. I was a bit nervous at first since I was still getting my bearings in the kitchen, but I was surprised at how quickly they came together. The rich flavor of the red velvet cake, paired with the creamy white chocolate and dark chocolate drizzle, had everyone asking for the recipe. What I didn’t expect was how much of an impact these little bites would make. So, if you’re ready to fall in love with a dessert that’s just as fun to make as it is to eat, let’s dive into this easy Red Velvet Truffle recipe!
Why You’ll Love This Recipe
Red Velvet Truffles are the perfect treat for anyone who’s new to baking. They require very little hands-on time and don’t demand any advanced skills, making them beginner-friendly. All you need is a box of red velvet cake mix, cream cheese, and chocolate—and the result is a delicious, visually stunning dessert that looks like it came straight from a bakery. The cake mix simplifies the process, so you can focus on creating truffles that will wow your guests without the stress of making everything from scratch.
The key to these truffles is the smooth, velvety texture of the cake balls, combined with the creamy white chocolate coating and the rich dark chocolate drizzle. They’re perfect for special occasions but are also simple enough to whip up for a weeknight treat. If you’re someone who enjoys easy, fuss-free recipes that don’t compromise on flavor, then this Red Velvet Truffle recipe is for you. These truffles will melt in your mouth, and after just one bite, you’ll be hooked.
Ingredients and Preparation
Before we jump into the instructions, let’s take a closer look at the ingredients. The beauty of this recipe is that it uses ingredients that are simple to find, so you don’t need to go on a long hunt for special items. Plus, it’s easy to adapt based on what you have available.
Ingredients:
- 1 box of red velvet cake mix (plus the ingredients listed on the box to prepare the cake)
- 8 oz cream cheese, softened
- 16 oz white chocolate (you’ll melt this for the coating)
- 2 oz dark or semi-sweet chocolate (for the drizzle on top)
Now, let’s look at some substitution options in case you want to customize this recipe:
- Cake mix alternatives: If you don’t have a box of red velvet cake mix on hand, you can substitute with a homemade red velvet cake recipe, although that may involve a few extra steps. However, using cake mix keeps the recipe quick and simple.
- Cream cheese substitution: If you don’t have cream cheese, you can use a soft buttercream frosting or even a store-bought cream cheese frosting as a substitute. The cream cheese provides a rich, tangy flavor that complements the sweetness of the chocolate, but other frostings can work too.
- Chocolate substitution: While white chocolate is the classic choice for these truffles, you can always switch it up by using milk chocolate, dark chocolate, or even a combination. Dark chocolate will provide a slightly more bitter flavor that contrasts nicely with the sweet cake balls.
With these ingredients on hand and ready to go, you’re almost set to create your own batch of delicious Red Velvet Truffles.
Step-by-Step Instructions
Making Red Velvet Truffles is surprisingly simple, especially if you’re just starting out in the kitchen. Each step is manageable, and as long as you follow the instructions, you’ll have a batch of gorgeous truffles in no time.
Step 1: Prepare the Red Velvet Cake
Start by preparing the red velvet cake according to the package instructions. Typically, you’ll need eggs, oil, and water, but refer to the back of your cake mix box for specific quantities. Bake the cake in a 9 x 13-inch pan. Make sure to follow the baking time listed on the box to ensure the cake is cooked perfectly. Once baked, allow it to cool completely before proceeding.
Step 2: Crumble the Cake
After your cake has cooled, crumble it into small pieces. You can use your fingers to break it apart, or a fork will work too. The goal is to create small crumbs, as this will help the cream cheese incorporate well into the mixture. The texture of the crumbled cake should resemble coarse sand.
Step 3: Add the Cream Cheese
Next, add the softened cream cheese to the crumbled cake. Use your fingers or a spatula to knead the mixture together until the cream cheese is fully incorporated. The cream cheese should bind the cake crumbs into a dough-like consistency. It’s important to knead gently to avoid making the mixture too wet or sticky. Once you have a smooth, cohesive mixture, you’re ready to form the truffles.
Step 4: Form the Truffles
Take about one heaping tablespoon of the mixture and roll it between your palms to form a ball. You should get about 35-40 truffles from this recipe, depending on how large you roll them. Once you’ve rolled all the truffles, place them on a baking sheet lined with parchment paper. This will keep them from sticking while they chill. Place the baking sheet in the fridge for at least 15 minutes to help the truffles firm up before dipping them in chocolate.
Step 5: Melt the White Chocolate
While the truffles chill, melt the white chocolate. You can do this in a microwave-safe bowl, heating in 20-second intervals and stirring after each interval. Alternatively, you can melt the chocolate using a double boiler. Just make sure to stir frequently to avoid burning the chocolate. Once melted, set the bowl aside and get ready to coat the truffles.
Step 6: Dip the Truffles in White Chocolate
Once the truffles are firm and ready, use a fork to dip them into the melted white chocolate. Roll each truffle around to ensure it’s evenly coated. Once coated, gently tap the fork on the side of the bowl to remove any excess chocolate. Place each truffle back on the parchment paper to set. Repeat this for all the truffles.
Step 7: Drizzle the Dark Chocolate
Melt the dark chocolate in the same way as the white chocolate, either in the microwave or using a double boiler. Once melted, transfer the chocolate into a small piping bag or a Ziploc bag with a corner snipped off. Drizzle the dark chocolate over the white chocolate-coated truffles in a decorative pattern. This adds a touch of elegance and extra flavor to the truffles.
Step 8: Let the Truffles Set
Return the truffles to the fridge and let them chill until the chocolate has set, about 30 minutes. The truffles will firm up and be ready to enjoy. If you want to speed up the process, you can place them in the freezer for about 10 minutes.
Beginner Tips and Notes
- Overcooked Cake: If you accidentally overbake your red velvet cake, don’t panic! You can still salvage it by crumbling it into small pieces and mixing it with cream cheese. Just be mindful that overly dry cake may need a little more cream cheese to reach the right consistency.
- Chilling the Truffles: Chilling the truffles is an essential step. If you skip it, the cake mixture may be too soft and difficult to handle when dipping in chocolate. If the mixture is too soft, refrigerate it for an additional 10-15 minutes to firm it up.
- Melting Chocolate: Be patient when melting chocolate. Always use a low heat setting, and stir frequently to prevent the chocolate from seizing up. If the chocolate gets too thick, add a small amount of vegetable oil to thin it out.
- Handling the Truffles: If the mixture is sticking to your hands when rolling, lightly coat your palms with a bit of powdered sugar or butter to make the process smoother.
Serving Suggestions
Red Velvet Truffles are beautiful on their own, but if you’re looking for some extra flair, here are a few serving suggestions:
- Serve them with a warm cup of coffee or tea. The creamy, sweet truffles pair wonderfully with the bitterness of a freshly brewed cup.
- Arrange the truffles on a decorative plate with a sprinkling of powdered sugar or cocoa powder for a sophisticated presentation.
- Red Velvet Truffles make a great gift! Place them in a decorative box or a mason jar for a personalized touch.
Storage Tips:
To keep your Red Velvet Truffles fresh, store them in an airtight container in the fridge for up to 1-2 weeks. If you need to store them longer, they can also be frozen for up to 3 months. Just be sure to separate the layers of truffles with parchment paper to prevent them from sticking together.

Conclusion: Time to Fall in Love with Red Velvet Truffles
Now that you’ve made your own batch of Red Velvet Truffles, you can see how simple it is to create a dessert that’s both elegant and delicious. The combination of red velvet cake, cream cheese, and chocolate is a match made in dessert heaven. This recipe is perfect for beginners, but it’s also a great way to impress your family, friends, or loved ones with your newfound kitchen skills. Whether you’re making these truffles for a special occasion or just for fun, they’re sure to be a hit. So go ahead—give this recipe a try and let us know how yours turned out in the comments!