
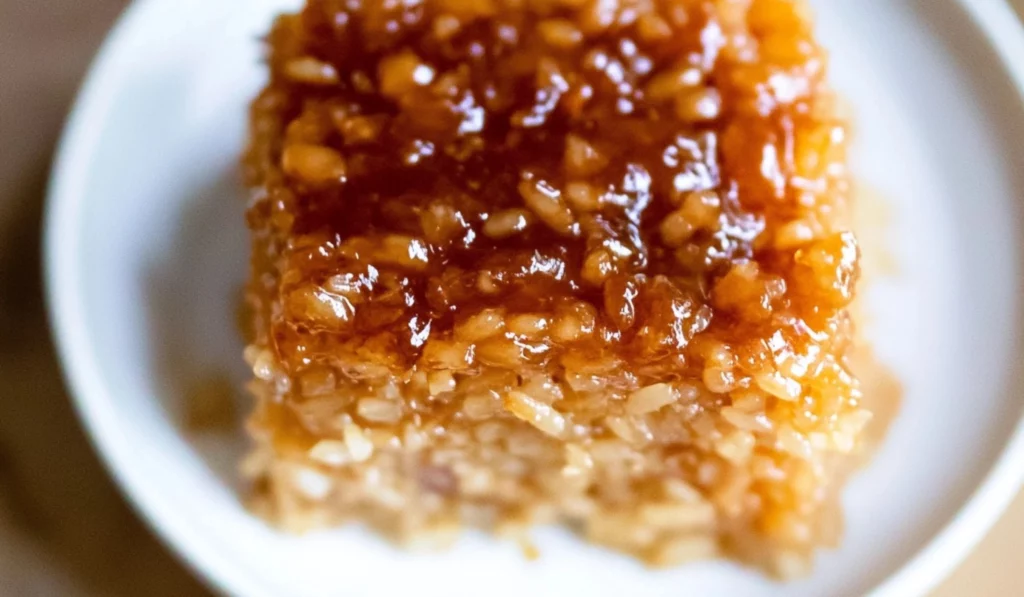
Filipino cuisine is full of vibrant flavors and rich traditions, and when it comes to desserts, there’s one that consistently steals the show: Biko. This sweet, sticky rice cake, made from glutinous rice and a delicious coconut caramel topping, is a Filipino classic that’s often seen at family celebrations, parties, and even casual gatherings. The texture is irresistibly chewy and sticky, and the flavors are comforting and indulgent. But the best part? This Easy Biko Recipe is perfect for beginners and requires minimal ingredients, making it ideal for those new to cooking or Filipino desserts. Whether you’re craving a taste of home or want to try something new, this easy Biko recipe will help you make a traditional Filipino dessert with ease.


The Ultimate Easy Biko Recipe: A Delicious Filipino Sticky Rice Cake Dessert for Beginners
Biko, the Filipino sticky rice cake, is a sweet and chewy dessert that’s easy to make and perfect for beginners. With simple ingredients like glutinous rice, coconut milk, and brown sugar, this Easy Biko Recipe will help you create a delicious treat that’s sure to impress. Whether you’re a first-time cook or a seasoned pro, this recipe is the perfect way to bring a taste of the Philippines to your kitchen. Let’s get started!
- Total Time: 9 hours 20 minutes (including soaking)
- Yield: 16–20 pieces 1x
Ingredients
- 4 cups glutinous rice (also called sticky rice or sweet rice)
- 5 cups full-fat coconut milk, divided
- 1 1/2 cups water
- 2 1/2 cups dark brown sugar, divided
- 1/2 teaspoon salt
Instructions
- Soak the Glutinous Rice:
Start by soaking the glutinous rice in water for at least 8 hours or overnight. Soaking is crucial to achieving that signature sticky texture and ensures the rice absorbs enough water to cook evenly. If you’re in a rush, a 4-hour soak will suffice, but overnight soaking is ideal for the best results. - Rinse and Drain the Rice:
Once the rice has soaked, drain it and rinse it under cold water. This helps remove any excess starch that could make the rice too gummy and prevents it from sticking to the pot as it cooks. - Cook the Rice:
In a large pot, combine 4 1/4 cups of the coconut milk with 1 1/2 cups of water. Bring this mixture to a gentle boil over medium heat. Once it starts boiling, add the soaked and drained rice. Stir occasionally, then reduce the heat to medium-low and let the rice simmer for 6-8 minutes. The rice should begin to absorb the liquid, but it should still be moist and sticky. The goal is to have the rice cooked but not dry. - Add the Brown Sugar and Salt:
Once the rice has absorbed most of the liquid, reduce the heat to low and stir in the brown sugar and salt. Let the sugar dissolve completely while you continue to stir constantly. This is where the magic happens, as the sugar will create a rich, caramel-like flavor that infuses the rice. Continue cooking for another 4-7 minutes until the rice mixture becomes thick and sticky. Be careful not to let the mixture burn, so keep stirring and adjust the heat if necessary. Taste the mixture to ensure the rice is fully cooked and the sweetness is to your liking. - Preheat the Oven:
While the rice mixture is cooking, preheat your oven to 350°F (175°C). Grease a 9×13-inch baking dish or pan with a little cooking spray or butter to prevent the rice from sticking during baking. - Transfer the Rice Mixture to the Baking Dish:
Once the rice is cooked and the mixture is thick and sticky, carefully transfer it to the greased baking dish. Use a spatula to spread it out evenly and press it down gently to compact the rice. This helps ensure an even bake and a nice texture throughout the dessert. - Make the Caramel Topping:
In a small saucepan, combine the remaining 3/4 cup of coconut milk with the remaining 1 cup of brown sugar. Bring this mixture to a boil, stirring occasionally to dissolve the sugar. Let it simmer for a few minutes until it thickens slightly. Once it’s thickened and the sugar is dissolved, remove the saucepan from the heat and allow the caramel to cool for about 5 minutes. - Pour the Caramel Over the Rice:
Once the caramel has cooled slightly, pour it evenly over the cooked rice mixture in the baking dish. Use a spoon to spread it out if necessary, making sure the rice is evenly covered with the caramel. - Bake the Biko:
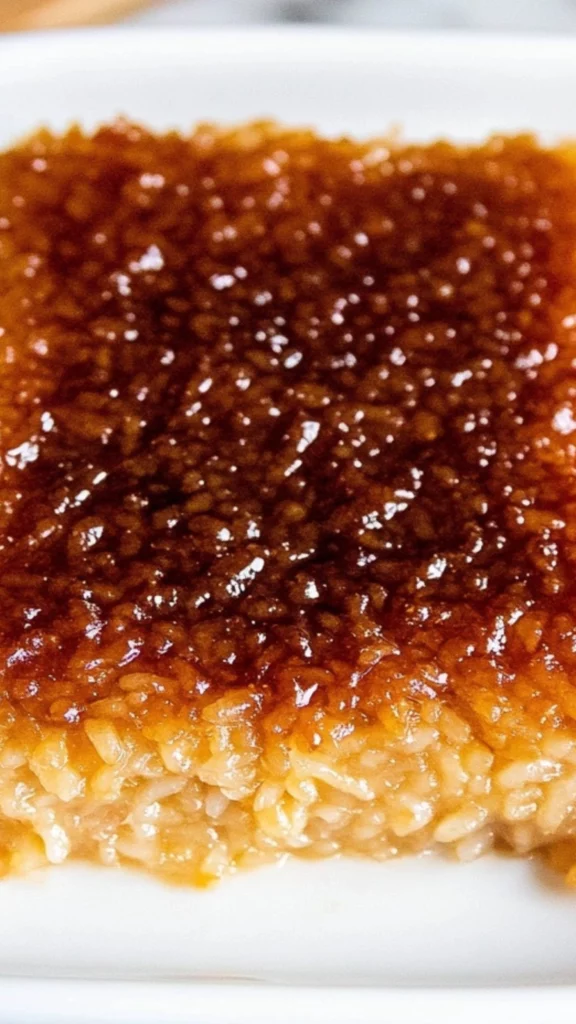
Place the baking dish in the preheated oven and bake for 60-65 minutes, or until the top is golden brown and slightly crispy. The caramel topping will bubble up as it bakes, creating a golden, crunchy crust. Once done, remove from the oven and allow the Biko to cool completely before serving. - Serve and Enjoy:
Once the Biko has cooled, cut it into squares or diamond shapes. The sticky rice will hold its shape but be soft and chewy inside. Serve the Biko to your family and friends, and watch how quickly it disappears!
Notes
- Soaking the Rice: Always remember to soak your rice overnight for the best texture. If you’re in a time crunch, soak it for at least 4 hours, but longer is better. This ensures the rice will cook properly and be super sticky.
- Stirring Constantly: While cooking the rice and making the caramel topping, it’s important to stir constantly. This prevents the rice from sticking to the pot and burning, and helps the sugar dissolve evenly.
- Preventing Burnt Rice: If you notice the rice starting to stick to the bottom of the pan or burn, reduce the heat slightly and add a splash of water or coconut milk to loosen it up.
- Texture Troubleshooting: If your Biko seems too runny before baking, let it cook a little longer on the stove until the liquid has mostly been absorbed. If it’s too thick, add a bit more coconut milk or water during the cooking process.
- Prep Time: 20 minutes
- Cook Time: 1 hour
- Category: Dessert
- Method: Baking, Stovetop
- Cuisine: Filipino
- Diet: Vegetarian
Growing up, Biko was one of my favorite desserts to enjoy at family parties. My grandmother would always prepare it ahead of time, filling the house with the sweet aroma of coconut and brown sugar. We would wait eagerly for it to cool, so we could cut it into squares and enjoy it with family and friends. Over time, I learned that the secret to a great Biko lies in the simplicity of the ingredients and the care you take in each step. This recipe aims to simplify the process even further, so you can create this beloved dessert in your kitchen with confidence. What’s more, it’s easy enough for beginners to follow, yet still offers the authentic taste and texture that make Biko such a cherished Filipino treat.
This Biko recipe is simple, affordable, and doesn’t require any fancy equipment or complicated techniques. You’ll be able to make a large batch of this delightful dessert in just a few hours, perfect for sharing with loved ones. From soaking the glutinous rice to creating the caramel topping, every step is beginner-friendly, and you’ll feel accomplished as you see your Biko transform into a golden, sticky dessert that will leave everyone asking for seconds.
Ingredients and Preparation
Before diving into the step-by-step instructions, let’s take a closer look at the ingredients you’ll need. This recipe uses a handful of pantry staples, making it both budget-friendly and accessible.
Ingredients:
- 4 cups glutinous rice (also called sticky rice or sweet rice)
- 5 cups full-fat coconut milk, divided
- 1 1/2 cups water
- 2 1/2 cups dark brown sugar, divided
- 1/2 teaspoon salt
The primary ingredients in this recipe are glutinous rice and coconut milk. The glutinous rice is essential for achieving that sticky, chewy texture that defines Biko. It’s the perfect foundation for a dessert that holds its shape, even as it melts in your mouth. The coconut milk adds creaminess and a subtle, tropical sweetness, while the dark brown sugar brings richness and depth to the flavor, perfectly complementing the natural sweetness of the coconut.
Ingredient Substitutions:
If you’re unable to find glutinous rice at your local store, you can substitute it with sushi rice, though it may not achieve the exact same texture. Glutinous rice is crucial for Biko’s signature stickiness, so using sushi rice is a close alternative.
For those who prefer a lighter dessert, you can use light coconut milk instead of full-fat coconut milk, though it will slightly change the richness of the final dish.
Dark brown sugar is recommended for its deep, molasses-like flavor, but you can use light brown sugar or even regular white sugar if that’s what you have available.
Step-by-Step Instructions
Now that you have all your ingredients, it’s time to get cooking! The process is simple, but it’s important to follow each step closely to get that perfect sticky rice texture and caramel topping. Let’s go over the detailed instructions to help you through each stage:
- Soak the Glutinous Rice:
Start by soaking the glutinous rice in water for at least 8 hours or overnight. Soaking is crucial to achieving that signature sticky texture and ensures the rice absorbs enough water to cook evenly. If you’re in a rush, a 4-hour soak will suffice, but overnight soaking is ideal for the best results. - Rinse and Drain the Rice:
Once the rice has soaked, drain it and rinse it under cold water. This helps remove any excess starch that could make the rice too gummy and prevents it from sticking to the pot as it cooks. - Cook the Rice:
In a large pot, combine 4 1/4 cups of the coconut milk with 1 1/2 cups of water. Bring this mixture to a gentle boil over medium heat. Once it starts boiling, add the soaked and drained rice. Stir occasionally, then reduce the heat to medium-low and let the rice simmer for 6-8 minutes. The rice should begin to absorb the liquid, but it should still be moist and sticky. The goal is to have the rice cooked but not dry. - Add the Brown Sugar and Salt:
Once the rice has absorbed most of the liquid, reduce the heat to low and stir in the brown sugar and salt. Let the sugar dissolve completely while you continue to stir constantly. This is where the magic happens, as the sugar will create a rich, caramel-like flavor that infuses the rice. Continue cooking for another 4-7 minutes until the rice mixture becomes thick and sticky. Be careful not to let the mixture burn, so keep stirring and adjust the heat if necessary. Taste the mixture to ensure the rice is fully cooked and the sweetness is to your liking. - Preheat the Oven:
While the rice mixture is cooking, preheat your oven to 350°F (175°C). Grease a 9×13-inch baking dish or pan with a little cooking spray or butter to prevent the rice from sticking during baking. - Transfer the Rice Mixture to the Baking Dish:
Once the rice is cooked and the mixture is thick and sticky, carefully transfer it to the greased baking dish. Use a spatula to spread it out evenly and press it down gently to compact the rice. This helps ensure an even bake and a nice texture throughout the dessert. - Make the Caramel Topping:
In a small saucepan, combine the remaining 3/4 cup of coconut milk with the remaining 1 cup of brown sugar. Bring this mixture to a boil, stirring occasionally to dissolve the sugar. Let it simmer for a few minutes until it thickens slightly. Once it’s thickened and the sugar is dissolved, remove the saucepan from the heat and allow the caramel to cool for about 5 minutes. - Pour the Caramel Over the Rice:
Once the caramel has cooled slightly, pour it evenly over the cooked rice mixture in the baking dish. Use a spoon to spread it out if necessary, making sure the rice is evenly covered with the caramel. - Bake the Biko:
Place the baking dish in the preheated oven and bake for 60-65 minutes, or until the top is golden brown and slightly crispy. The caramel topping will bubble up as it bakes, creating a golden, crunchy crust. Once done, remove from the oven and allow the Biko to cool completely before serving. - Serve and Enjoy:
Once the Biko has cooled, cut it into squares or diamond shapes. The sticky rice will hold its shape but be soft and chewy inside. Serve the Biko to your family and friends, and watch how quickly it disappears!
Beginner Tips and Notes
- Soaking the Rice: Always remember to soak your rice overnight for the best texture. If you’re in a time crunch, soak it for at least 4 hours, but longer is better. This ensures the rice will cook properly and be super sticky.
- Stirring Constantly: While cooking the rice and making the caramel topping, it’s important to stir constantly. This prevents the rice from sticking to the pot and burning, and helps the sugar dissolve evenly.
- Preventing Burnt Rice: If you notice the rice starting to stick to the bottom of the pan or burn, reduce the heat slightly and add a splash of water or coconut milk to loosen it up.
- Texture Troubleshooting: If your Biko seems too runny before baking, let it cook a little longer on the stove until the liquid has mostly been absorbed. If it’s too thick, add a bit more coconut milk or water during the cooking process.
Serving Suggestions
Biko is rich and sweet on its own, but you can elevate the experience by serving it with other Filipino dishes like Leche Flan, Halo-Halo, or Pancit. You could also pair it with a cup of coffee or a cold glass of milk for a simple yet satisfying treat.
For leftovers, store them in an airtight container at room temperature for up to two days, or refrigerate for up to 3 days. To reheat, microwave individual pieces for 10-20 seconds or enjoy them cold straight from the fridge.
Conclusion
Biko is a wonderful dessert that brings a piece of Filipino tradition to your table. With this easy-to-follow recipe, you’ll be able to make a delicious and authentic sticky rice cake with minimal effort. Whether you’re a beginner or a seasoned cook, this recipe will guide you through each step, ensuring that you end up with a dessert that’s sweet, sticky, and oh-so-satisfying. Don’t be afraid to experiment with ingredients or adjust the sweetness to suit your preferences. Once you’ve mastered this dish, you’ll be ready to share it with your friends and family and celebrate the joy of Filipino food! Enjoy every bite and let me know how it turns out. Happy cooking!


