

Imagine biting into a creamy, melt-in-your-mouth truffle that tastes just like a classic banana split. The sweet banana, the crunchy walnuts, the tangy pineapple, all enveloped in a smooth white candy coating and topped with a chocolate drizzle, sprinkles, and a cherry. It’s a dessert that’s as fun to make as it is to eat. That’s the magic of Banana Split Truffles. I remember the first time I made these for a summer barbecue. I wanted to create a dessert that was both delicious and unique, something that would capture the essence of a classic summer treat. These truffles were a huge hit. Everyone loved the playful combination of flavors and the fact that they were bite-sized and easy to eat.

Banana Split Truffles: A Sweet and Playful Treat for Beginner Dessert Makers
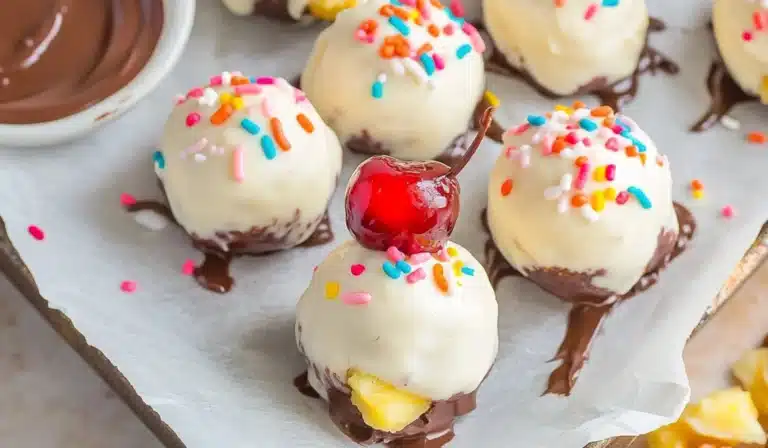
These Banana Split Truffles are a delightful no-bake treat that captures the flavors of a classic banana split. Creamy, fruity, and coated in sweet candy, they’re perfect for parties and gatherings.
- Total Time: 2 hours 25 minutes
- Yield: Varies (approx. 24-30 truffles)
Ingredients
- 15.25 oz white cake mix, heat treated
- 8 oz cream cheese, softened
- 1 teaspoon vanilla
- ½ cup crushed pineapple, drained
- ¾ cup chopped walnuts
- 1 banana, sliced
- 8 oz white candy coating
- ½ cup chocolate melting wafers
- Rainbow sprinkles, maraschino cherries
Instructions
- Prepare Cookie Sheet: Prepare a large cookie sheet with parchment paper and set aside. Parchment paper prevents the truffles from sticking. Use a large cookie sheet for ample space. Use parchment paper that fits the cookie sheet. Beginner Note: Use a silicone mat for easy cleanup.
- Combine Ingredients: In a medium mixing bowl, cream together the cake mix, cream cheese, and vanilla extract until fully combined and “dough-like”. Creaming the ingredients ensures a smooth and consistent dough. Use a hand mixer or stand mixer. Use a spatula to scrape the sides of the bowl. Mix until the ingredients are well combined. Beginner Note: Use a large mixing bowl.
- Add Pineapple, Walnuts, and Banana: Add in crushed pineapple, chopped walnuts, and banana slices. Mix until equally distributed. Even distribution of ingredients ensures consistent flavor in each truffle. Use a spatula for mixing. Avoid overmixing. Mix until the ingredients are evenly distributed. Beginner Note: Do not overmix the dough.
- Scoop and Roll: Using a 1-2 inch cookie scoop, scoop the mixture and roll into 1 – 1-½ inch balls. Use the palms of your hands to smooth and round each ball. Do this until the mixture is completely used. See notes for additional tips. Using a cookie scoop ensures uniform truffles. Rolling the truffles between your palms creates a smooth surface. Use a cookie scoop with a release mechanism. Use a light touch when rolling the balls. Beginner Note: Use a cookie scoop that is the right size.
- Chill Truffles: Place each truffle ball on the sheet of parchment paper and place inside the refrigerator for 1 hour. Chilling the truffles firms them up, making them easier to dip. Use a timer to track the chilling time. Use a refrigerator that is at the correct temperature. Beginner Note: Use a timer to ensure the truffles are chilled for the correct amount of time.
- Melt Candy Coating: About 5-10 minutes before the chilling time is complete, begin to prepare your candy coating by first adding them to a microwave safe bowl. Heat candy coating on 50% power for 1 minute and stir when completed. Return to the microwave for 30 second intervals on 50% power, stirring in between each turn. Do this until the candy coating is silky smooth and fully melted. Melting the candy coating on 50% power prevents it from burning. Stirring frequently ensures even melting. Use a microwave-safe bowl. Use a silicone spatula for stirring. Beginner Note: Melt the candy coating slowly.
- Dip Truffles: Using two forks or dipping tools, dip each truffle ball into the melted chocolate, covering it completely. Roll the ball, working it into the chocolate to cover it completely. Place each chocolate covered truffle on parchment paper and repeat the process for all truffles. Using two forks or dipping tools makes dipping easier. Allow excess coating to drip off. Use dipping tools with a curved end. Use a gentle dipping motion. Beginner Note: Dip the truffles quickly.
- Chill Coated Truffles: Place inside the refrigerator and allow to cool for an additional 30 minutes. Chilling the coated truffles sets the candy coating. Use a timer to track the chilling time. Use a refrigerator that is at the correct temperature. Beginner Note: Chill the truffles until the coating is firm.
- Melt Chocolate Wafers: When the truffles have almost finished chilling, repeat step 5 for the chocolate melting wafers until they are silky smooth. Melting the chocolate wafers on 50% power prevents them from burning. Stirring frequently ensures even melting. Use a microwave-safe bowl. Use a silicone spatula for stirring. Beginner Note: Melt the chocolate wafers slowly.
- Add Chocolate Drizzle and Garnish: Using a small spoon, spoon a small dollop of the melted chocolate over top of the truffle to make the “chocolate syrup”. See notes for additional tips. Place a stemmed cherry immediately in the melted chocolate and hold for a few seconds until firmed. Top with sprinkles and repeat for each truffle, working one at a time. Adding the chocolate drizzle and garnishes immediately prevents the chocolate from setting before you can add the toppings. Use a small spoon for precise drizzling. Use a gentle touch when adding garnishes. Beginner Note: Add the garnishes quickly.
- Final Chill: Return the baking sheet to the refrigerator and allow truffles to chill for an additional 30 minutes before serving. This final chill sets the chocolate drizzle and garnishes. Use a timer to track the chilling time. Use a refrigerator that is at the correct temperature. Beginner Note: Chill the truffles until the chocolate drizzle is firm.
Notes
- Heat treat the cake mix.
- Drain pineapple well.
- Chill truffles before dipping.
- Melt coating slowly.
- Work quickly when garnishing.
- Prep Time: 25 minutes
- Cook Time: 0 minutes
- Category: Dessert
- Method: Mixing, Rolling, Dipping, Chilling
- Cuisine: American Inspired
This recipe is perfect for beginner cooks because it requires no baking and utilizes simple techniques like mixing, rolling, and dipping. It’s a fantastic way to learn about combining flavors and creating fun, visually appealing desserts. Plus, it’s a crowd-pleaser that’s sure to impress. If you’re looking for a dessert that’s easy, fun, and delicious, Banana Split Truffles are the perfect choice. It’s a culinary adventure that’s accessible to everyone, regardless of their cooking experience. It’s also a great way to learn about working with candy coatings and creating visually appealing desserts, proving that even a beginner can create something truly special with minimal effort. This recipe provides a wonderful opportunity to build confidence in dessert making, demonstrating that even intricate-looking treats can be achieved with simple steps and readily available ingredients.
Ingredients and Preparation: A Symphony of Sweet Flavors
This recipe uses readily available ingredients, making it easy for even the most novice cooks to assemble.
- 15.25 oz box white cake mix, heat treated (See notes) – Alternative: You can use yellow cake mix or a gluten-free cake mix. Heat treating the cake mix is essential to eliminate any potential bacteria. Ensure the cake mix is fresh. Use a measuring cup for accurate measurements. Use a baking sheet and oven for heat treating. Use a timer to track the heat treating time.
- 8 oz block of cream cheese, softened to room temperature – Alternative: You can use Neufchâtel cheese. Softened cream cheese blends smoothly into the dough. Ensure the cream cheese is at room temperature. Leave it out for an hour before baking. Use a knife to cut the cream cheese into smaller pieces for faster softening.
- 1 teaspoon vanilla – Alternative: You can use vanilla bean paste or vanilla extract. Vanilla enhances the flavor of the truffles. Use pure vanilla extract for the best flavor. Use a measuring spoon for accurate measurements. Use a level measuring spoon.
- ½ cup crushed pineapple, very well drained – Alternative: You can use crushed mango or peaches. Draining the pineapple well prevents the truffles from becoming soggy. Use canned crushed pineapple for convenience. Drain the pineapple using a fine mesh sieve. Press the pineapple to remove excess liquid.
- ¾ cup chopped walnuts – Alternative: You can use pecans, almonds, or macadamia nuts. Chopped walnuts add a crunchy texture. Use toasted walnuts for added flavor. Use a sharp knife for chopping the walnuts. Use a cutting board for chopping. Use a food processor for chopping nuts.
- 1 banana, sliced – Alternative: You can use banana extract for a more shelf-stable option. Sliced banana adds a fresh banana flavor. Use a ripe but firm banana. Slice the banana just before using. Use a sharp knife for slicing. Use a cutting board for slicing.
- 8 oz of white candy coating – Alternative: You can use white chocolate or almond bark. White candy coating provides a smooth, sweet coating. Use high-quality candy coating for the best results. Use a microwave-safe bowl for melting the candy coating. Use a double boiler for melting candy coating.
- ½ cup chocolate melting wafers – Alternative: You can use semi-sweet chocolate or dark chocolate. Chocolate melting wafers create a smooth, drizzle-able chocolate. Use high-quality chocolate melting wafers. Use a microwave-safe bowl for melting the chocolate. Use a double boiler for melting chocolate.
- Rainbow sprinkles and stemmed maraschino cherries for garnishing – Alternative: You can use other sprinkles, chopped nuts, or chocolate shavings. Rainbow sprinkles and maraschino cherries add a fun, festive touch. Use stemmed maraschino cherries for easy handling. Use a small spoon for adding sprinkles.
Step-by-Step Instructions: Crafting Playful Banana Split Truffles
These easy-to-follow instructions will guide you through each step of creating your delicious Banana Split Truffles:
- Prepare Cookie Sheet: Prepare a large cookie sheet with parchment paper and set aside. Parchment paper prevents the truffles from sticking. Use a large cookie sheet for ample space. Use parchment paper that fits the cookie sheet. Beginner Note: Use a silicone mat for easy cleanup.
- Combine Ingredients: In a medium mixing bowl, cream together the cake mix, cream cheese, and vanilla extract until fully combined and “dough-like”. Creaming the ingredients ensures a smooth and consistent dough. Use a hand mixer or stand mixer. Use a spatula to scrape the sides of the bowl. Mix until the ingredients are well combined. Beginner Note: Use a large mixing bowl.
- Add Pineapple, Walnuts, and Banana: Add in crushed pineapple, chopped walnuts, and banana slices. Mix until equally distributed. Even distribution of ingredients ensures consistent flavor in each truffle. Use a spatula for mixing. Avoid overmixing. Mix until the ingredients are evenly distributed. Beginner Note: Do not overmix the dough.
- Scoop and Roll: Using a 1-2 inch cookie scoop, scoop the mixture and roll into 1 – 1-½ inch balls. Use the palms of your hands to smooth and round each ball. Do this until the mixture is completely used. See notes for additional tips. Using a cookie scoop ensures uniform truffles. Rolling the truffles between your palms creates a smooth surface. Use a cookie scoop with a release mechanism. Use a light touch when rolling the balls. Beginner Note: Use a cookie scoop that is the right size.
- Chill Truffles: Place each truffle ball on the sheet of parchment paper and place inside the refrigerator for 1 hour. Chilling the truffles firms them up, making them easier to dip. Use a timer to track the chilling time. Use a refrigerator that is at the correct temperature. Beginner Note: Use a timer to ensure the truffles are chilled for the correct amount of time.
- Melt Candy Coating: About 5-10 minutes before the chilling time is complete, begin to prepare your candy coating by first adding them to a microwave safe bowl. Heat candy coating on 50% power for 1 minute and stir when completed. Return to the microwave for 30 second intervals on 50% power, stirring in between each turn. Do this until the candy coating is silky smooth and fully melted. Melting the candy coating on 50% power prevents it from burning. Stirring frequently ensures even melting. Use a microwave-safe bowl. Use a silicone spatula for stirring. Beginner Note: Melt the candy coating slowly.
- Dip Truffles: Using two forks or dipping tools, dip each truffle ball into the melted chocolate, covering it completely. Roll the ball, working it into the chocolate to cover it completely. Place each chocolate covered truffle on parchment paper and repeat the process for all truffles. Using two forks or dipping tools makes dipping easier. Allow excess coating to drip off. Use dipping tools with a curved end. Use a gentle dipping motion. Beginner Note: Dip the truffles quickly.
- Chill Coated Truffles: Place inside the refrigerator and allow to cool for an additional 30 minutes. Chilling the coated truffles sets the candy coating. Use a timer to track the chilling time. Use a refrigerator that is at the correct temperature. Beginner Note: Chill the truffles until the coating is firm.
- Melt Chocolate Wafers: When the truffles have almost finished chilling, repeat step 5 for the chocolate melting wafers until they are silky smooth. Melting the chocolate wafers on 50% power prevents them from burning. Stirring frequently ensures even melting. Use a microwave-safe bowl. Use a silicone spatula for stirring. Beginner Note: Melt the chocolate wafers slowly.
- Add Chocolate Drizzle and Garnish: Using a small spoon, spoon a small dollop of the melted chocolate over top of the truffle to make the “chocolate syrup”. See notes for additional tips. Place a stemmed cherry immediately in the melted chocolate and hold for a few seconds until firmed. Top with sprinkles and repeat for each truffle, working one at a time. Adding the chocolate drizzle and garnishes immediately prevents the chocolate from setting before you can add the toppings. Use a small spoon for precise drizzling. Use a gentle touch when adding garnishes. Beginner Note: Add the garnishes quickly.
- Final Chill: Return the baking sheet to the refrigerator and allow truffles to chill for an additional 30 minutes before serving. This final chill sets the chocolate drizzle and garnishes. Use a timer to track the chilling time. Use a refrigerator that is at the correct temperature. Beginner Note: Chill the truffles until the chocolate drizzle is firm.
Beginner Tips and Notes: Your Truffle-Making Guide
Even simple recipes have a few tricks to make them even better:
- Heat Treat Cake Mix: To heat treat the cake mix, spread it on a baking sheet and bake at 350°F (175°C) for 5-10 minutes, stirring occasionally. This eliminates any potential bacteria. Use a baking sheet that is clean. Use an oven thermometer to verify oven temperature.
- Drain Pineapple Well: Ensure the crushed pineapple is very well drained to prevent the truffles from becoming soggy. Use a fine mesh sieve. Use paper towels to absorb excess liquid.
- Chill Truffles Before Dipping: Chilling the truffles firms them up, making them easier to dip into the candy coating. Use a refrigerator that is at the correct temperature. Use a timer.
- Melt Candy Coating Slowly: Melt the candy coating on 50% power in the microwave, stirring frequently, to prevent it from burning. Use a microwave-safe bowl. Use short intervals.
Serving Suggestions: Completing the Sweet Experience
These Banana Split Truffles are delicious and satisfying on their own, but you can also enhance them with some complementary toppings and pairings.
- Whipped Cream: A dollop of whipped cream adds a light and airy texture. Use freshly whipped cream.
- Chocolate Sauce: A drizzle of chocolate sauce adds richness and decadence. Use a high-quality chocolate sauce.
- Caramel Sauce: Caramel sauce adds a sweet and gooey element. Use a homemade or store-bought caramel sauce.
- Chopped Nuts: Extra chopped nuts add a crunchy texture. Use toasted nuts.
Storage Tips for Leftovers:
Store leftover Banana Split Truffles in an airtight container in the refrigerator for up to 5 days. The truffles may become slightly firm when chilled, so allow them to come to room temperature before serving for a softer texture.

Conclusion: A Sweet and Playful Treat for Home Dessert Makers
These Banana Split Truffles are a delightful and fun dessert to make, perfect for any occasion. They’re a fantastic way to learn about combining flavors and creating visually appealing treats. I encourage you to try this recipe and make it your own. Don’t be afraid to experiment with different ingredients and toppings to create your perfect truffle masterpiece. Share your culinary creations and experiences in the comments below – I’d love to see your variations! This easy and versatile recipe is a game-changer for parties, potlucks, or any time you need a sweet and playful treat. It’s a flavorful way to get a delicious and impressive dessert on the table without any fuss. And the best part? It’s so easy to customize! You can adjust the ingredients to your liking, pair it with a variety of toppings, and even make it ahead of time.
These Banana Split Truffles are more than just a recipe; they’re an experience. It’s a celebration of flavor, texture, and the joy of creating a delicious and satisfying treat. It’s a perfect blend of sweet, fruity, and crunchy flavors, a delightful way to nourish your body and your soul. It’s a testament to the fact that cooking doesn’t have to be complicated or intimidating; it can be fun, creative, and incredibly rewarding. It’s a reminder that even the simplest ingredients, when combined with a little creativity and love, can create something truly special. It’s a chance to explore new flavors and create your own dessert masterpieces. It’s an invitation to gather around the table with loved ones and share a treat that’s both comforting and delicious. So, what are you waiting for? Get rolling and create some truffle magic!


