
There’s something incredibly nostalgic about popcorn chicken. Whether it’s from your childhood, grabbing a bucket from the mall food court, or sharing them with friends at a movie night, these crispy, golden bites of chicken never fail to bring a smile. As an adult, I can’t help but reach for these little pieces of comfort food every chance I get. They’re crispy on the outside, tender and juicy on the inside – the perfect snack or meal for any occasion. Popcorn chicken is one of those dishes that’s easy to make at home, yet feels indulgent and special. If you’ve been craving this tasty treat but didn’t think you could replicate that crispy, delicious texture yourself, think again! This homemade popcorn chicken recipe is simple, quick, and full of flavor – ideal for beginner cooks. Plus, it’s a fantastic way to create a healthier version of this favorite without compromising on taste. In this article, we’ll walk you through every step of making homemade popcorn chicken from start to finish, including ingredient alternatives, tips, and tricks to help you feel confident in the kitchen. Whether you’re looking for an easy sheet pan dinner or just something fun to whip up for the family, this recipe is for you. Let’s dive in and make your very own batch of crispy, golden popcorn chicken!
Homemade Popcorn Chicken: A Delicious, Easy-to-Make Recipe for Beginners
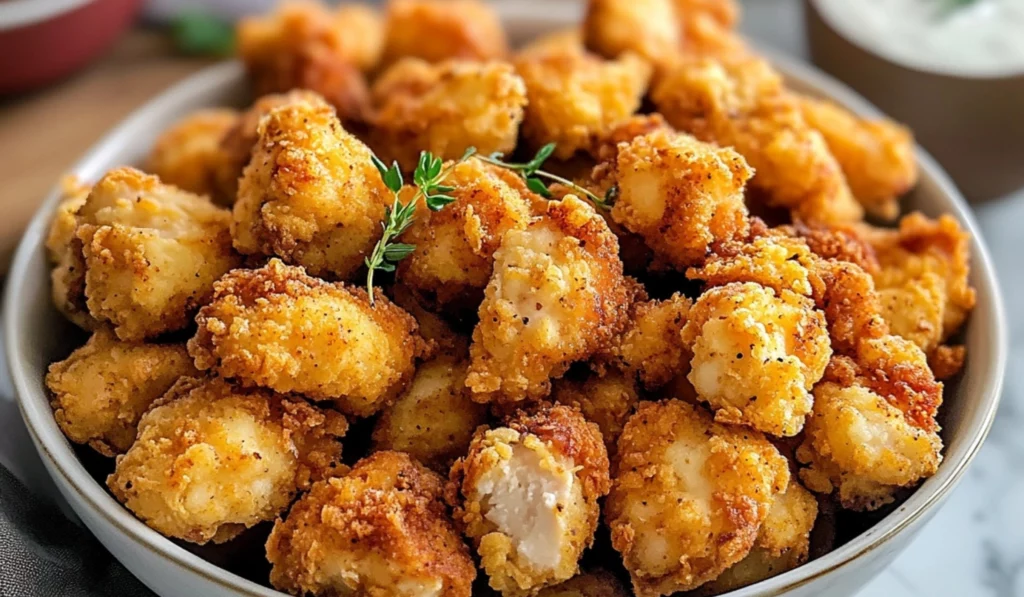
If there’s one thing that never goes out of style, it’s crispy, golden popcorn chicken. Whether you’re dipping it into your favorite sauce at a party or snacking on it during movie night, these bite-sized pieces of chicken never fail to deliver. This homemade version takes it up a notch, giving you that perfect crispy crunch without the deep fryer or store-bought convenience. It’s the kind of recipe that brings back childhood memories of grabbing a bucket of these crispy chicken bites and devouring them without a care in the world. But now, you can make them from scratch in the comfort of your own kitchen, with just a few simple ingredients and easy-to-follow steps. So, if you’ve been craving that irresistible crunch, let’s dive into this simple, delicious popcorn chicken recipe that’s perfect for any occasion – no culinary experience required!
- Total Time: 35 minutes
- Yield: 6 servings 1x
Ingredients
- 1 1/2 lbs boneless, skinless chicken breasts, cut into 1-inch pieces
- 1 cup all-purpose flour
- 1 tsp salt
- 1 tsp garlic powder
- 1 cup buttermilk
- 2 cups panko breadcrumbs
- Vegetable or canola oil for frying
Instructions
Step 1: Prepare the Chicken
Start by cutting the boneless skinless chicken breasts into 1-inch bite-sized pieces. The key here is to make sure each piece is roughly the same size to ensure they cook evenly. Once cut, pat the chicken pieces dry with paper towels to remove excess moisture – this will help the breading stick better. It’s crucial to remove any extra moisture from the chicken so that the breading adheres properly, resulting in that perfect crispy texture.
Step 2: Prepare the Dredging Stations
In a shallow bowl, whisk together the flour, salt, and garlic powder. This seasoned flour will coat the chicken and give it a delicious flavor. Make sure the flour is evenly mixed with the salt and garlic powder so that each piece of chicken gets a nice, balanced flavor.
Next, pour the buttermilk into another shallow bowl. This will act as a wet coating for the chicken, helping the breadcrumbs stick. The buttermilk not only adds flavor but also helps tenderize the chicken, making it juicy on the inside while crispy on the outside.
Finally, place the panko breadcrumbs in a separate shallow bowl. Panko breadcrumbs are light and airy, which makes them perfect for achieving that crispy, crunchy texture on the chicken. If you want to add a little extra flavor to the breadcrumbs, you can mix in some dried herbs or a pinch of paprika for a smoky twist.
Step 3: Dredge the Chicken
Now comes the fun part! Take each chicken piece and first dip it into the seasoned flour, making sure it’s evenly coated. Gently shake off any excess flour. This flour coating is the base layer, ensuring that the chicken has a light, crispy exterior. Then, dip the chicken into the buttermilk, allowing any excess liquid to drip off. The buttermilk acts as a binding agent that keeps the breadcrumbs attached to the chicken. Finally, coat the chicken in the panko breadcrumbs, pressing gently to make sure the breadcrumbs adhere. Repeat this process for all the chicken pieces. As you work through the chicken, you’ll start to see the transformation from simple chicken chunks to perfectly breaded, crispy pieces.
Step 4: Heat the Oil
Fill a heavy-bottomed pot or Dutch oven with 2-3 inches of oil. Heat the oil to 350°F. To test if the oil is hot enough, drop a small piece of bread into the oil – if it browns in about 60 seconds, you’re ready to fry. It’s important to get the oil to the right temperature so that the chicken cooks quickly and evenly, producing a crisp, golden coating. If the oil is too cold, the breading will absorb more oil, making it greasy. If it’s too hot, the breading may burn before the chicken cooks through.
Step 5: Fry the Chicken
Working in batches, carefully place the breaded chicken pieces into the hot oil. Fry for 2-3 minutes or until golden brown and crispy. Be sure not to overcrowd the pot – this can cause the oil temperature to drop, resulting in soggy chicken. Frying in small batches allows the chicken to cook evenly and ensures that every piece gets that perfect, crispy texture.
Once the chicken is golden brown and crispy, use a slotted spoon to remove it from the oil and drain on a paper towel-lined plate. The paper towels will help absorb any excess oil, keeping your chicken crispy. If desired, season with a little extra salt while the chicken is still hot, and you’ll have the perfect balance of crispy, salty goodness.
Notes
- Oil Temperature: One of the most important things to keep in mind when frying is the oil temperature. Too low, and the chicken will absorb too much oil, making it greasy. Too high, and the outside will burn before the chicken cooks through. Use a thermometer to maintain the temperature at 350°F for optimal crispiness. If you don’t have a thermometer, you can test the oil by dropping in a small piece of bread – if it bubbles and turns golden brown in 60 seconds, the oil is ready.
- Batch Frying: Fry the chicken in batches to avoid overcrowding the pot. Overcrowding will cause the temperature of the oil to drop, resulting in soggy breading. Be patient and fry in small batches for crispy perfection. This will take a few extra minutes, but it’s worth it to ensure every piece is perfectly cooked.
- Cook Time: Each batch of chicken should only take 2-3 minutes to cook. Check a piece to ensure it’s fully cooked through by cutting into the thickest part. The internal temperature should reach 165°F. If you’re unsure, you can also use a meat thermometer to make sure the chicken is cooked through.
- Substitute Tools: If you don’t have a deep fryer or Dutch oven, you can also fry the chicken in a large skillet. Just make sure you have enough oil to cover the chicken halfway, and be sure to flip the pieces halfway through cooking to ensure even browning. Another great option is an air fryer, which can also yield crispy results with little to no oil.
- Breading Tips: When dredging the chicken, make sure to press the breadcrumbs gently to ensure they stick. This will create a thick, crispy coating. If you want an extra-crispy result, dip the chicken into the flour and buttermilk a second time before coating in the breadcrumbs. This double-dipping method creates a thicker, crunchier crust.
- Prep Time: 20 minutes
- Cook Time: 15 minutes
- Category: Appetizer, Snack
- Method: Frying
- Cuisine: American
Ingredients and Preparation
Before we start cooking, let’s gather everything you’ll need to make this tasty homemade popcorn chicken. This recipe serves 6, making it perfect for a family dinner, a party snack, or even a meal prep option for the week ahead.
Ingredients:
- 1 1/2 lbs boneless, skinless chicken breasts, cut into 1-inch pieces
- 1 cup all-purpose flour
- 1 tsp salt
- 1 tsp garlic powder
- 1 cup buttermilk
- 2 cups panko breadcrumbs
- Vegetable or canola oil for frying
Ingredient Alternatives:
- Chicken: You can substitute boneless skinless chicken breasts with boneless thighs or even turkey breast for a different flavor. If you prefer a leaner option, chicken tenders would work as well. For an even healthier twist, consider using chicken breast tenderloins, which are already portioned and lower in fat.
- Buttermilk: If you don’t have buttermilk on hand, you can make a quick substitute by adding 1 tbsp of lemon juice or white vinegar to 1 cup of milk. Let it sit for 5 minutes to curdle and thicken. Alternatively, you can also use plain yogurt, diluted with a little water or milk, to achieve a similar tangy flavor and consistency.
- Breadcrumbs: If you don’t have panko, regular breadcrumbs will work just fine. Panko gives the chicken that extra crispiness, but regular breadcrumbs will still deliver a tasty result. You can also try using crushed cornflakes or cracker crumbs for a different texture and flavor.
- Oil for frying: If you’re looking for a healthier alternative, you can bake the chicken instead of frying it. Simply coat the breaded chicken with a light spray of oil and bake at 400°F for about 20 minutes or until golden and crispy. Another great option is air-frying the chicken for a lower-fat result with just as much crisp!
Step-by-Step Instructions
Now that you have your ingredients ready, it’s time to get cooking! Don’t worry – this recipe is beginner-friendly and easy to follow. Let’s break it down into manageable steps.
Step 1: Prepare the Chicken
Start by cutting the boneless skinless chicken breasts into 1-inch bite-sized pieces. The key here is to make sure each piece is roughly the same size to ensure they cook evenly. Once cut, pat the chicken pieces dry with paper towels to remove excess moisture – this will help the breading stick better. It’s crucial to remove any extra moisture from the chicken so that the breading adheres properly, resulting in that perfect crispy texture.
Step 2: Prepare the Dredging Stations
In a shallow bowl, whisk together the flour, salt, and garlic powder. This seasoned flour will coat the chicken and give it a delicious flavor. Make sure the flour is evenly mixed with the salt and garlic powder so that each piece of chicken gets a nice, balanced flavor.
Next, pour the buttermilk into another shallow bowl. This will act as a wet coating for the chicken, helping the breadcrumbs stick. The buttermilk not only adds flavor but also helps tenderize the chicken, making it juicy on the inside while crispy on the outside.
Finally, place the panko breadcrumbs in a separate shallow bowl. Panko breadcrumbs are light and airy, which makes them perfect for achieving that crispy, crunchy texture on the chicken. If you want to add a little extra flavor to the breadcrumbs, you can mix in some dried herbs or a pinch of paprika for a smoky twist.
Step 3: Dredge the Chicken
Now comes the fun part! Take each chicken piece and first dip it into the seasoned flour, making sure it’s evenly coated. Gently shake off any excess flour. This flour coating is the base layer, ensuring that the chicken has a light, crispy exterior. Then, dip the chicken into the buttermilk, allowing any excess liquid to drip off. The buttermilk acts as a binding agent that keeps the breadcrumbs attached to the chicken. Finally, coat the chicken in the panko breadcrumbs, pressing gently to make sure the breadcrumbs adhere. Repeat this process for all the chicken pieces. As you work through the chicken, you’ll start to see the transformation from simple chicken chunks to perfectly breaded, crispy pieces.
Step 4: Heat the Oil
Fill a heavy-bottomed pot or Dutch oven with 2-3 inches of oil. Heat the oil to 350°F. To test if the oil is hot enough, drop a small piece of bread into the oil – if it browns in about 60 seconds, you’re ready to fry. It’s important to get the oil to the right temperature so that the chicken cooks quickly and evenly, producing a crisp, golden coating. If the oil is too cold, the breading will absorb more oil, making it greasy. If it’s too hot, the breading may burn before the chicken cooks through.
Step 5: Fry the Chicken
Working in batches, carefully place the breaded chicken pieces into the hot oil. Fry for 2-3 minutes or until golden brown and crispy. Be sure not to overcrowd the pot – this can cause the oil temperature to drop, resulting in soggy chicken. Frying in small batches allows the chicken to cook evenly and ensures that every piece gets that perfect, crispy texture.
Once the chicken is golden brown and crispy, use a slotted spoon to remove it from the oil and drain on a paper towel-lined plate. The paper towels will help absorb any excess oil, keeping your chicken crispy. If desired, season with a little extra salt while the chicken is still hot, and you’ll have the perfect balance of crispy, salty goodness.
Beginner Tips and Notes
Cooking popcorn chicken is easy, but here are a few tips and tricks to ensure you get the best results every time:
- Oil Temperature: One of the most important things to keep in mind when frying is the oil temperature. Too low, and the chicken will absorb too much oil, making it greasy. Too high, and the outside will burn before the chicken cooks through. Use a thermometer to maintain the temperature at 350°F for optimal crispiness. If you don’t have a thermometer, you can test the oil by dropping in a small piece of bread – if it bubbles and turns golden brown in 60 seconds, the oil is ready.
- Batch Frying: Fry the chicken in batches to avoid overcrowding the pot. Overcrowding will cause the temperature of the oil to drop, resulting in soggy breading. Be patient and fry in small batches for crispy perfection. This will take a few extra minutes, but it’s worth it to ensure every piece is perfectly cooked.
- Cook Time: Each batch of chicken should only take 2-3 minutes to cook. Check a piece to ensure it’s fully cooked through by cutting into the thickest part. The internal temperature should reach 165°F. If you’re unsure, you can also use a meat thermometer to make sure the chicken is cooked through.
- Substitute Tools: If you don’t have a deep fryer or Dutch oven, you can also fry the chicken in a large skillet. Just make sure you have enough oil to cover the chicken halfway, and be sure to flip the pieces halfway through cooking to ensure even browning. Another great option is an air fryer, which can also yield crispy results with little to no oil.
- Breading Tips: When dredging the chicken, make sure to press the breadcrumbs gently to ensure they stick. This will create a thick, crispy coating. If you want an extra-crispy result, dip the chicken into the flour and buttermilk a second time before coating in the breadcrumbs. This double-dipping method creates a thicker, crunchier crust.
Serving Suggestions
Now that your homemade popcorn chicken is ready, let’s think about how to serve it. This dish is versatile and can be paired with a variety of sides and sauces. Whether you’re serving it for a family dinner, as a snack, or for a party, these ideas will elevate your meal.
Complementary Sides:
- Fries or Potato Wedges: A classic pairing with popcorn chicken. Crispy, golden fries or potato wedges will round out your meal perfectly. You can also try sweet potato fries for a healthier twist.
- Coleslaw: A fresh, tangy coleslaw is a great contrast to the crispy chicken. The crunch of the cabbage and the creamy dressing complement the chicken perfectly.
- Vegetables: Roasted or steamed vegetables like broccoli, carrots, or green beans add a healthy balance to the meal. You could also make a vegetable medley with bell peppers, onions, and zucchini for added flavor.
- Rice or Salad: For a lighter option, serve the chicken with a side of brown rice or a refreshing salad. A simple mixed greens salad with a tangy vinaigrette pairs wonderfully with the crispy chicken.
Sauces for Dipping:
Popcorn chicken is all about the dipping sauces. Try one or more of these to elevate your dish:
- Honey Mustard: A classic, sweet and tangy option that pairs perfectly with crispy chicken.
- Ranch: A creamy and cool dip that complements the crunchiness of the chicken.
- BBQ Sauce: Smoky and sweet, this sauce adds a rich flavor to the chicken.
- Sweet Chili Sauce: For a touch of heat and sweetness, sweet chili sauce is an excellent choice.
Leftover Storage Tips:
If you happen to have leftovers (though that’s rare!), store your popcorn chicken in an airtight container in the fridge for up to 2-3 days. To reheat, place the chicken in a preheated oven at 375°F for about 10 minutes to crisp up again. You can also use an air fryer to bring the chicken back to life, ensuring it stays crispy without drying out.

Conclusion
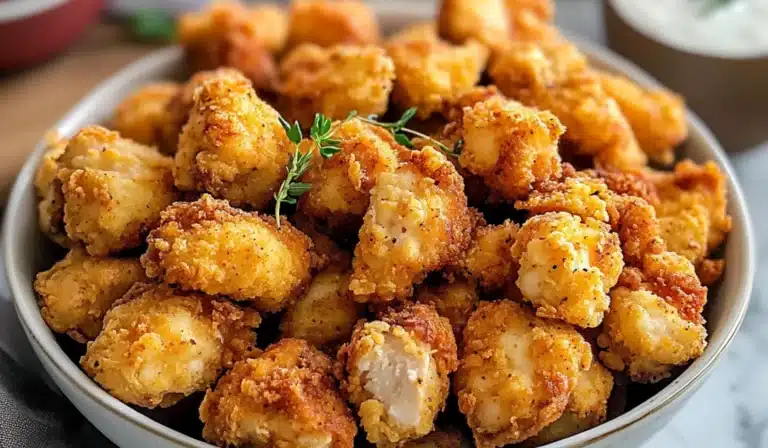
There you have it – your very own homemade popcorn chicken, crispy on the outside and juicy on the inside! Whether you’re serving it for dinner or snacking on it during movie night, this dish is sure to impress. It’s easy to make, beginner-friendly, and packed with flavor. With just a few simple ingredients and some basic frying techniques, you can create this crispy, golden treat at home. I hope you enjoy making this recipe as much as I do! Don’t forget to share your experience and any variations you try in the comments below. Happy cooking, and remember – if you can fry chicken, you can do anything!


