
There’s something magical about desserts that are fun, colorful, and packed with nostalgia. In this article, we’re diving into a whimsical treat that ticks all those boxes—Fruity Pebbles Cheesecake Tacos. From the no-bake shells to the creamy filling, they’re a dream come true for cereal lovers and dessert enthusiasts alike. I’ll take you through the story that inspired this delightful dish, how to make them, ingredient tips, and creative serving suggestions. We’ll also link in some other crave-worthy recipes from Paula’s Kitchen you won’t want to miss. Let’s get into the sweet stuff!
The Story Behind Fruity Pebbles Cheesecake Tacos
As a kid, my mornings were often brightened by a bowl of Fruity Pebbles. Their rainbow hues and fruity crunch never failed to lift my spirits. Fast forward a few years—and quite a few baking experiments later—I wanted to recapture that childhood joy but with a twist. One lazy weekend, my niece and I played around with a no bake fruity pebbles dessert idea, and boom—the idea for fruity pebbles cheesecake tacos was born!
They’re everything I love in a dessert: vibrant, creamy, and easy to make. Plus, they’re no bake, which means less mess and more time for fun. Whether it’s for a birthday party, a quirky brunch, or just a snack to cheer up your day, fruity pebbles cheesecake tacos are the ultimate crowd-pleaser.
What makes them even more special is the playful contrast between the crispy shell and the creamy filling—like a rainbow explosion in every bite. And if you’re a fan of other no-bake gems like these cherry cheesecake fluff or no-bake cheesecake parfaits, then you’re definitely in for a treat with this one.
Print
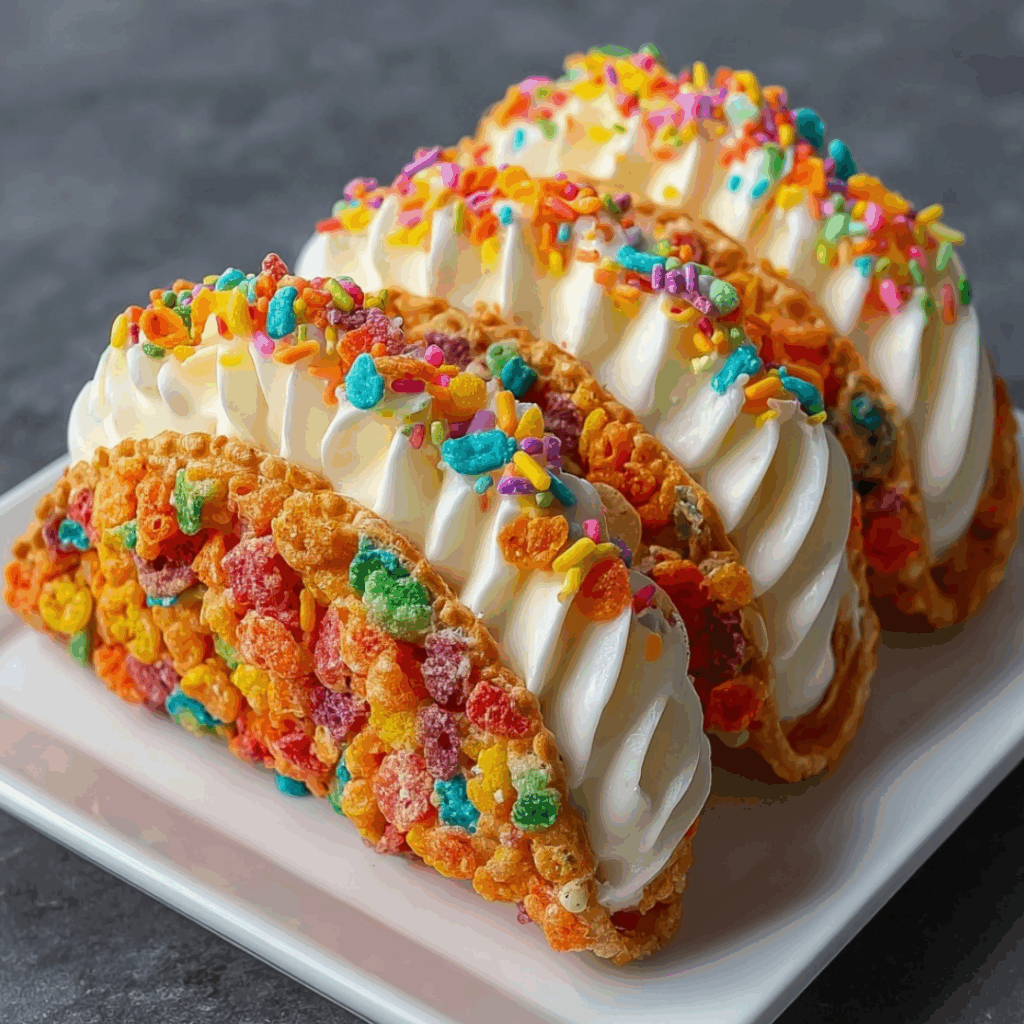
Fruity Pebbles Cheesecake Tacos: A No-Bake Rainbow Dessert You’ll Crave
Fruity Pebbles Cheesecake Tacos are colorful, no-bake dessert tacos made with Fruity Pebbles cereal shells and filled with creamy cheesecake filling. A fun, festive treat for any occasion.
- Total Time: 25 minutes
- Yield: 8 tacos 1x
Ingredients
- 3 cups Fruity Pebbles cereal
- 2 tablespoons butter
- 1½ cups mini marshmallows
- 8 ounces cream cheese (softened)
- 1/3 cup granulated sugar
- 1 teaspoon vanilla extract
- 1½ cups whipped topping
- Optional toppings: whipped cream, sprinkles, white chocolate drizzle
Instructions
- Melt the butter and mini marshmallows in a saucepan over medium heat, stirring until smooth.
- Stir in Fruity Pebbles cereal quickly until fully coated.
- Scoop portions of the mixture onto parchment paper and flatten into small circles.
- Drape each circle over a rolling pin or taco mold to form shell shapes; let cool until firm.
- In a bowl, beat cream cheese, sugar, and vanilla extract until smooth and fluffy.
- Fold in the whipped topping until evenly combined.
- Transfer filling into a piping bag and fill each cooled taco shell.
- Garnish with whipped cream, sprinkles, or white chocolate drizzle as desired. Chill before serving.
Notes
- Shape taco shells quickly before they firm up.
- Shells can be made a day in advance and stored in an airtight container.
- Cheesecake filling can be made up to 2 days ahead.
- Store assembled tacos in the fridge for up to 2 days.
- Prep Time: 20 minutes
- Cook Time: 5 minutes
- Category: Dessert
- Method: No-bake
- Cuisine: American
- Diet: Vegetarian
Creating the Perfect Cheesecake Filling
To make fruity pebbles dessert tacos recipe unforgettable, the cheesecake filling has to strike a balance between sweet and tangy. That’s where the combination of cream cheese and whipped topping shines. Room temperature cream cheese ensures a velvety texture, while the whipped topping adds an airy lightness.
You can customize the filling with a splash of vanilla or even a swirl of fruit preserves to match the cereal’s fruity flavor. I personally love using a little lemon zest—it brightens up the richness and gives each bite a burst of freshness.
For extra flavor and color, try folding in some chopped strawberries or a drizzle of white chocolate. The contrast in texture between the soft filling and the crunchy fruity pebbles cheesecake tacos is what makes this dessert feel so indulgent.
Forming and Setting Fruity Pebbles Shells
The star of these Fruity Pebbles Cheesecake Tacos is undoubtedly the shell. Creating them is surprisingly simple. You’ll melt marshmallows and butter, just like making classic cereal treats, but then shape them into taco shells before they set.
You have to work quickly while the mix is still warm and pliable. Use a rolling pin and mold the circles over a spoon rack or any rounded surface to achieve the perfect taco shape. Let them cool completely so they firm up and hold their shape.
This trick works like a charm and is the same method I use for my peach cobbler cheesecake cones. And for a fun variation, try dipping the shell edges in melted chocolate and adding more crushed Fruity Pebbles for that extra crunch and color.
In the next part, we’ll walk through the step-by-step process for making these tacos, from ingredients to assembly.
How to Assemble Fruity Pebbles Cheesecake Tacos Like a Pro
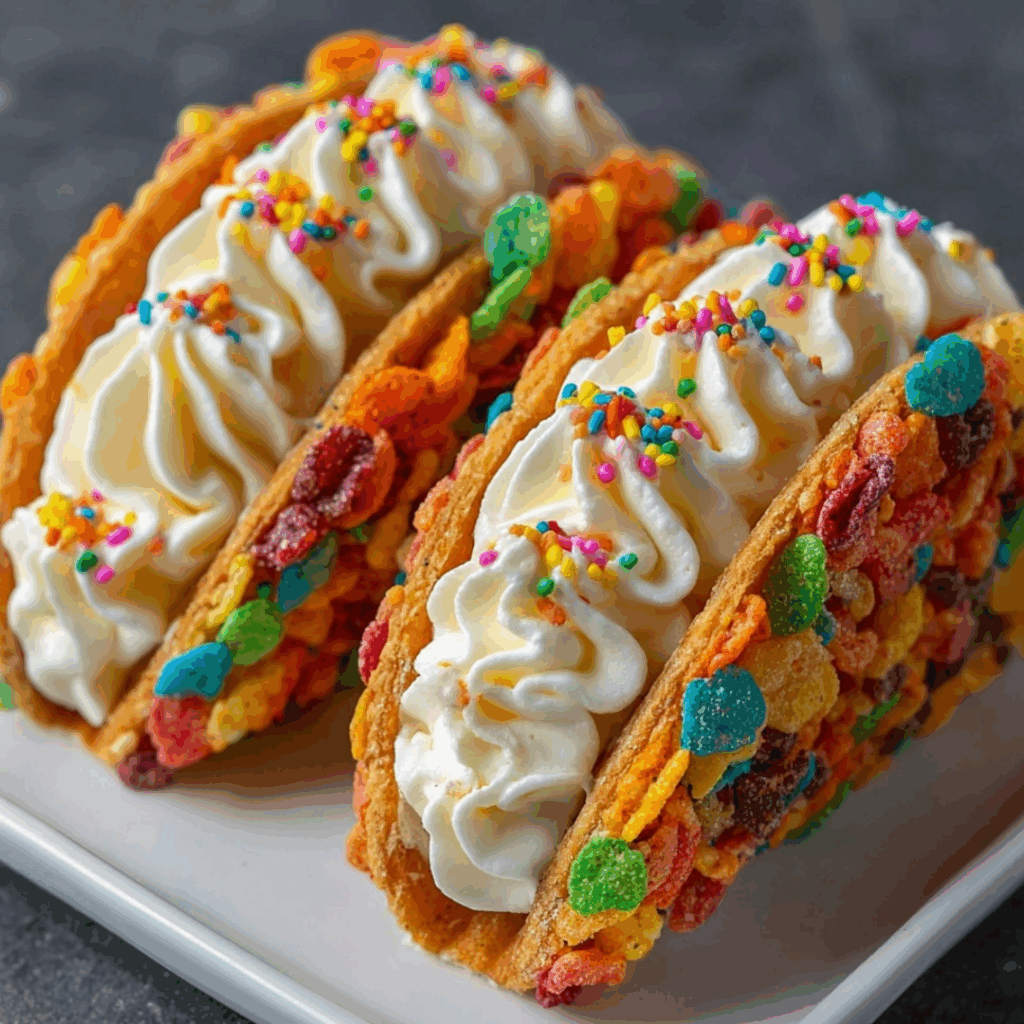
Once your shells have cooled and set, it’s time to get to the fun part—filling and decorating your fruity pebbles cheesecake tacos. Using a piping bag (or a simple zip-top bag with the corner cut off), pipe the cheesecake mixture into each shell. You’ll want to fill them generously, but not so much that the filling spills out.
If you like a little contrast, top them off with whipped cream, extra cereal, sprinkles, or even crushed cookies. One of my go-to finishes is a drizzle of white chocolate and a sprinkle of rainbow nonpareils. It makes each taco look like it came straight from a bakery case.
Need ideas for presentation? Serve them standing upright in a taco tray, or lay them gently on a colorful platter, just like I do for my banana split dump cake gatherings. These make a beautiful addition to any party dessert spread—and they disappear fast!
If you’re in a creative mood, experiment with different cereal coatings. Try Cocoa Pebbles for a chocolatey twist, or go wild with Cap’n Crunch Berries. Whatever route you choose, the Fruity Pebbles Cheesecake Tacos base is flexible and foolproof.
Tips for Making Ahead and Storing
One of the best parts about this no bake fruity pebbles cheesecake tacos dessert is that it’s a perfect make-ahead treat. You can prepare the taco shells a day in advance and store them in an airtight container. Just be sure to keep them in a cool, dry place so they stay crisp.
As for the cheesecake filling, you can whip that up two days ahead and store it in the fridge. When you’re ready to serve, fill the shells, garnish, and enjoy. It’s an easy setup that works great when you’re short on time but still want to impress.
If you’re looking for other fuss-free recipes that hold up well for parties, try these mini pecan pie cheesecakes or orange creamsicle cheesecake bars. They’re also no-bake and super shareable.
To store leftovers, keep your filled tacos in the refrigerator for up to 2 days. Be aware the shells may soften slightly over time, but the flavors remain delicious. If you’re planning a big event, consider offering the shells and filling separately, letting guests DIY their own tacos—fun and fresh!
Fun Flavor Variations for Fruity Pebbles Dessert Tacos
One of the best parts about making fruity pebbles cheesecake tacos is how easy they are to customize. You already have a stunning, colorful base with the cereal shells, so let’s play with what goes inside! Start with the classic cheesecake filling, then swirl in fruit preserves like strawberry, raspberry, or mango for a bright burst of flavor.
Want something more indulgent? Add a tablespoon of Nutella or cookie butter into your cheesecake base—it’ll transform your tacos into a decadent delight. You could even mix in mini chocolate chips or chopped fruit like kiwi or mango to amplify the fruity goodness.
Another great variation is turning your filling into a fruity mousse. Just fold in extra whipped topping or yogurt for a lighter texture. This method is inspired by my fluffy cherry cheesecake fluff—which shares a similar light, creamy vibe.
To match the Fruity Pebbles Cheesecake Tacos theme, consider adding gel food coloring to the filling. Divide the mixture into sections, dye each one a different color, and layer them for a full rainbow effect. It looks especially magical when you cut or bite into them!
How to Serve and Impress With Fruity Pebbles Cheesecake Tacos
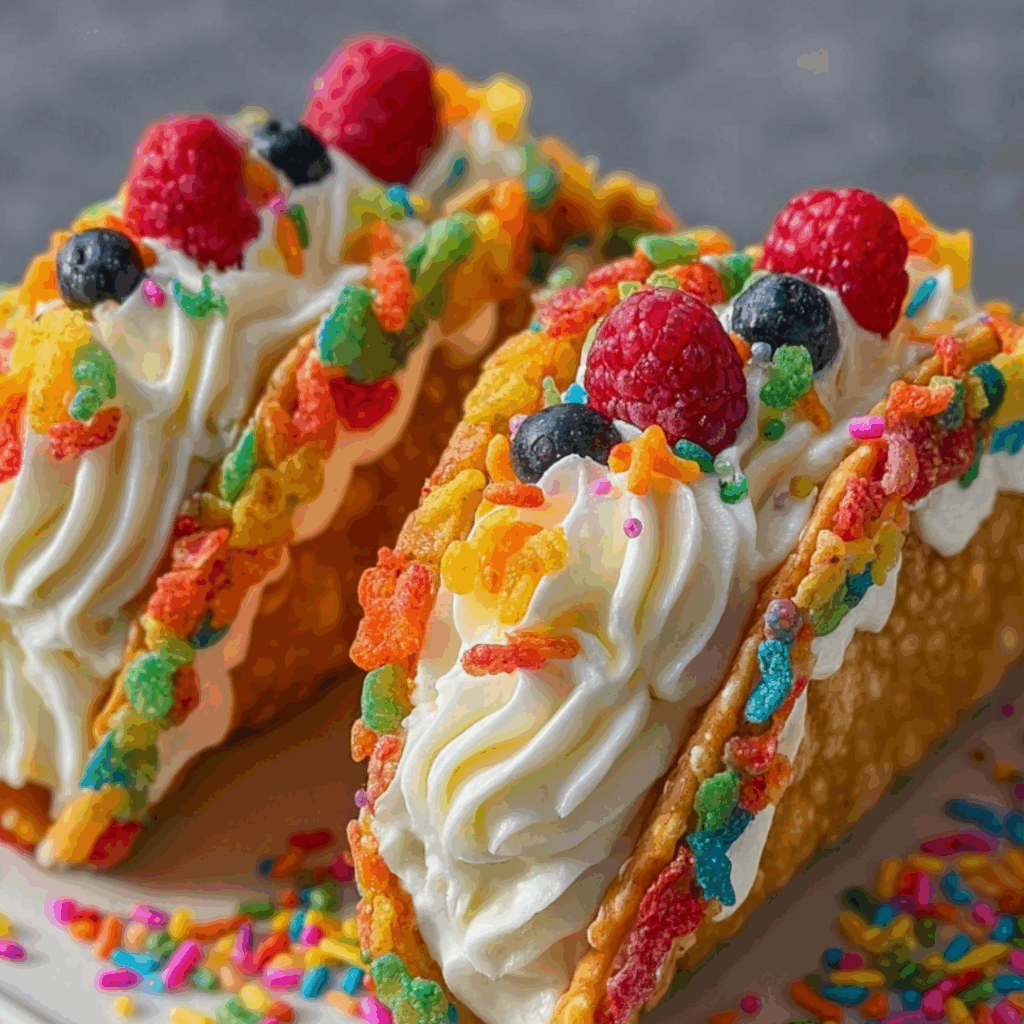
Presentation matters—and with these fruity pebbles dessert tacos, you’ve got a natural showstopper. Arrange your tacos upright in taco holders, or line them along a white serving tray to highlight the colors. A simple dusting of powdered sugar or edible glitter can add that “wow” effect.
These treats are perfect for birthday parties, baby showers, brunches, or Pride-themed celebrations. They’re fun, festive, and unexpected. Kids love them, and adults can’t resist their nostalgic charm. Plus, since they’re a no bake fruity pebbles cheesecake tacos dessert, you don’t have to stress about oven space when prepping for events.
Planning a full dessert spread? Pair them with other fruity no-bake treats like banana split truffles or vanilla magic custard cake to create a fun and whimsical dessert buffet.
Want to go all out? Offer a topping bar with sprinkles, whipped cream, melted chocolate, crushed candy, or even gummy bears. It’s a hands-on dessert station guests of all ages will love.
Bringing It All Together
In my kitchen, these fruity pebbles cheesecake tacos have become a symbol of joy. They’re colorful, nostalgic, and bring smiles to every face they meet. Whether you’re making them for a party, a fun family night, or just because, they never fail to deliver.
And the best part? They’re as easy as they are delightful. There’s no oven, no complicated prep, and no limit to the fun. This dessert is all about creativity and connection—which is what Paula’s Kitchen is truly about. Like with our beloved mini caramel apple cheesecakes and egg nog cheesecake bars, it’s not just the taste—it’s the experience.
So grab your cereal, swirl up that filling, and let your imagination run wild. These aren’t just tacos—they’re a party in every bite.
FAQs
What are Fruity Pebbles cheesecake tacos made of?
They’re crafted with a no-bake Fruity Pebbles and marshmallow shell filled with creamy cheesecake mixture made from cream cheese, whipped topping, and sugar. You can customize the filling with extracts, fruit, or chocolate.
How do you make Fruity Pebbles taco shells?
The shell starts like a cereal treat—melted marshmallows and butter stirred into Fruity Pebbles cereal. Shape the mix while warm into flat circles, then drape them over a rolling pin or rack until set into taco shapes.
Can I make cheesecake tacos ahead of time?
Yes! You can prep the shells a day in advance and store them airtight. Make the filling up to two days ahead, but assemble just before serving for the best texture and crunch.
Do Fruity Pebbles tacos need to be refrigerated?
Yes, after assembly. Since the filling contains dairy, store filled tacos in the fridge and enjoy within 48 hours. Unfilled shells should be kept at room temperature in a sealed container.


